

Send email without backend after form submission
If you have a contact form on your website and you don't want to make your own backend then this will be a thing for you.

I am a developer from Nepal who loves playing with tech.
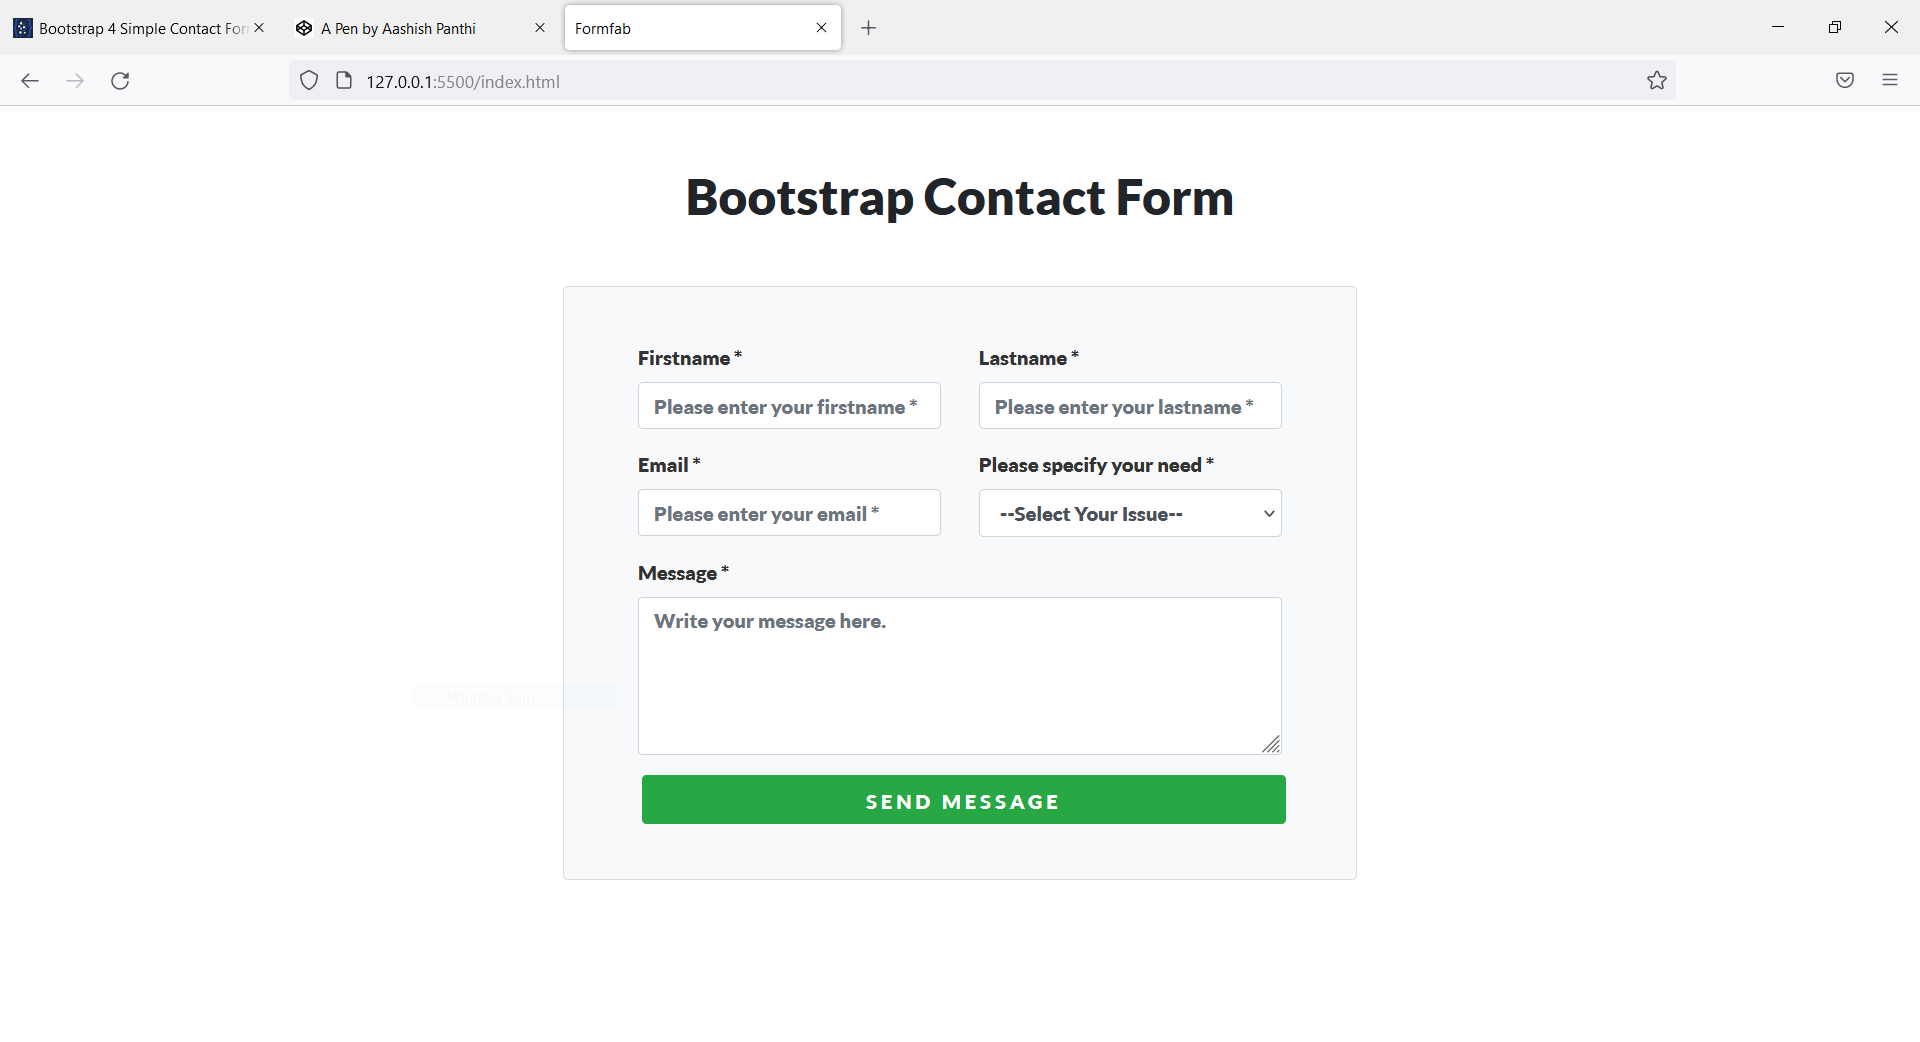
Alright, we will need a form to get input from the user and send it to the backend (not our backend). For this demo, I will use a contact form that I picked up from here. Yes, I am lazy to make my own form.
You can also use the same form to code along. If you have your own form, you can use that for the rest of the process. If you copied the same form, it should look like this:
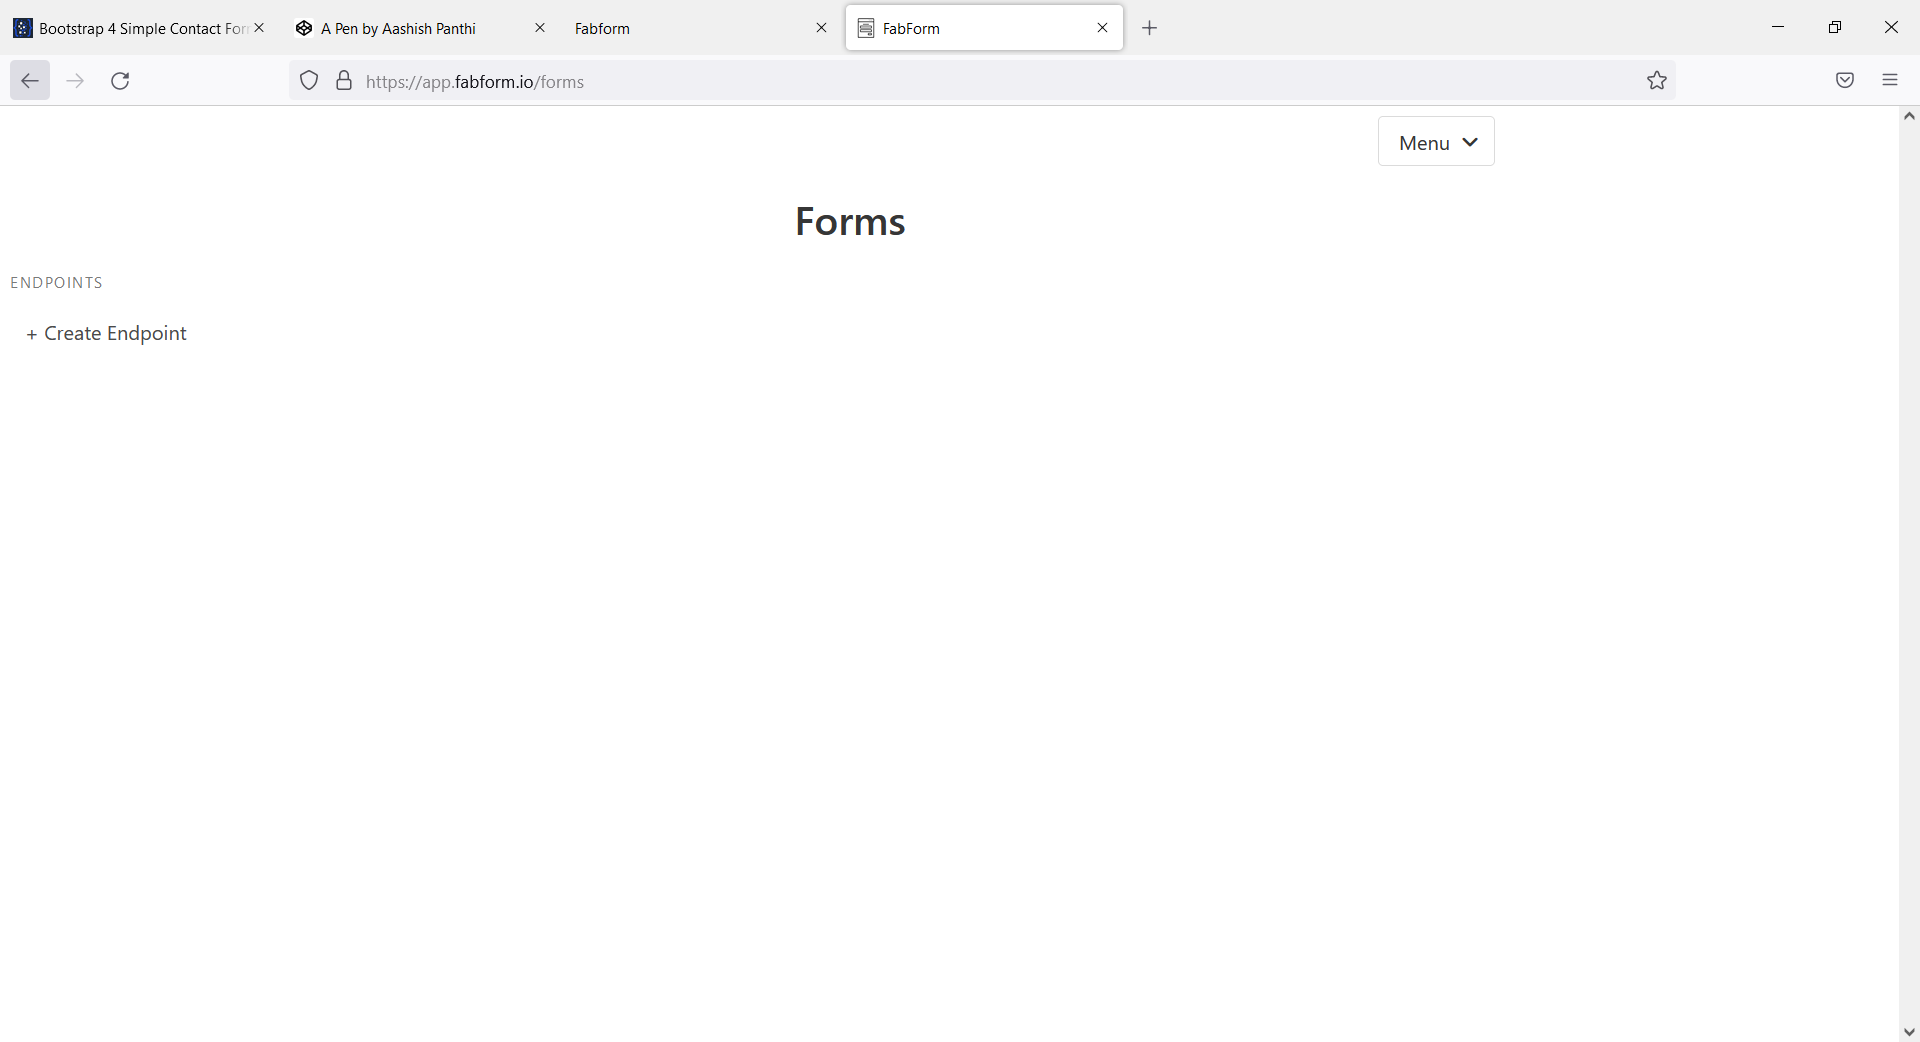
Fabform
We will use fabform.io to handle our form submission. It has quite a bit more features but the feature we will be using is to send emails with the data submitted by the user. You can visit https://fabform.io to learn more about the platform.
We will be using the free plan of fabform which has 10 forms and 500 submission limitations. And this much is sufficient for a small size website. For a hobby project, not really recommended for a professional or a business project.
You can find the official guides on their website which will be helpful for you when you are stuck. Although, I didn't find it complete it can be helpful sometimes.
Let's start
1. Register
First, you need to create an account on fabform.io. So visit https://app.fabform.io/signup and create an account now. You will get a verification email. You need to verify after which you can use the platform.
2. Create an endpoint
Now you need to create an endpoint. I will name it Test.
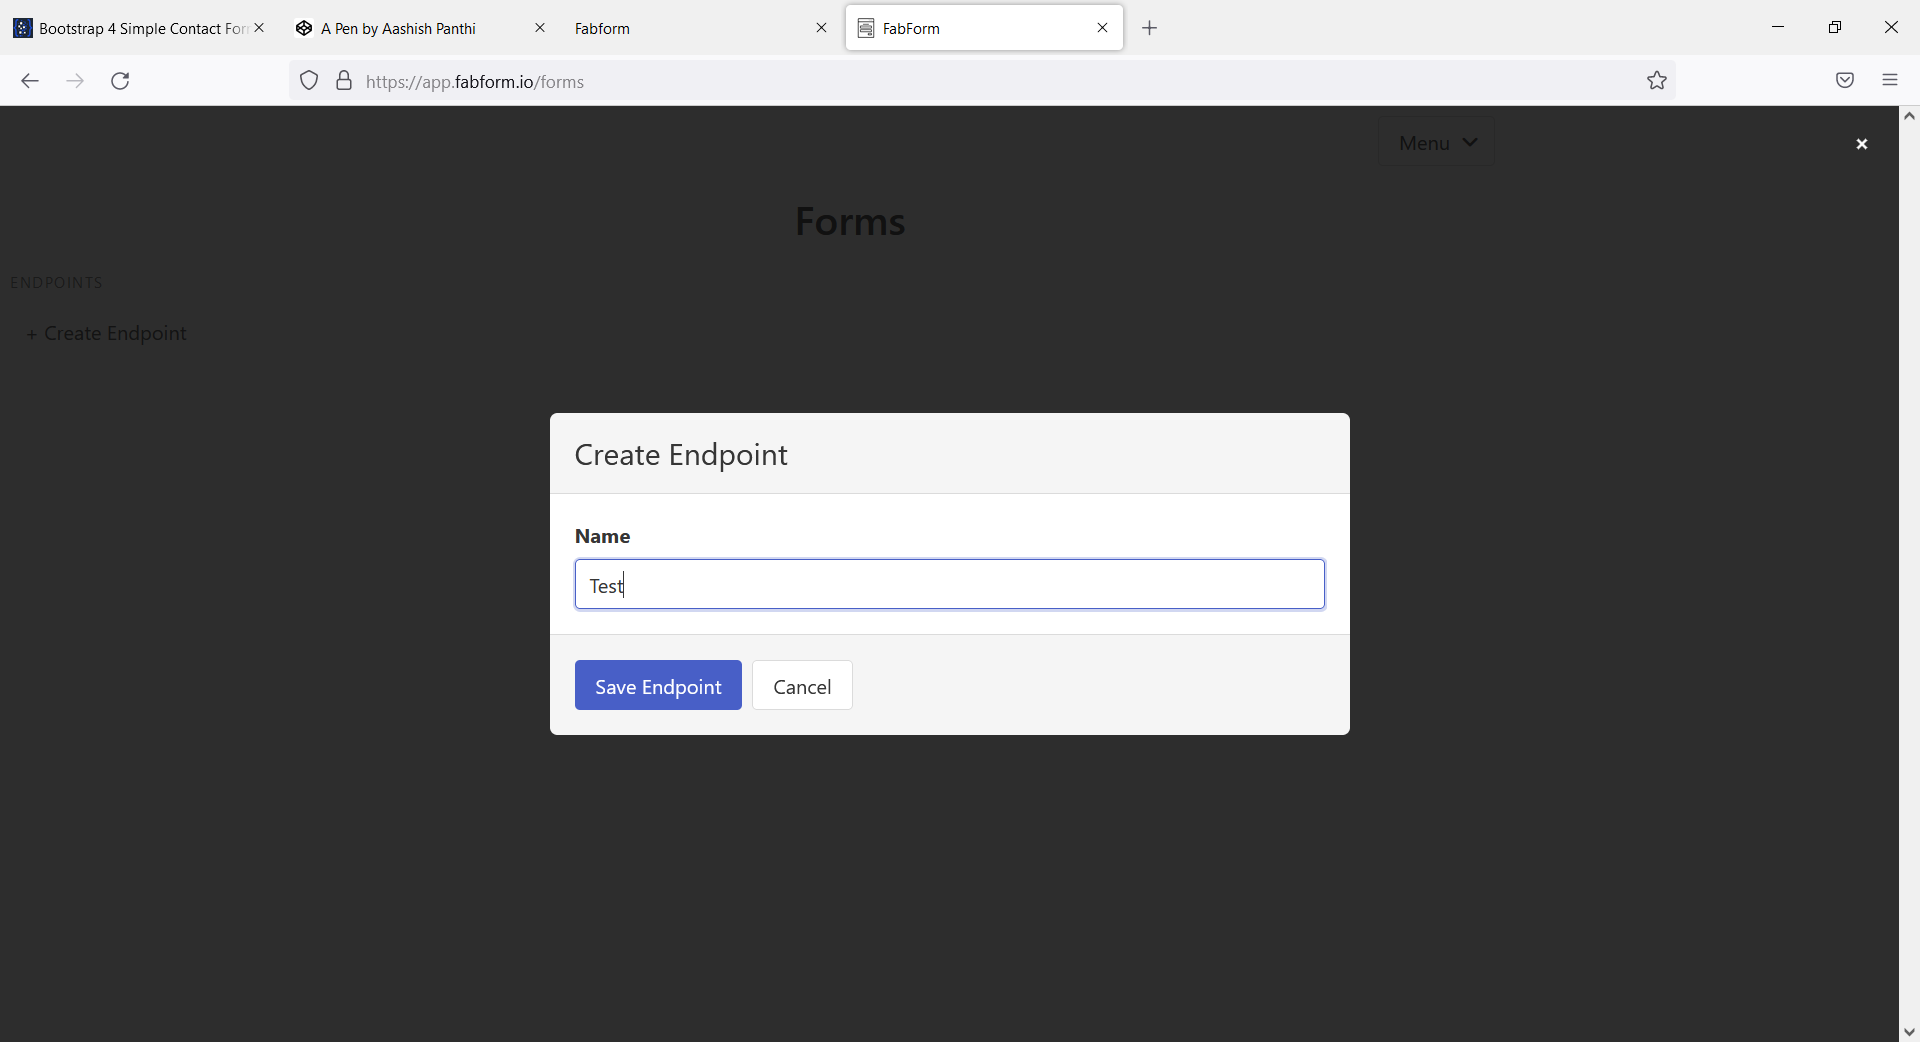
After creating an endpoint, click on that endpoint. Now you will be given a secret code which we will use while submitting the form.
3. Set the form up
You don't need to change a lot of things inside of your code. You just need to add an action attribute inside of your form tag. The action attributed will point towards the endpoint with a secret code.
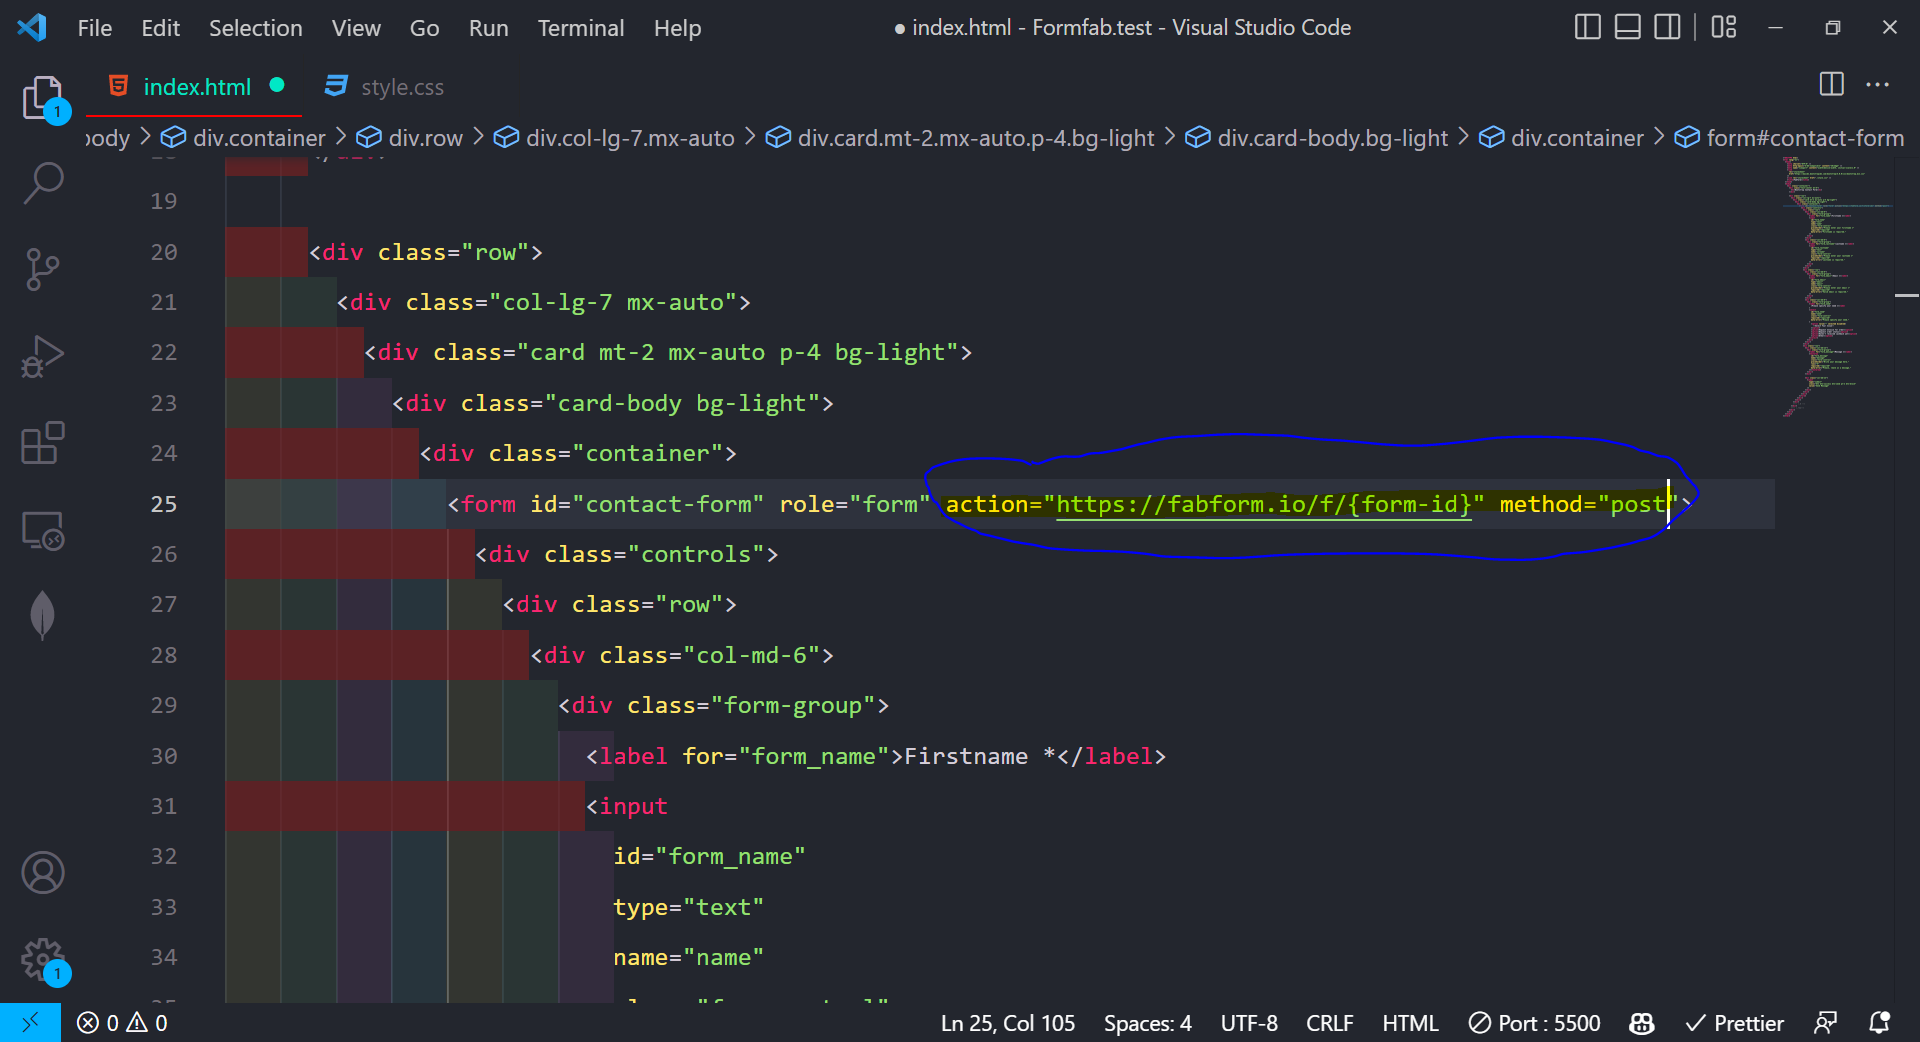
Replace {form-id} with the code you are given. My code is nSyCSTR so my action attribute will look like this: action="https://fabform.io/f/nSyCSTR". Also, don't forget to add a post method.
You need to provide a name attribute in every input field. And you need to have a submit button. The name will be used by the fabform to store the submitted data. Submit button will trigger a form-submit event.
Great, you have completed the coding part. Yes, that was it. Now you can handle all things using the dashboard of fabform.io.
4. Let's submit
Now fill up the form and submit it to see the real perk of it.
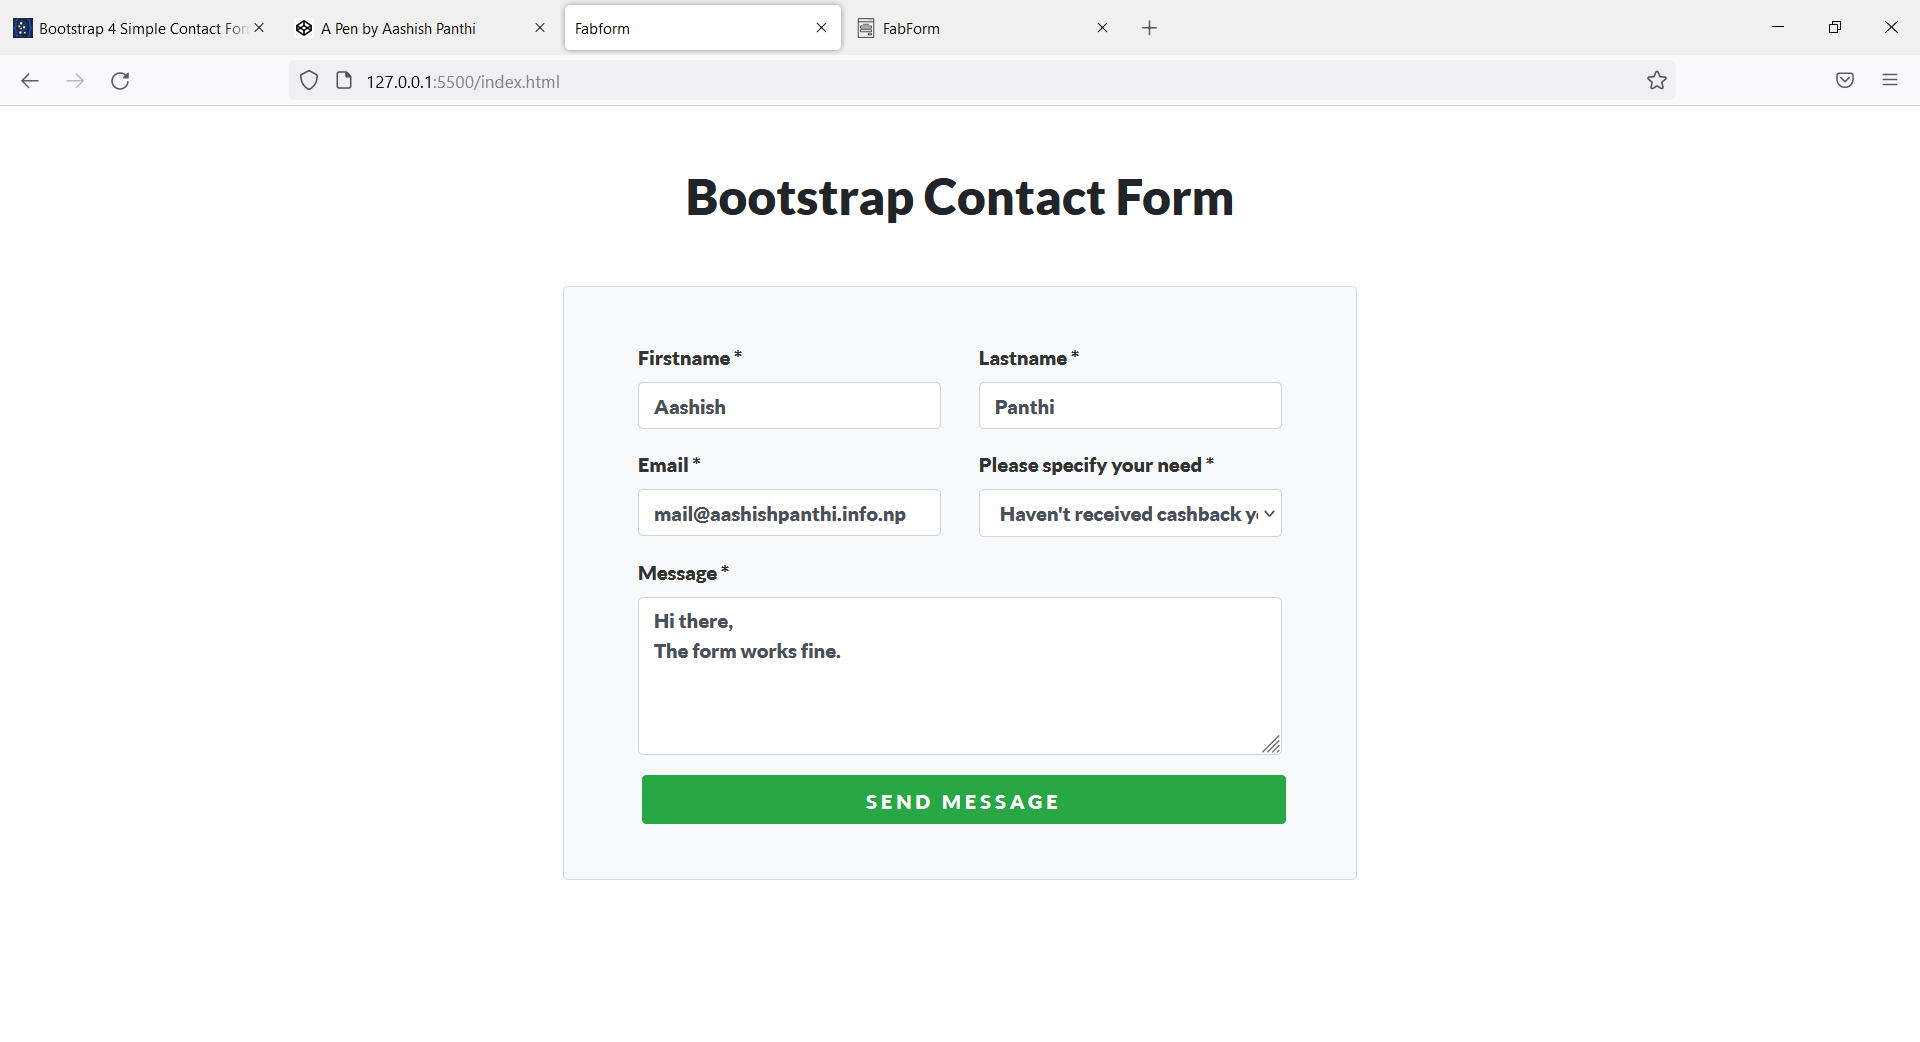
This is what the form looks like before submitting the form.
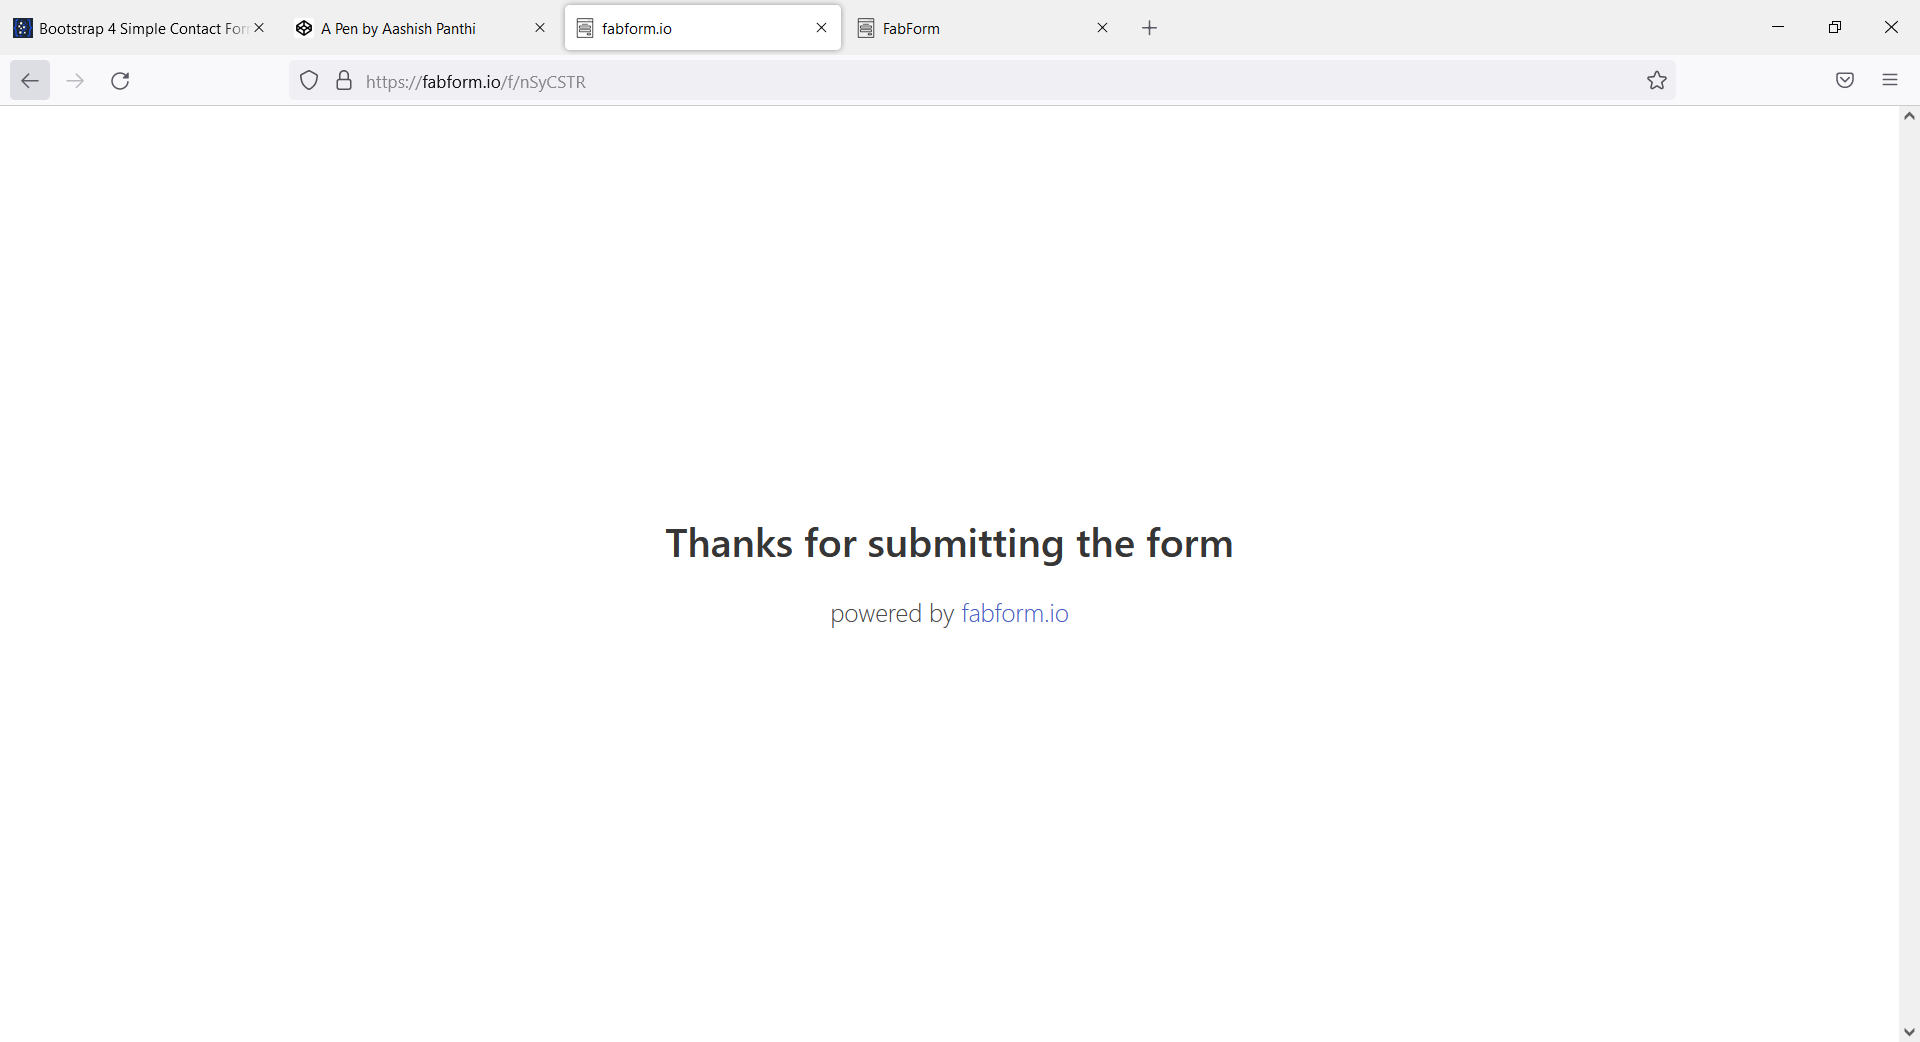
After submitting the form. We will get a success message like this:
5. View your data
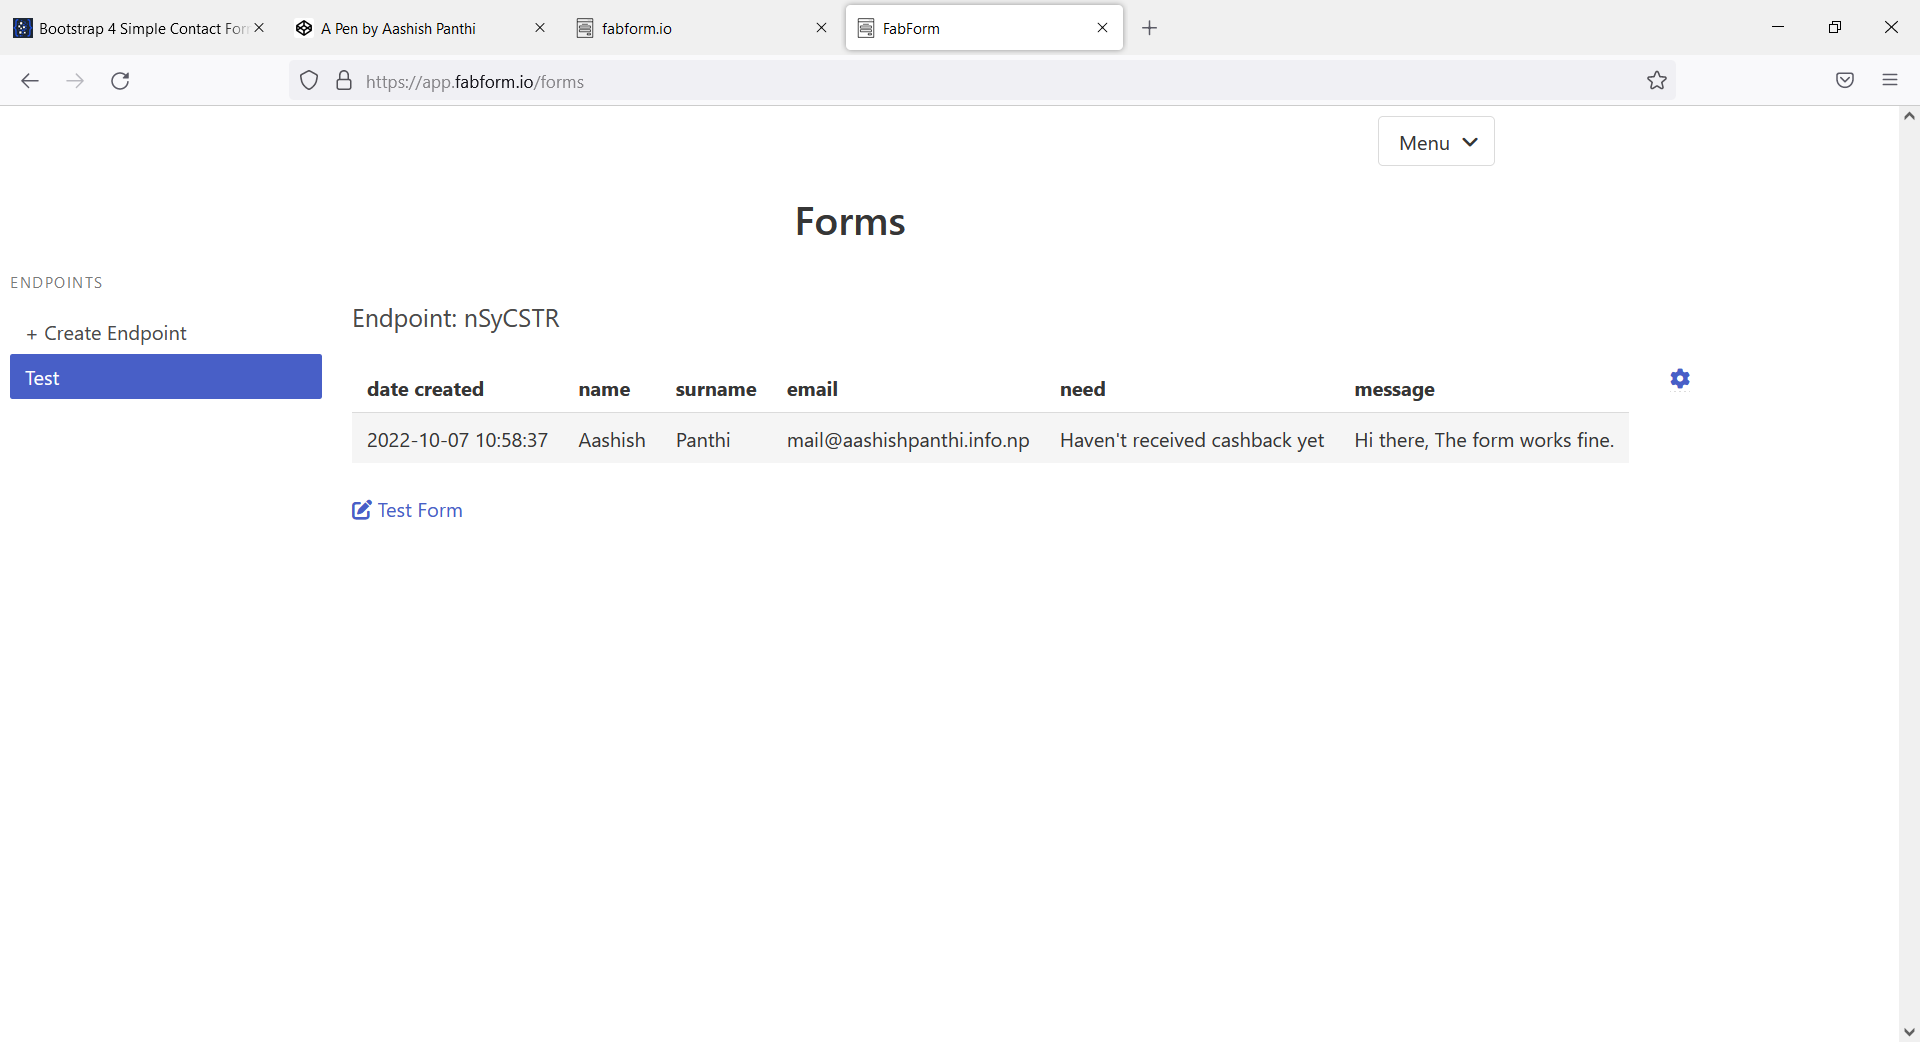
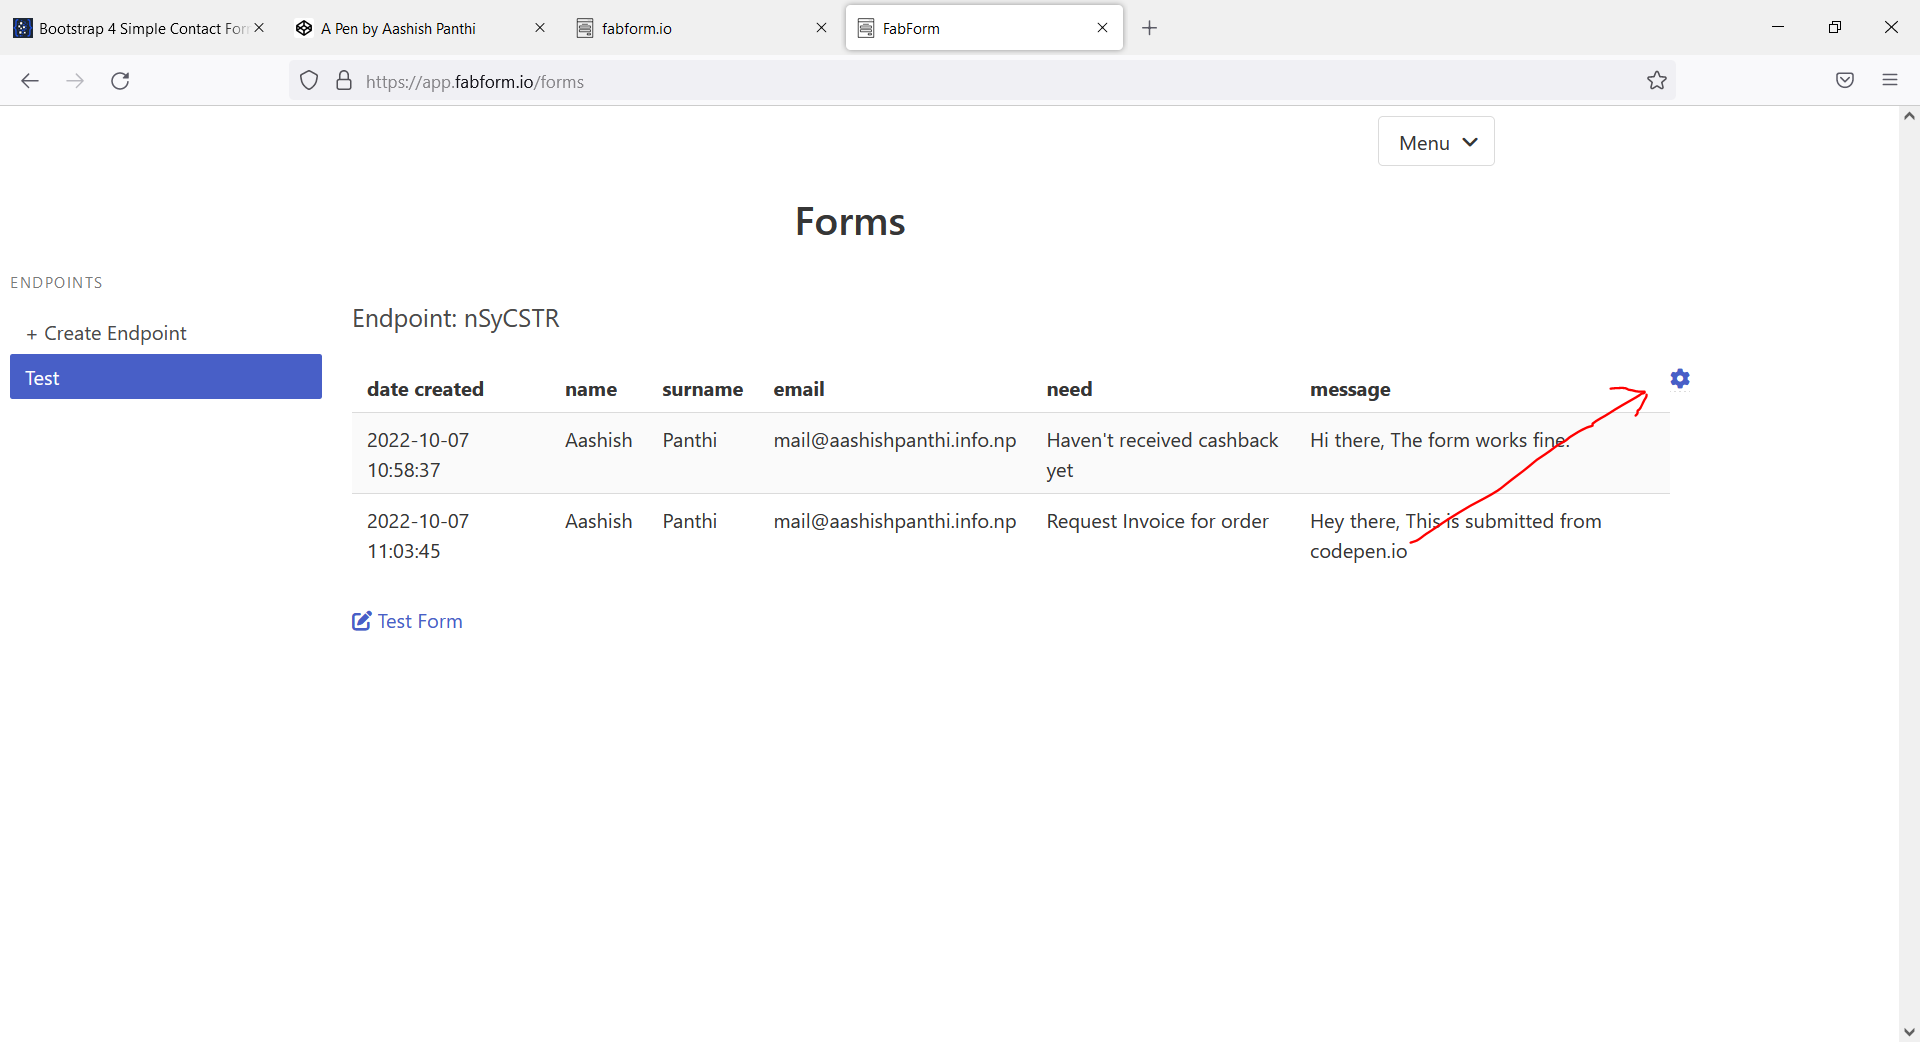
Now, go back to your fabform dashboard, select the endpoint and you will get the data that you just submitted. In my case, it looks like this:
Try out yourself
If you want to give it a try, I am embedding the codepen here. You can visit the website to test the form or to use the code that we just used.
Customization
Now the real perk comes here. Till now we only looked at how to submit the form data. Now we got the data inside of our dashboard, we want to get an email notifying us about the new submission every time a new user submits the form.
To use the email feature, you will need to route toward the settings page which you can go by clicking on the gear⚙ icon on the dashboard of an endpoint.
Inside the settings page, you should set your target Email and check the checkbox which says Send Email Notifications. Target email is the mail address where you want to receive an update on new form submissions.

You can set a message that will be presented to the users after submitting the form. You can also set a redirect URL where the user will be redirected after submitting the form and also enable CAPTCHA to protect from spam.

Now just hit the save button and enjoy the thing.


