Send professional email using nodemailer and zoho
We will use nodemailer, Cloudflare, and Zoho mail to set up and send email using node js
We will look at the easy and free way to send emails using nodejs in this article. We will use nodemailer to send emails and use Zoho for email setup. Now, let's go over the detail:
What is Nodemailer?
Nodemailer is a module for Node.js applications to allow easy-as-cake email sending. Nodemailer is licensed under MIT license.
What is Zoho mail?
Zoho is an online-based office-suite provider. But the only thing we are interested in is creating an email out of your domain name and being able to send emails. We will be using a free plan. If you like to use the premium plans, you can look them up here. There is a forever free plan for up to five users, 5GB/User, 25MB attachment limit. I think it is more than enough for most of us.
What is Cloudflare?
Cloudflare, Inc. is an American content delivery network and DDoS mitigation company. It delivers services like a DNS, a content delivery network (CDN), and many other additional services to make websites. It provides a lot of features and most of them are for free. We will be using Cloudflare for DNS management.
Setup a DNS
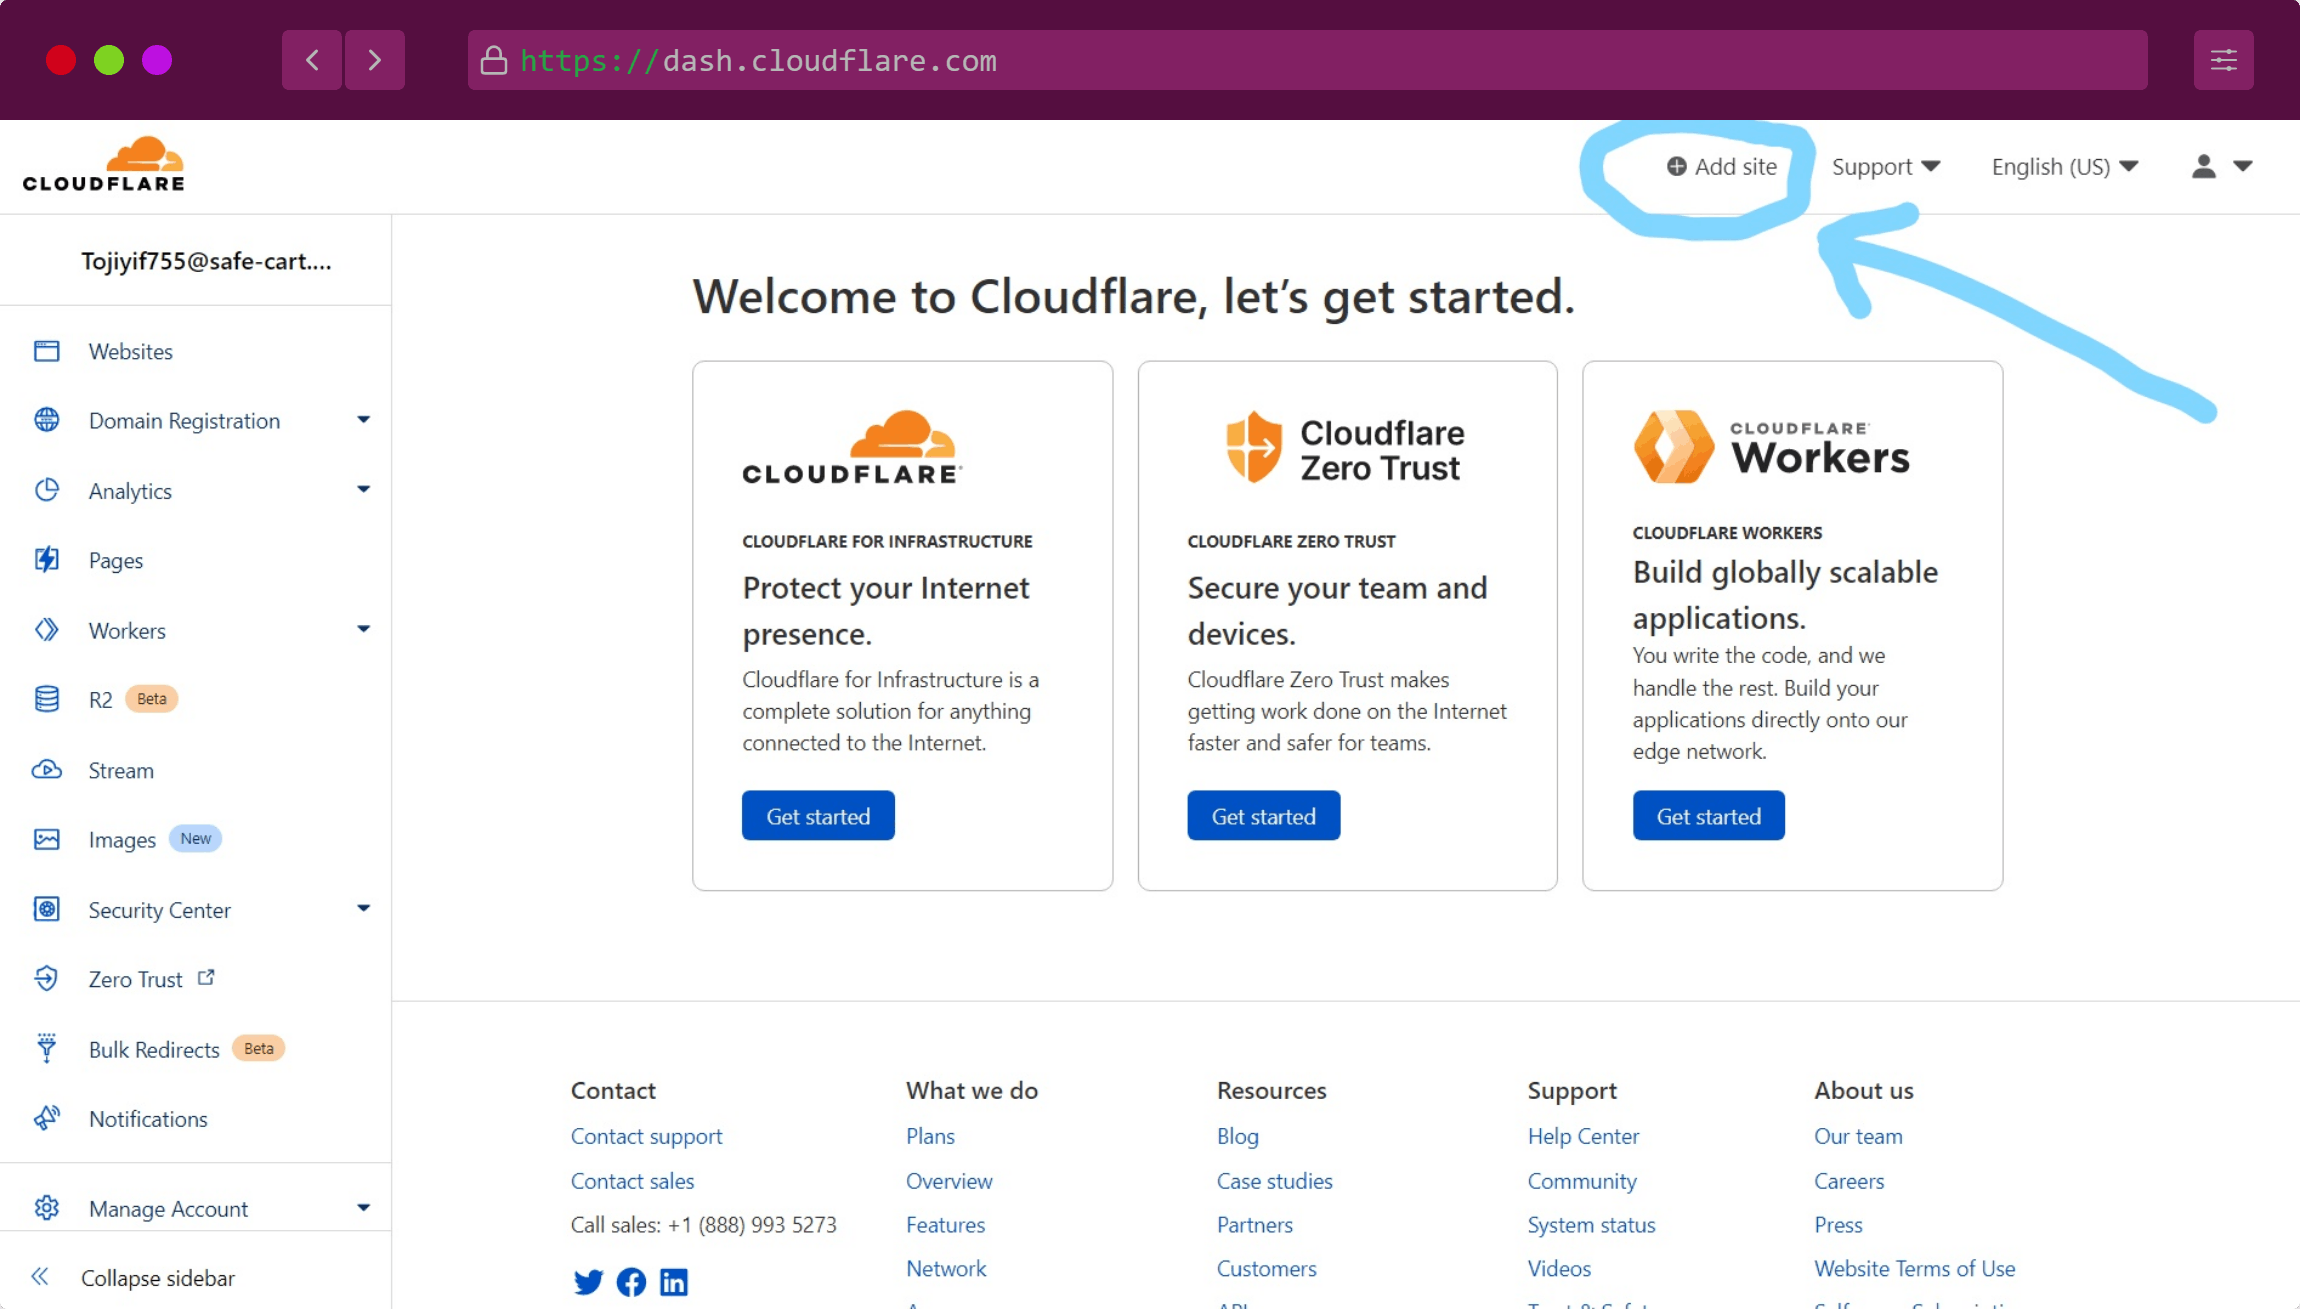
Sign up for a new Cloudflare account then click on add site.
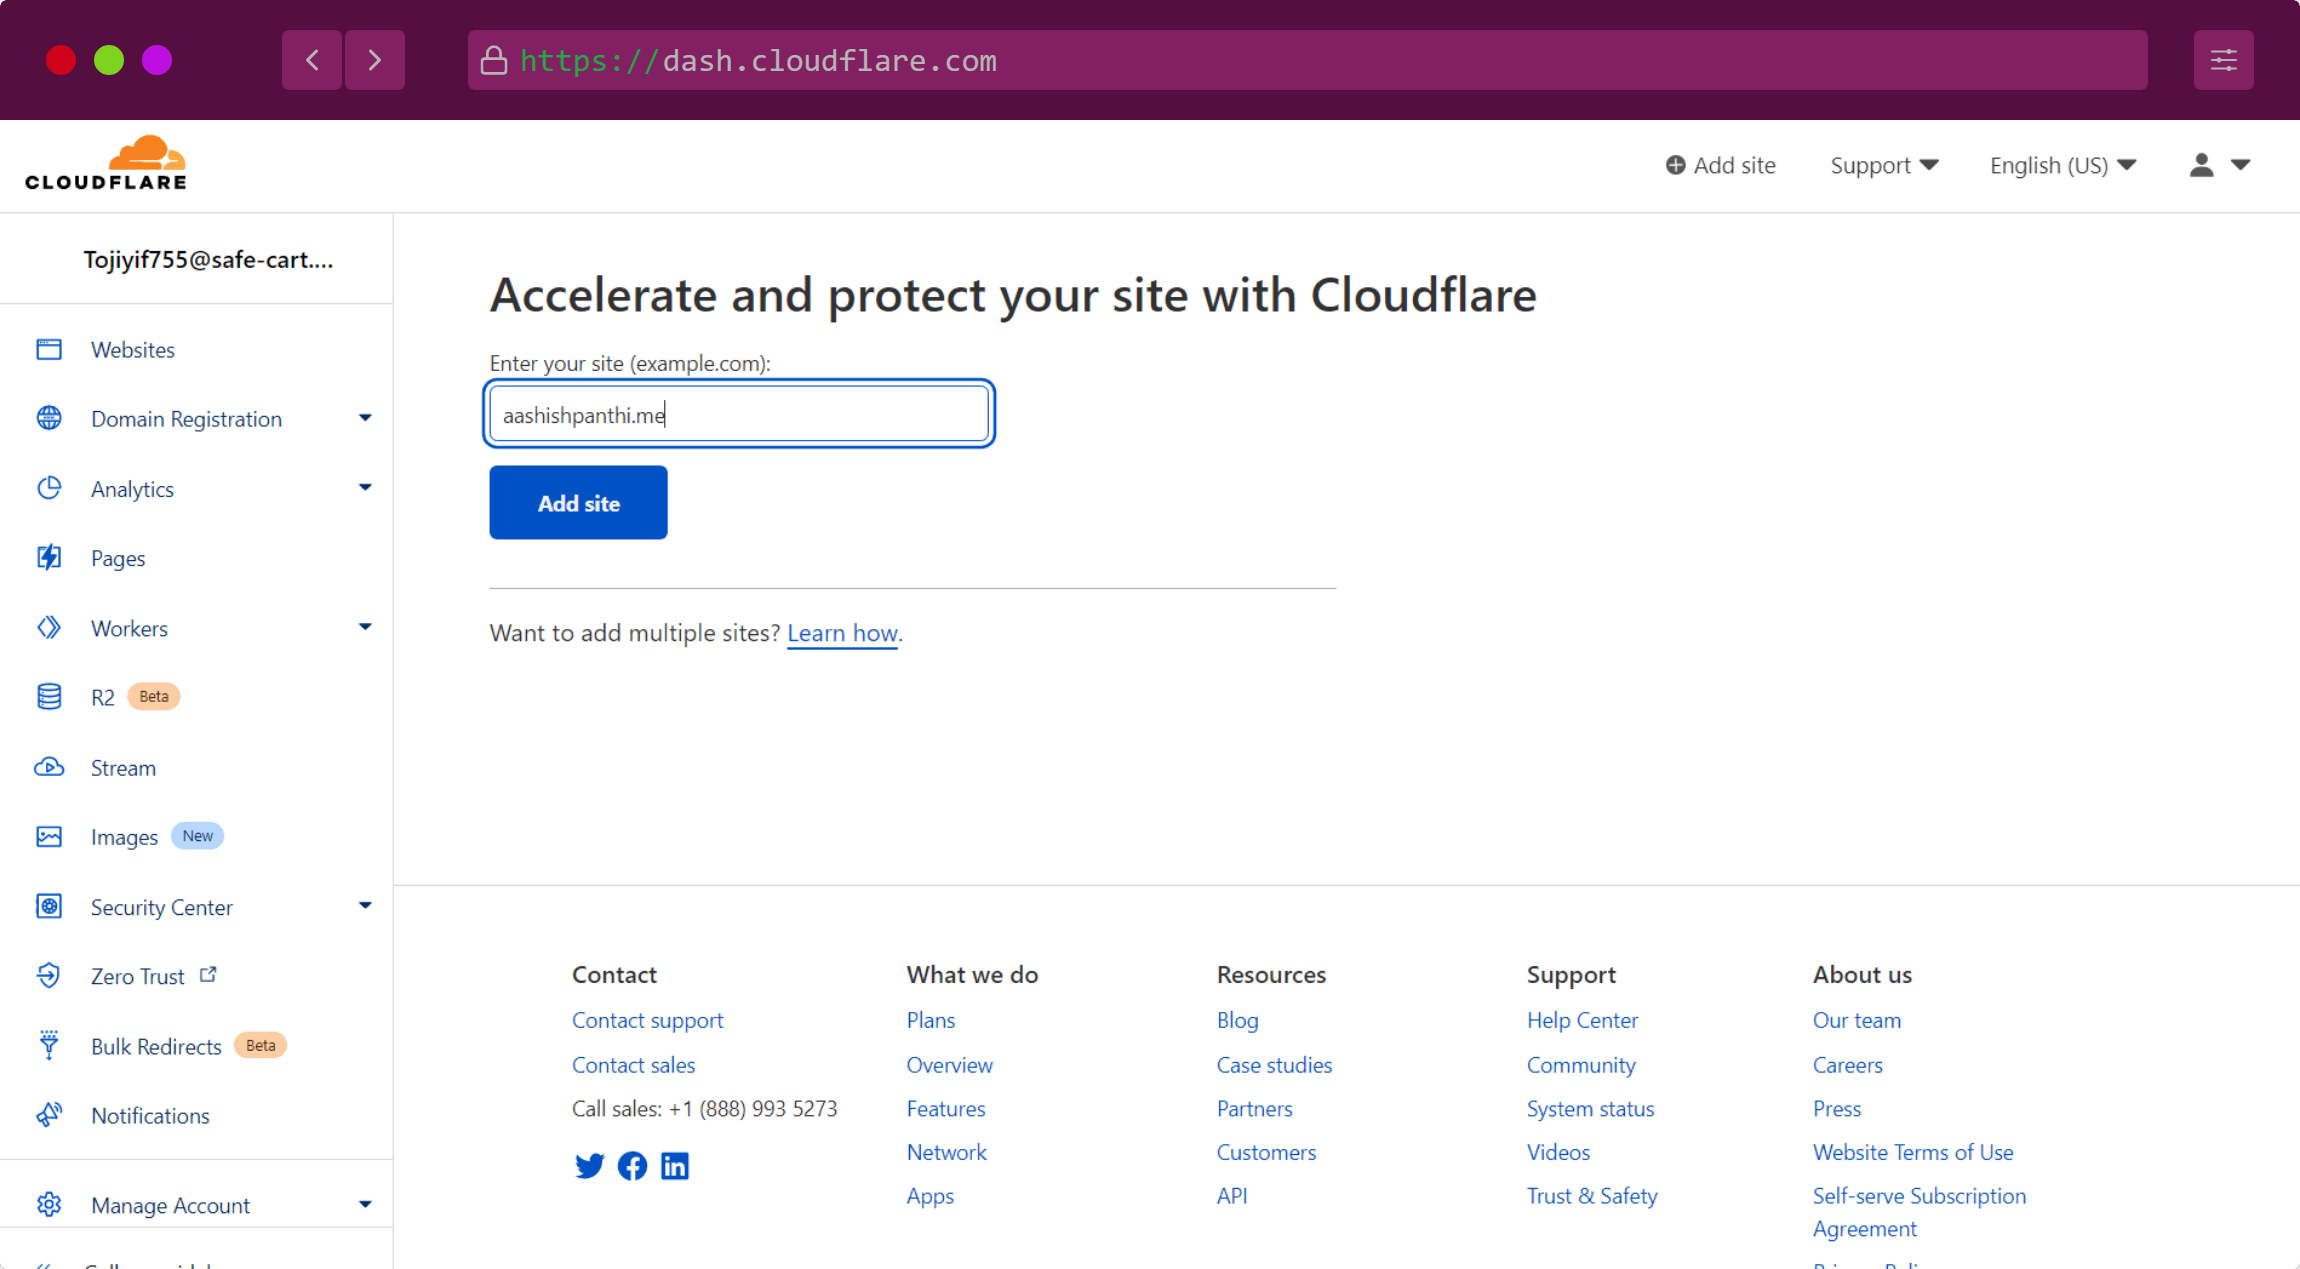
After that add your domain name inside the input box you are provided with. Remember not to include https://. For example, if your site is https://aashishpanthi.me, you should only provide aashishpanthi.me.
Then you are asked to select a plan. You can see premium plans there. If you scroll a bit, you will find a free plan. Select the free plan and click on continue.
Then you are asked to review your DNS records, if you have recently purchased your domain, you will see few or no records. Don't worry about this, click continue.
The next step is to set up nameservers. It depends upon where you bought the domain from, if you bought it from namecheap.com like me then you will have some nameservers of namecheap itself saved with your domain. In order to manage our DNS records from cloudflare we need to replace already existing nameservers with Cloudflare's nameserver or add new nameservers if nameservers are already not provided.
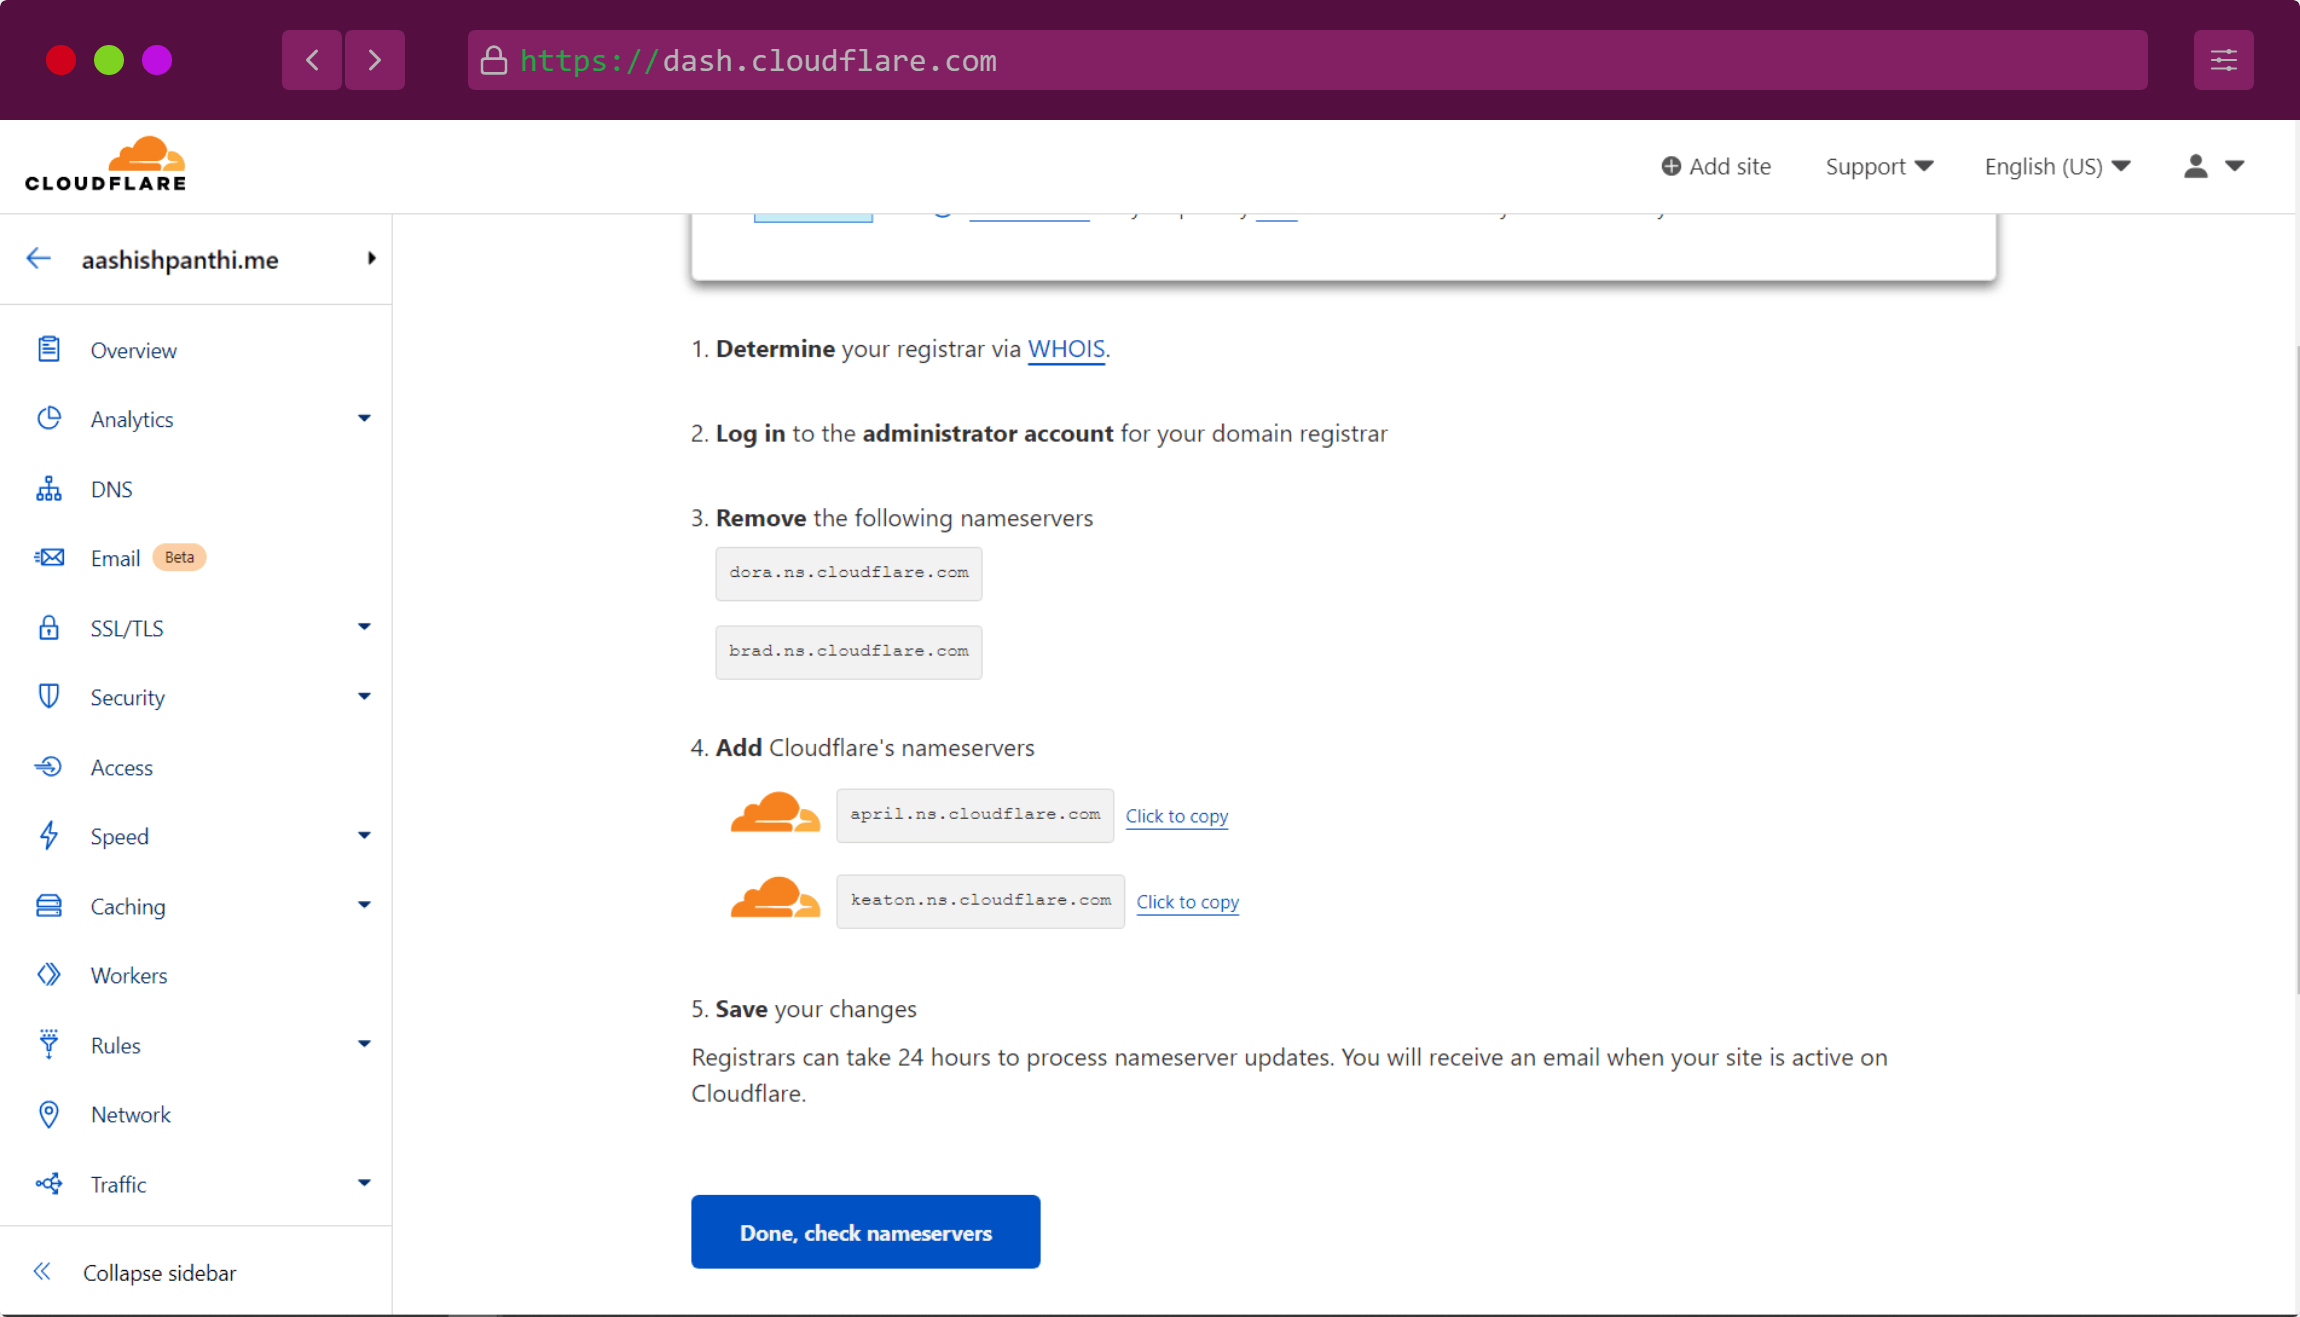
This step very much depends upon where you bought a domain from. By any chance, if you have forgotten where you bought your domain from, use whois to lookup.
My domain name provider is namecheap.com. I think I need to head towards namecheap now, should I? These are the domains that I bought from NameCheap. Of course, it's a single one but we are okay to move forward.
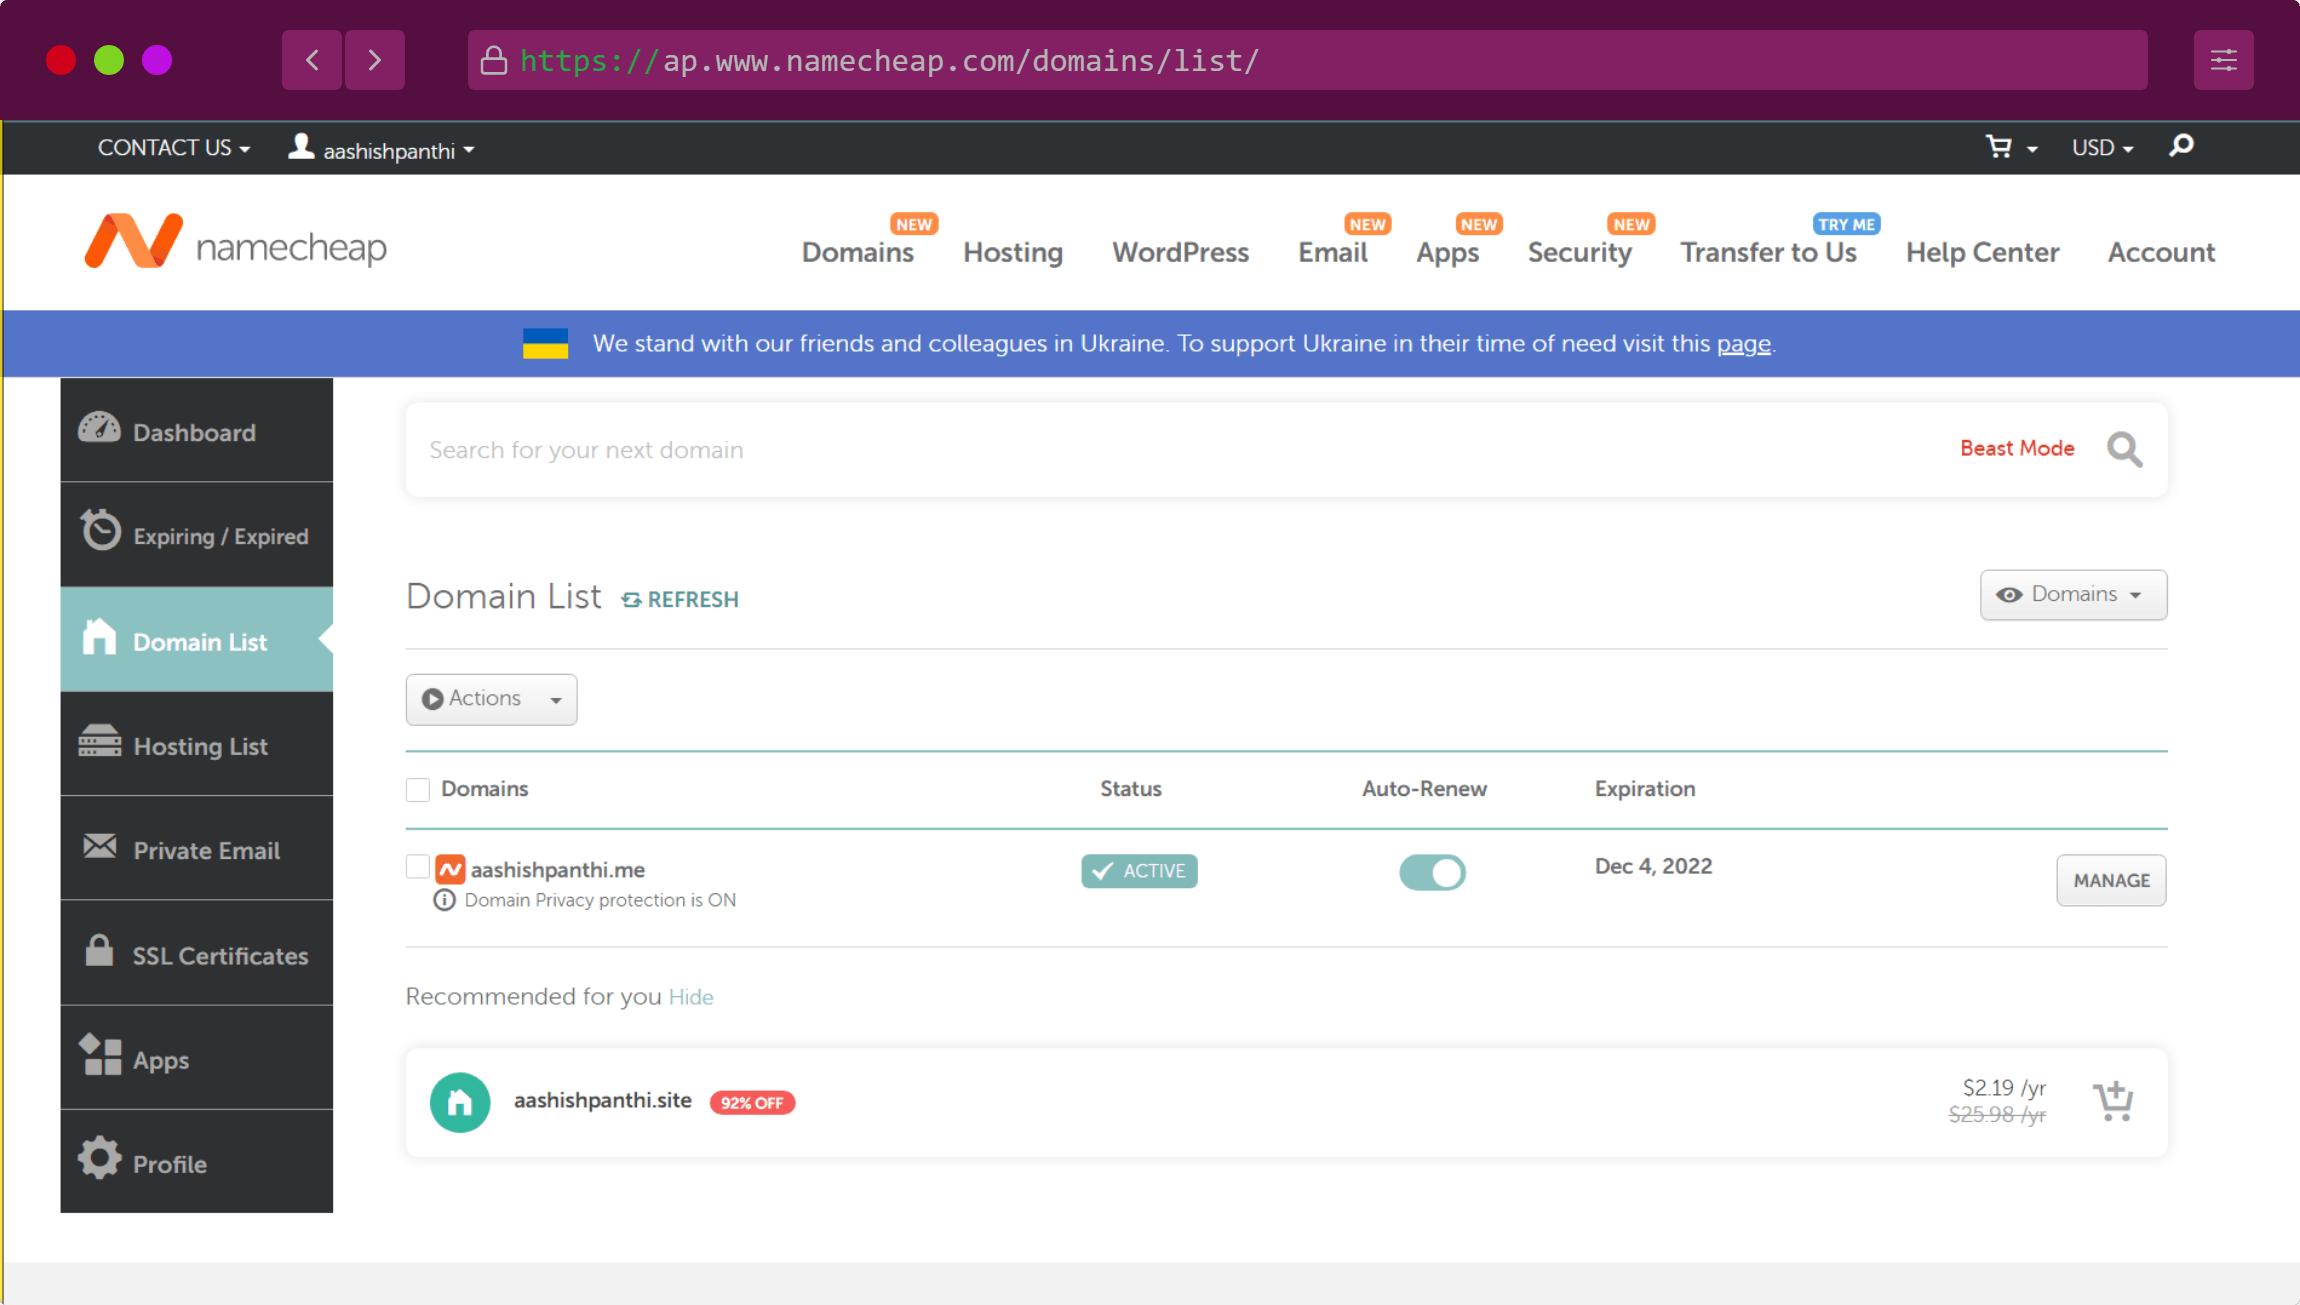
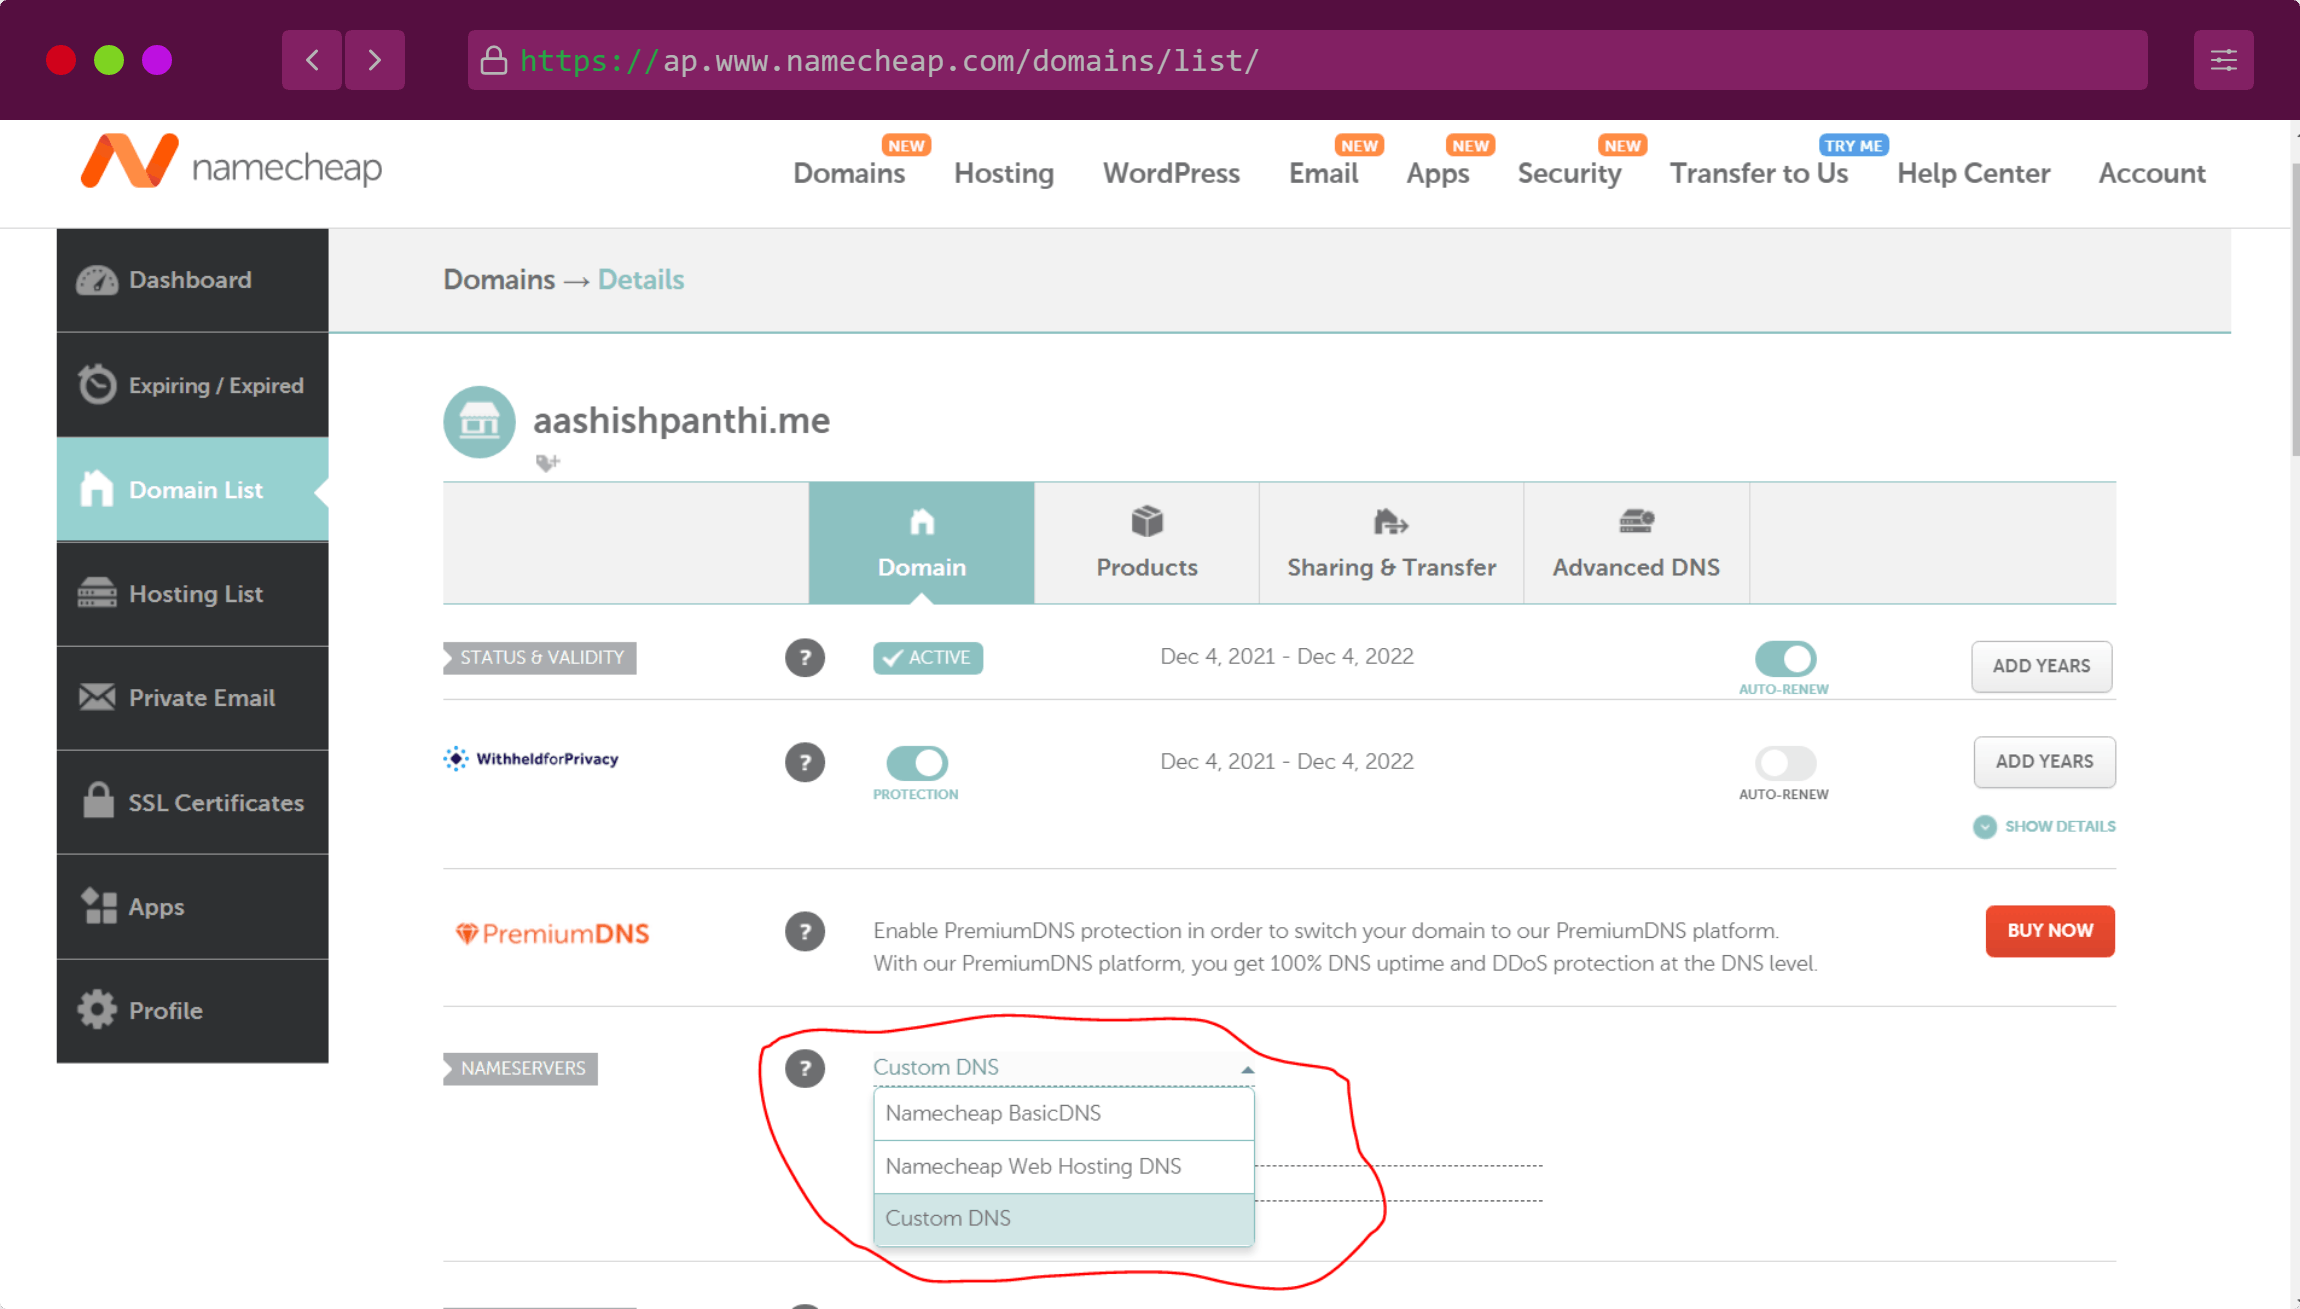
If you click on manage, you will be redirected to the details page where you will find a little section to manage nameservers. You may find there some pre-existing nameservers but anyways you should click on the custom DNS.
There you will find an input field to enter the nameservers, we have two nameservers recommended by Cloudflare. So add both of them. And click on the little tick icon to save the changes.
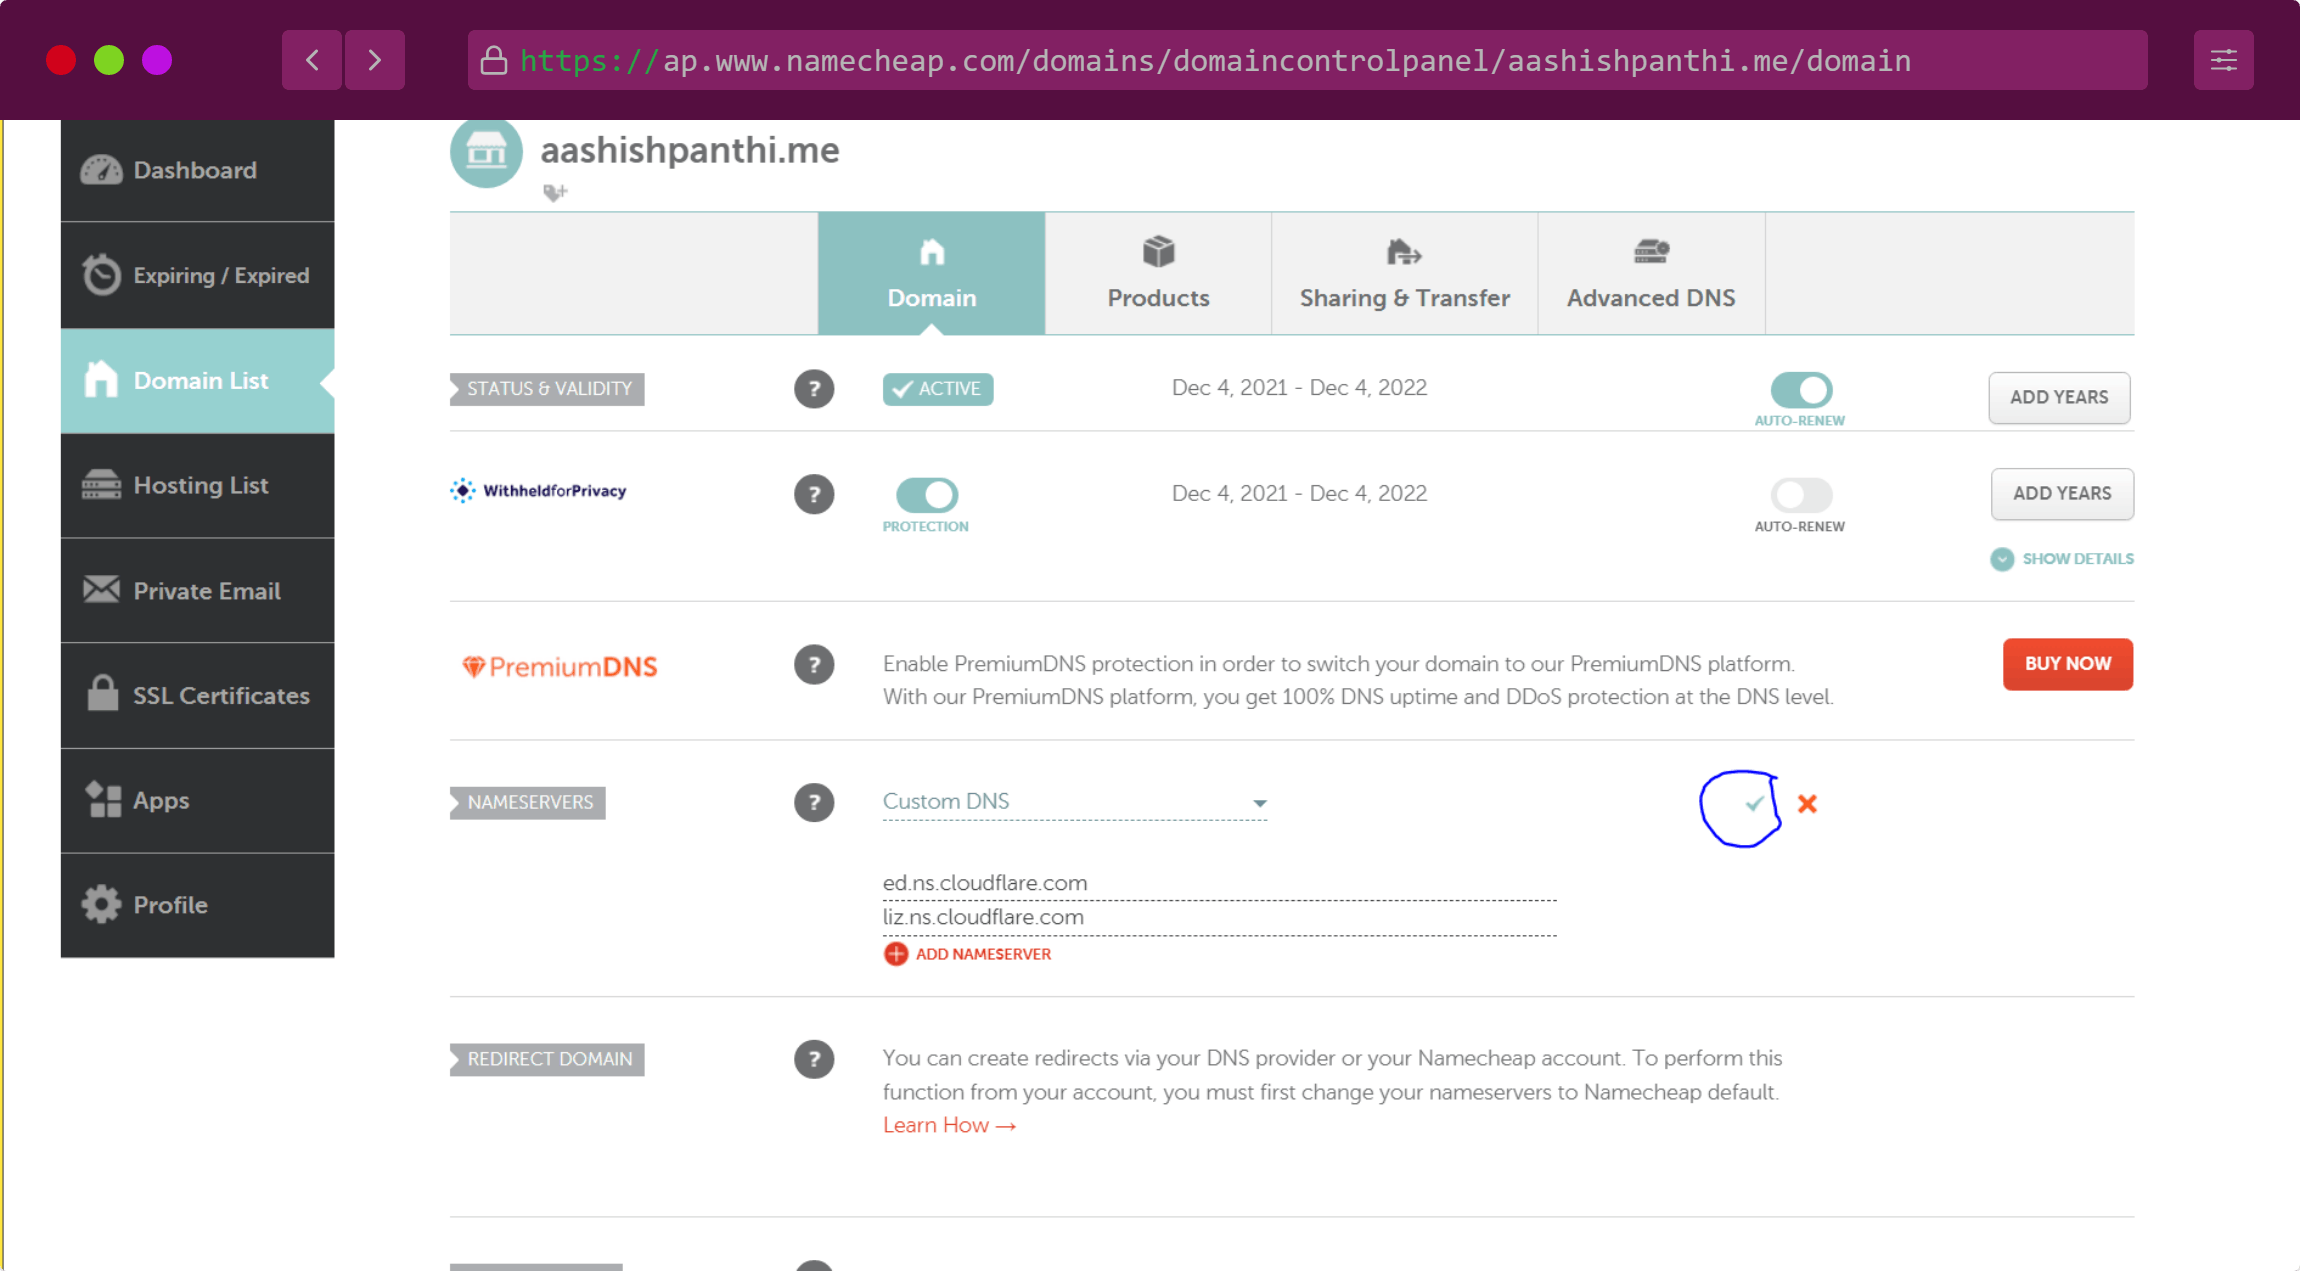
To reflect the changes, it may take time from a minute up to a whole day. Be patient and we can set up our DNS settings only after proving your ownership over the domain (that is after reflecting the nameservers update).
Email setup
First, visit zoho.com/mail and sign up for a business email. You need to verify your phone number and you will be redirected to the next page where you are asked for the plans. Scroll a bit down and you will see an option of a free plan. Click on try now.
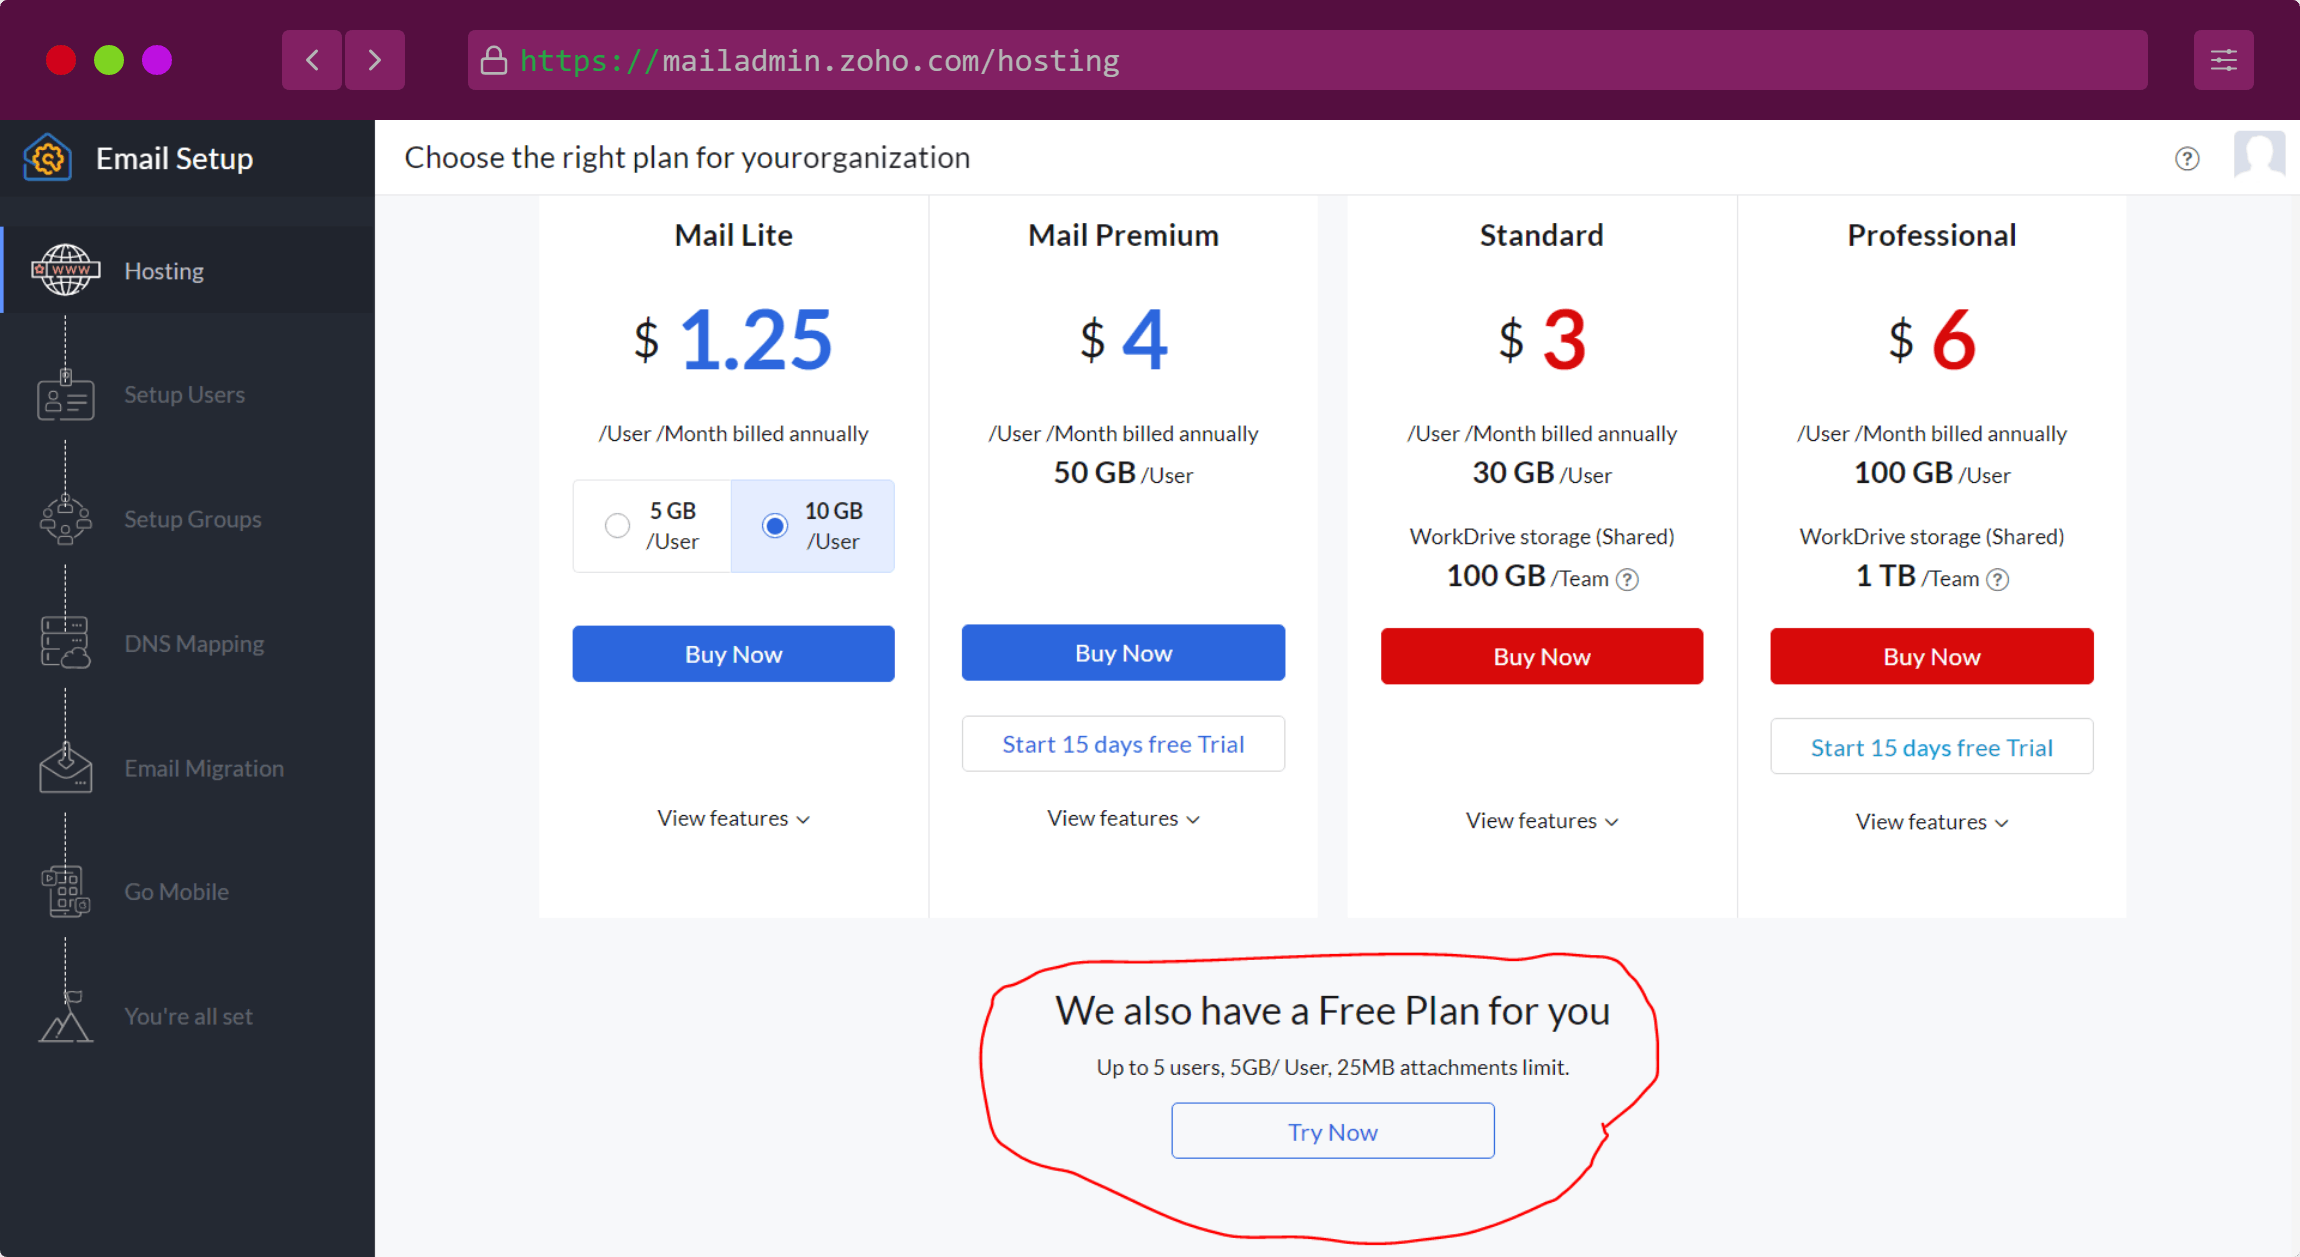
Now you will be asked to add a domain. You can add an existing email or buy directly from Zoho mail. If you've already purchased your domain and want to use that domain. Choose to add an existing email. That is what we are going to do today.
Provide your domain name, organization name, and type. If you're not using a company's domain, but using a personal domain on your name then you can provide your name as the organization name.
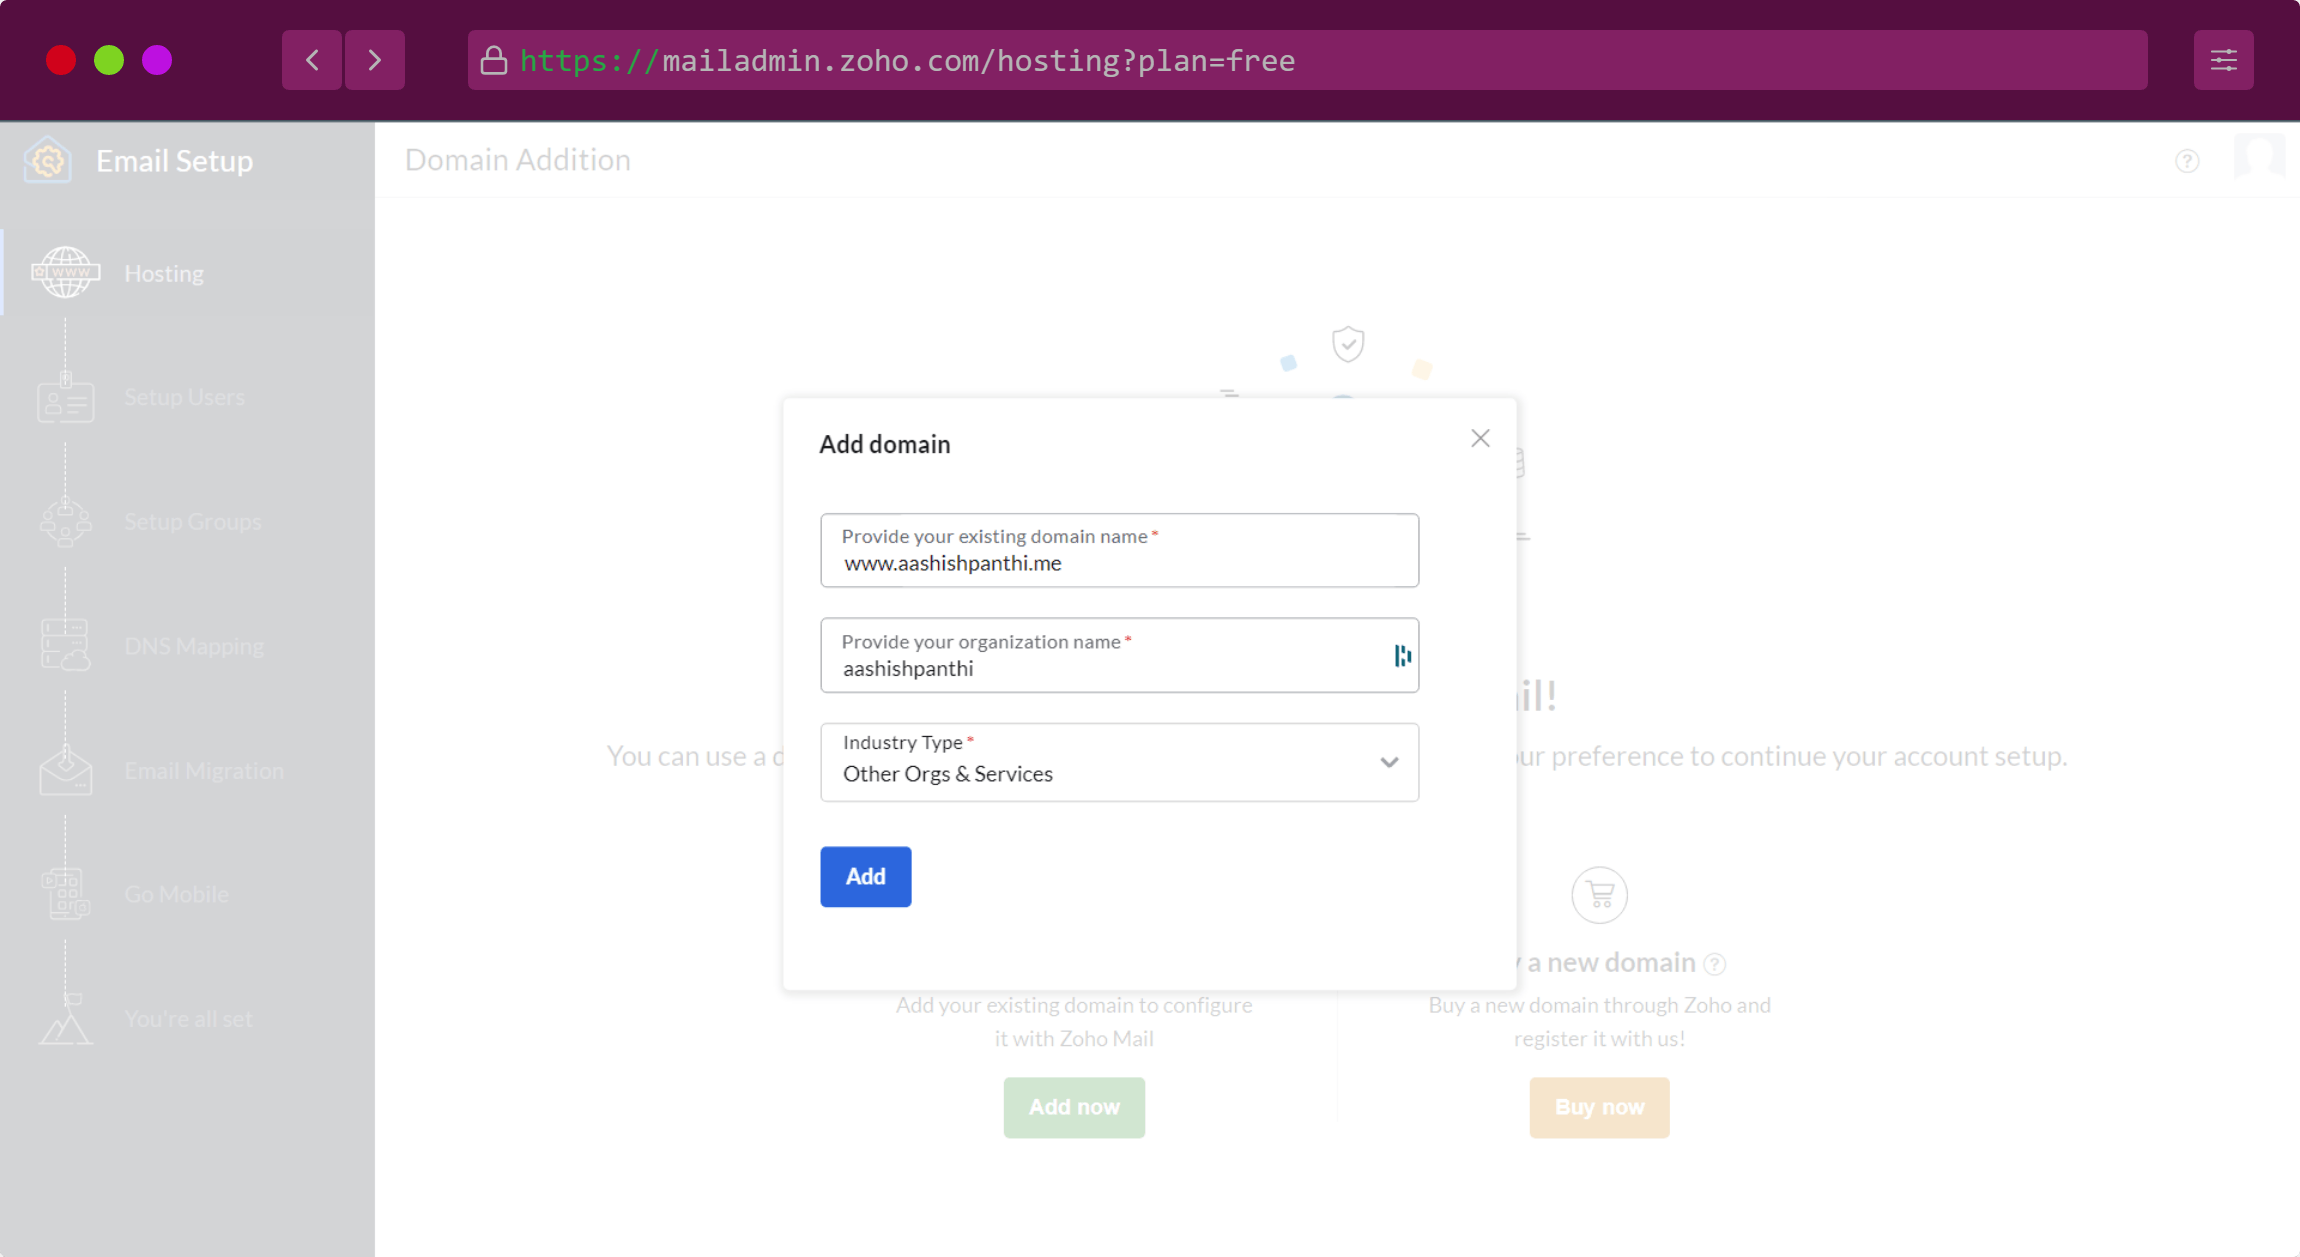
After this, you may be notified with a success message and a button to continue. Click continue. Now you will be given some TXT name and TXT value to enter into your DNS records.
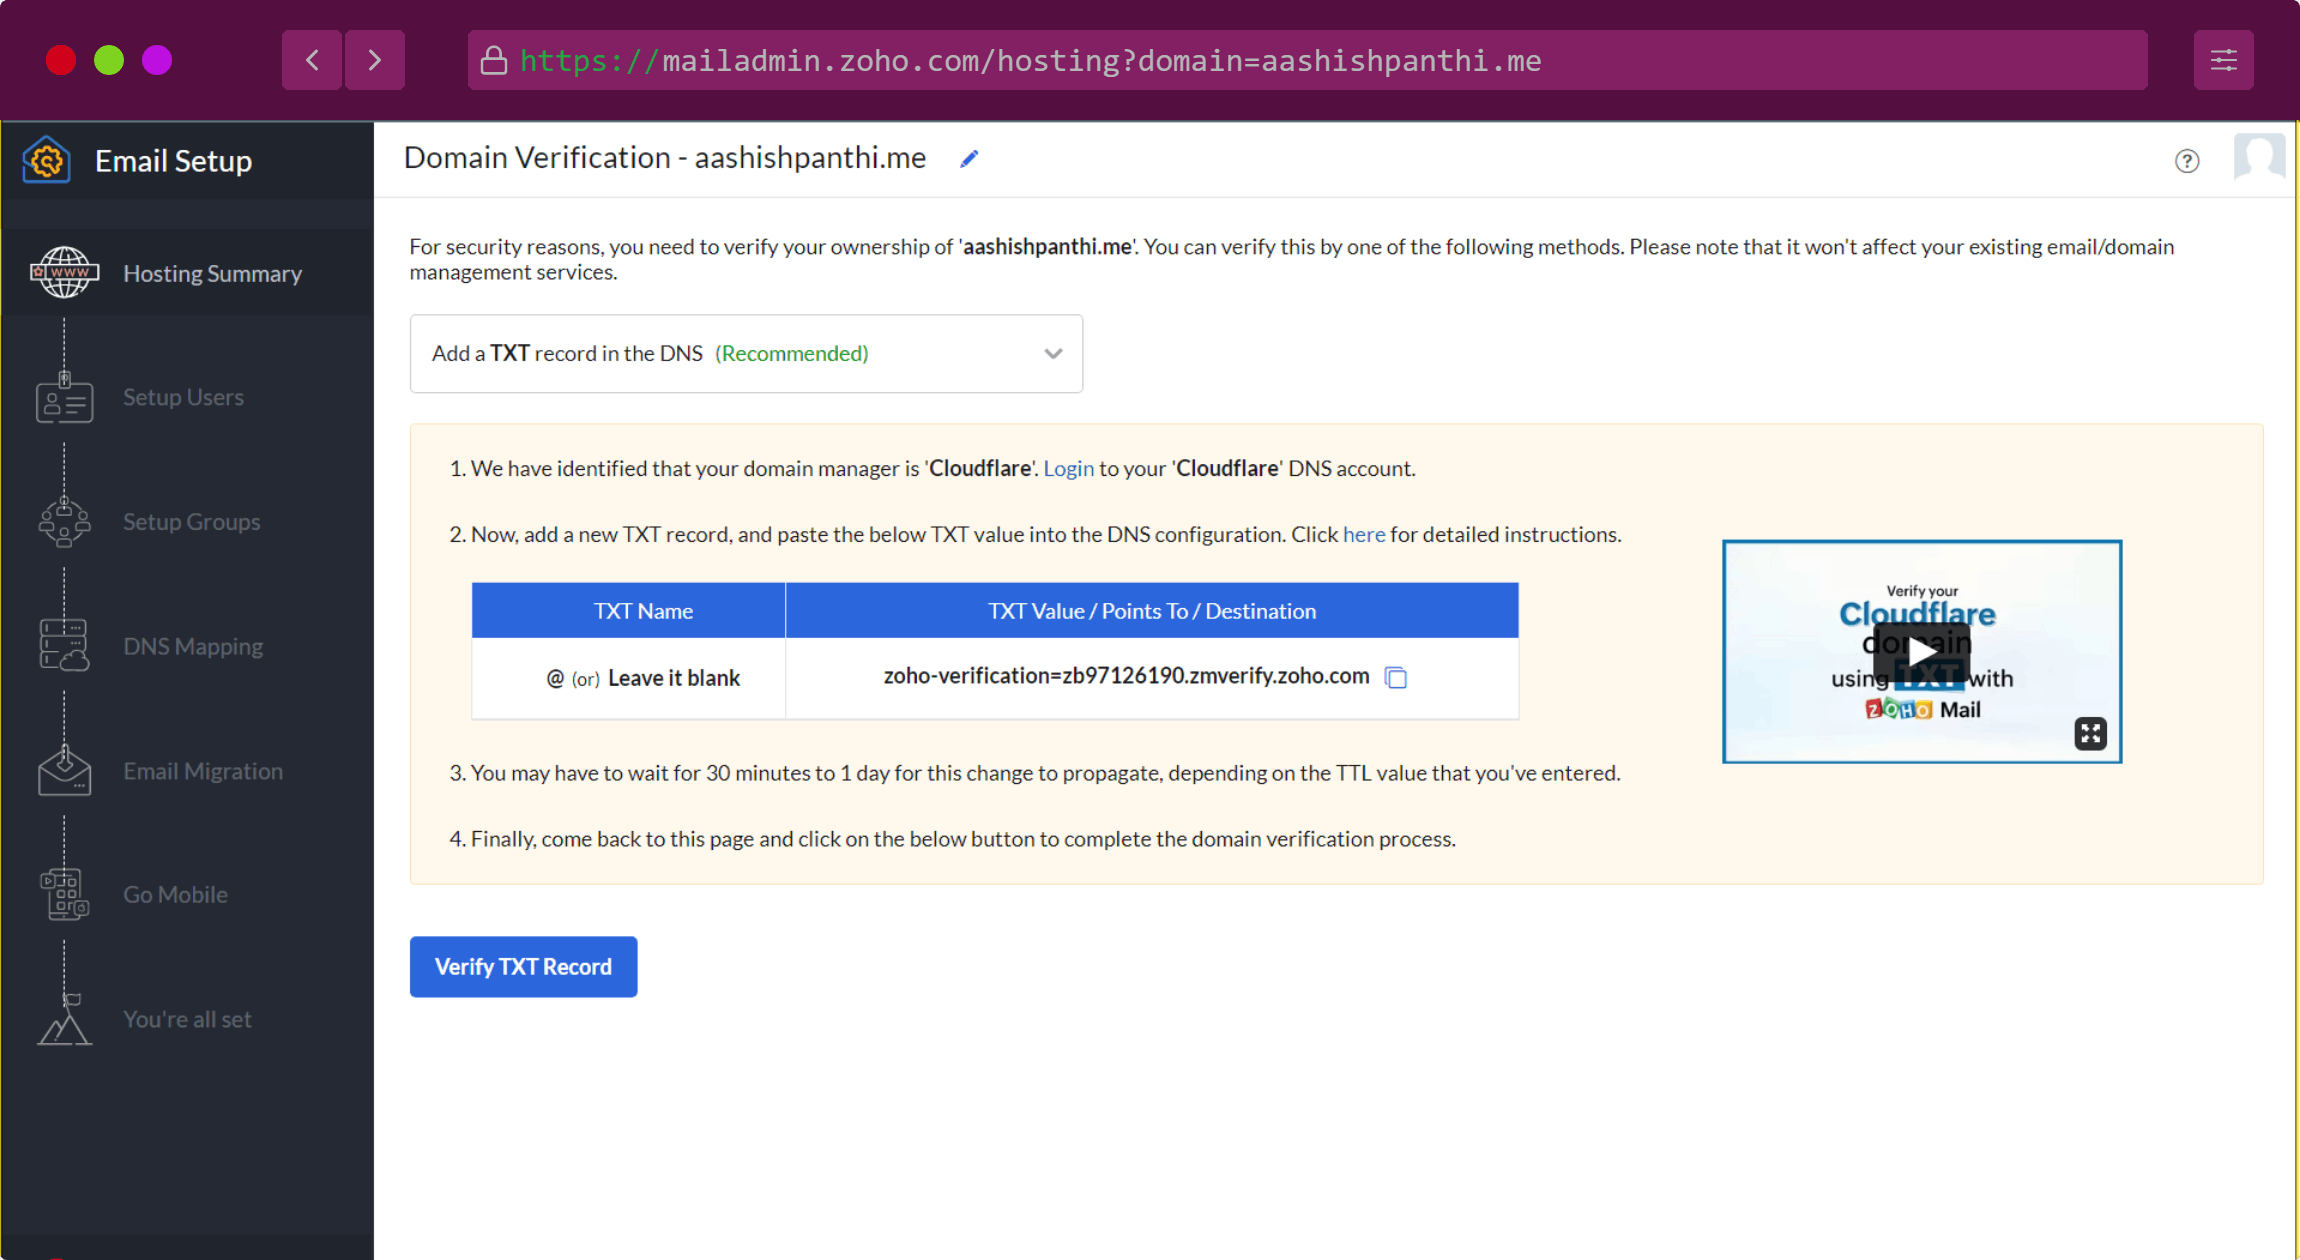
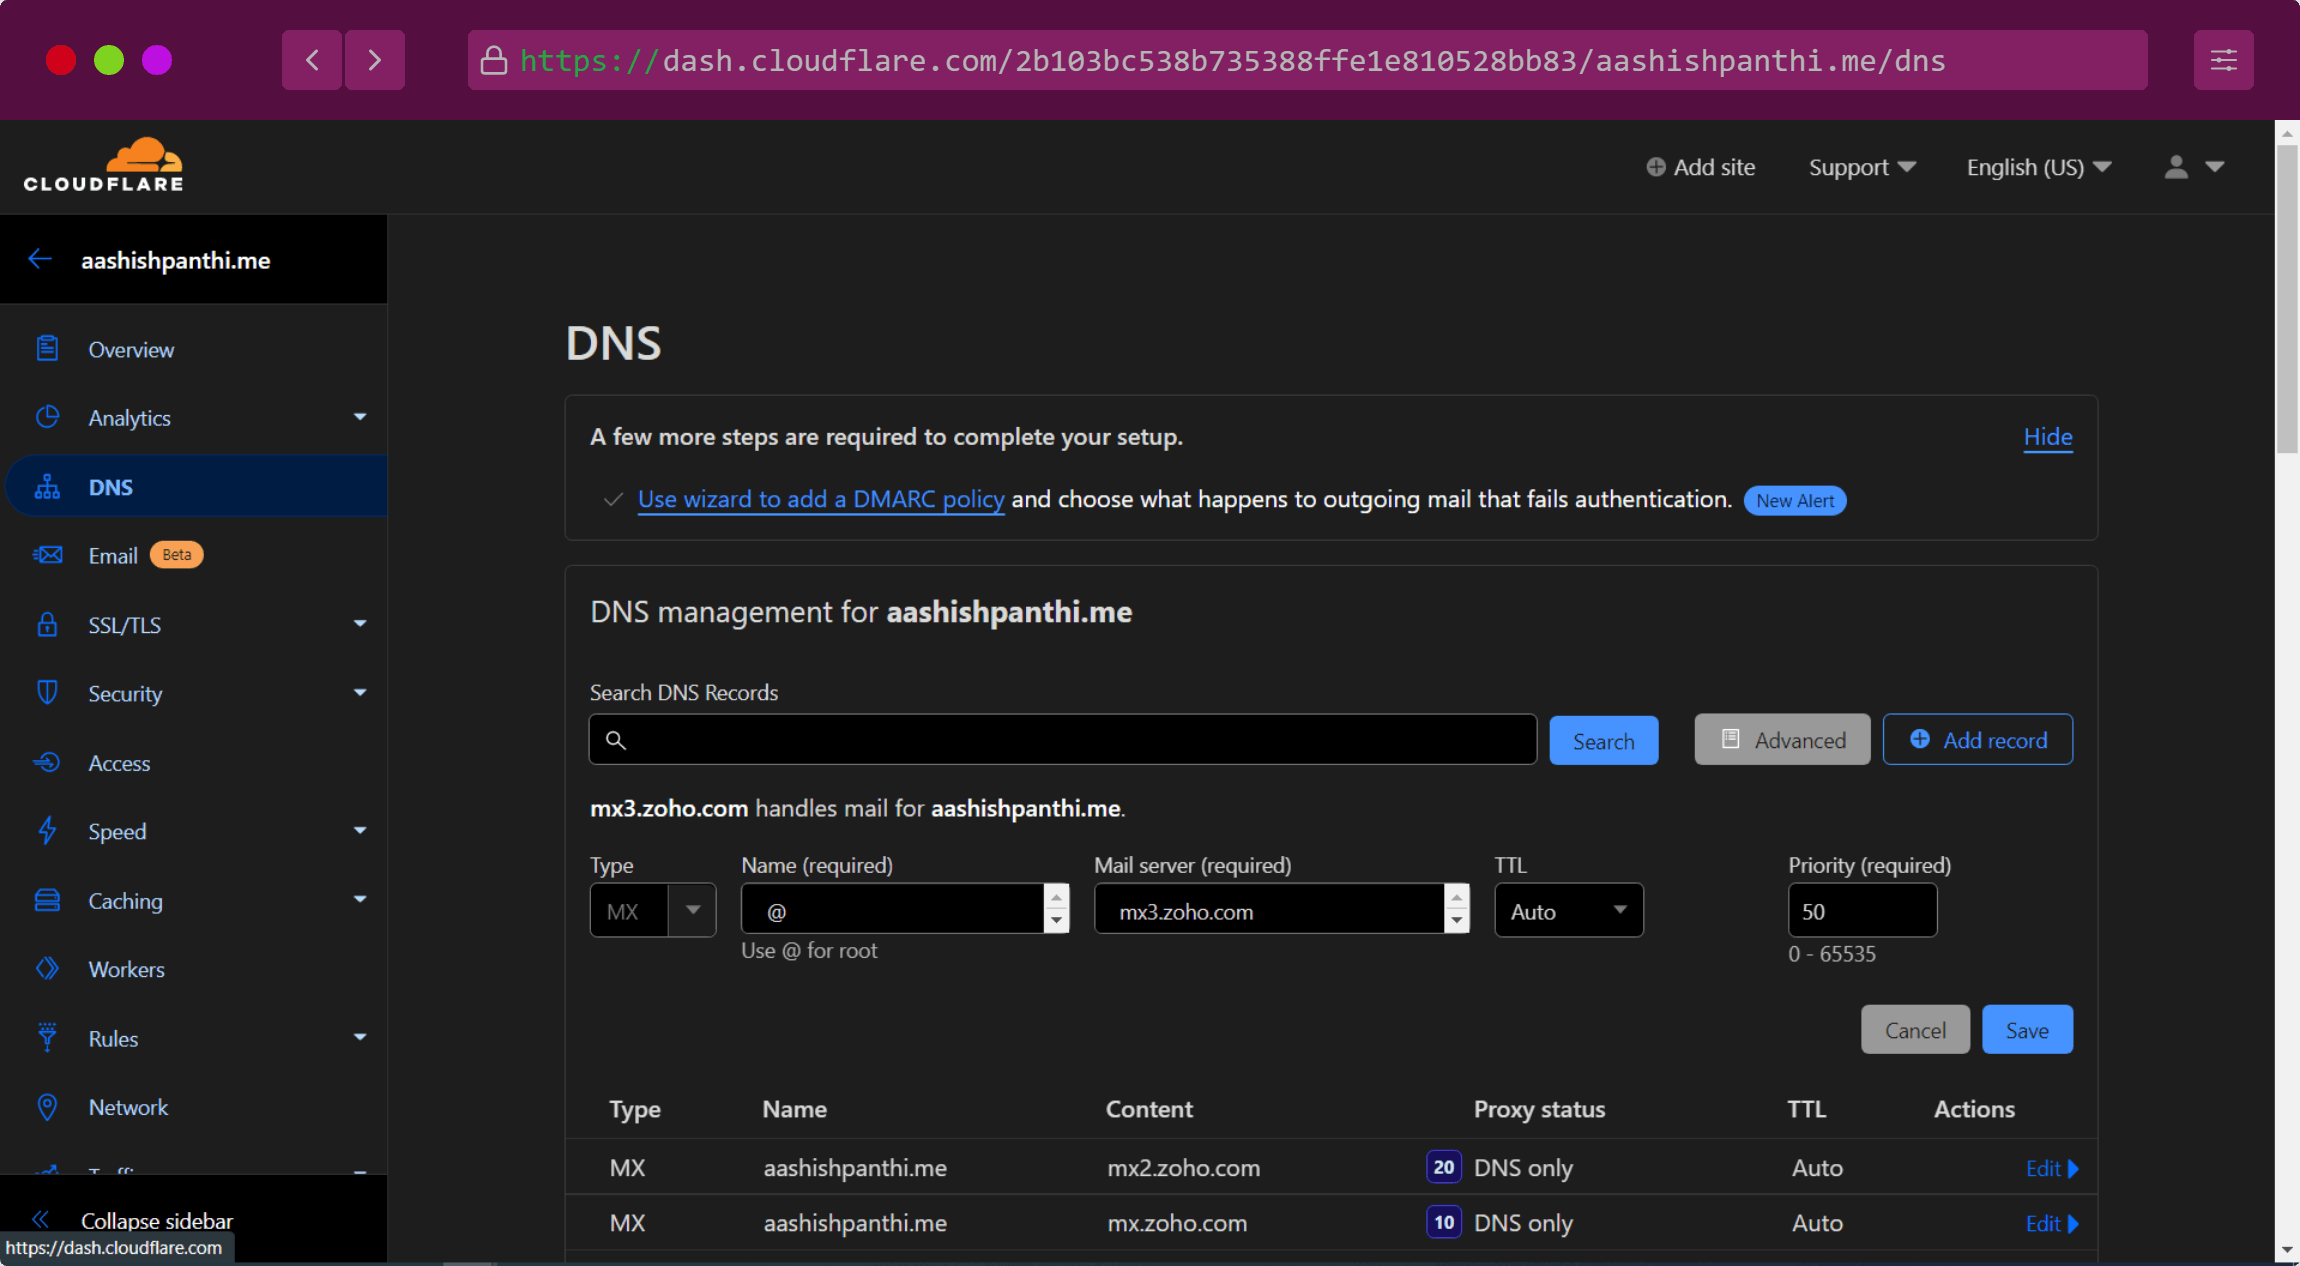
Copy the TXT value and paste it over to Cloudflare DNS. To paste the value, you need to go to the DNS tab and click on the add record button to add a new record. You can fill the data as instructed in the Zoho setup or look at how I entered the data.
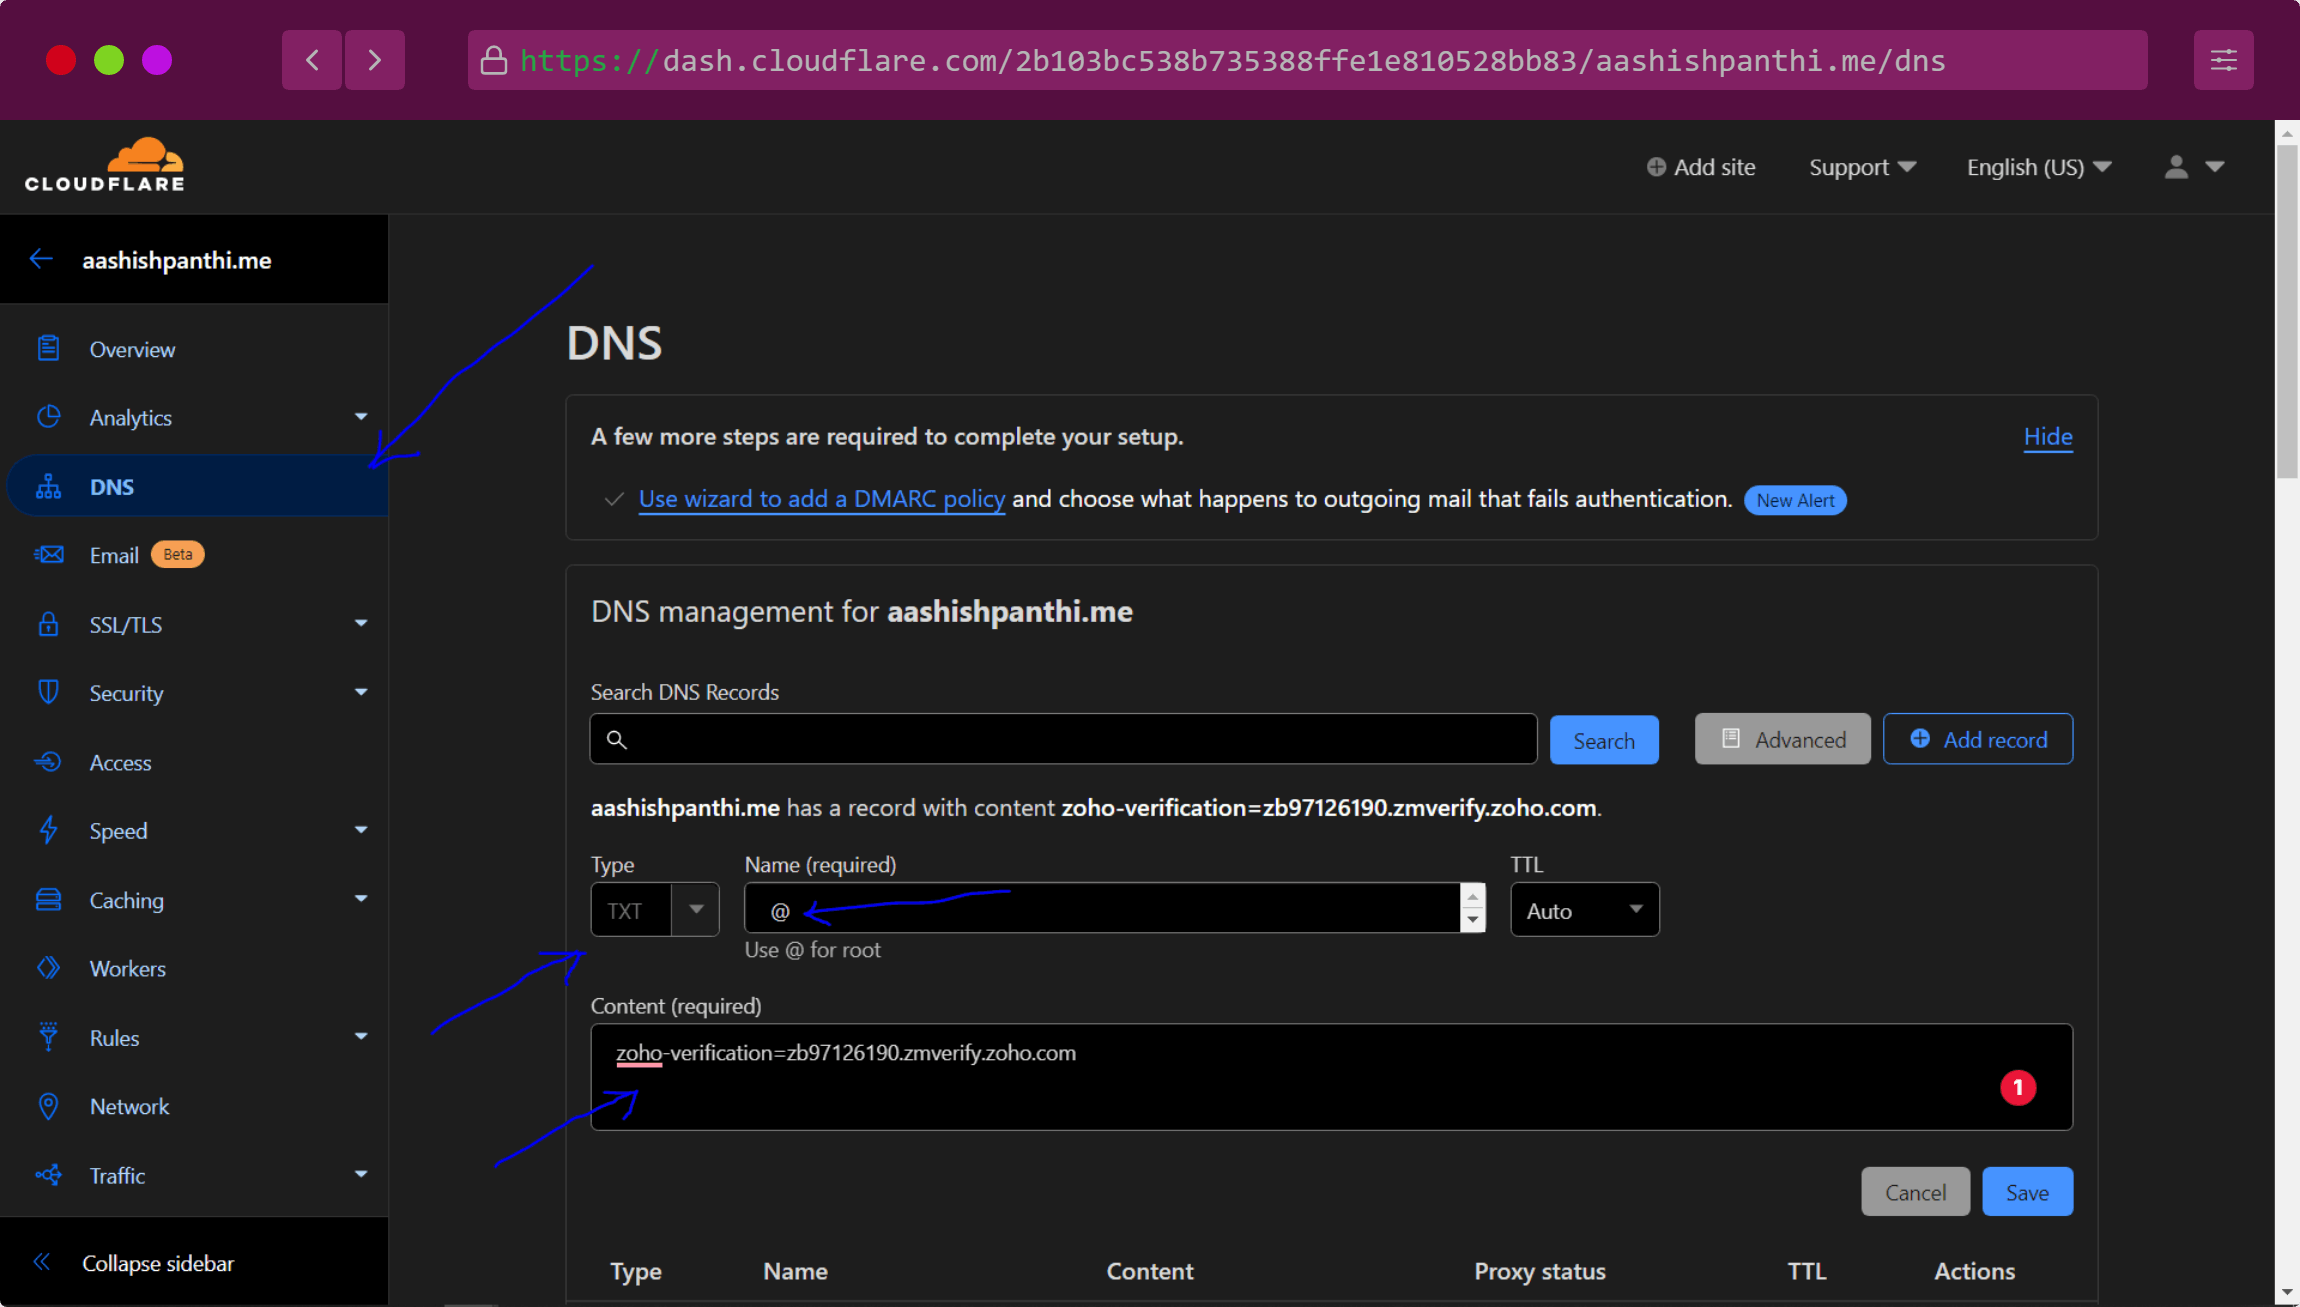
After you have saved the DNS record, you can verify and you are redirected for account creation. Type the email address you want to create. You can provide the prefix of the email you want to use. In my case, I want no-reply to send email as a bot.
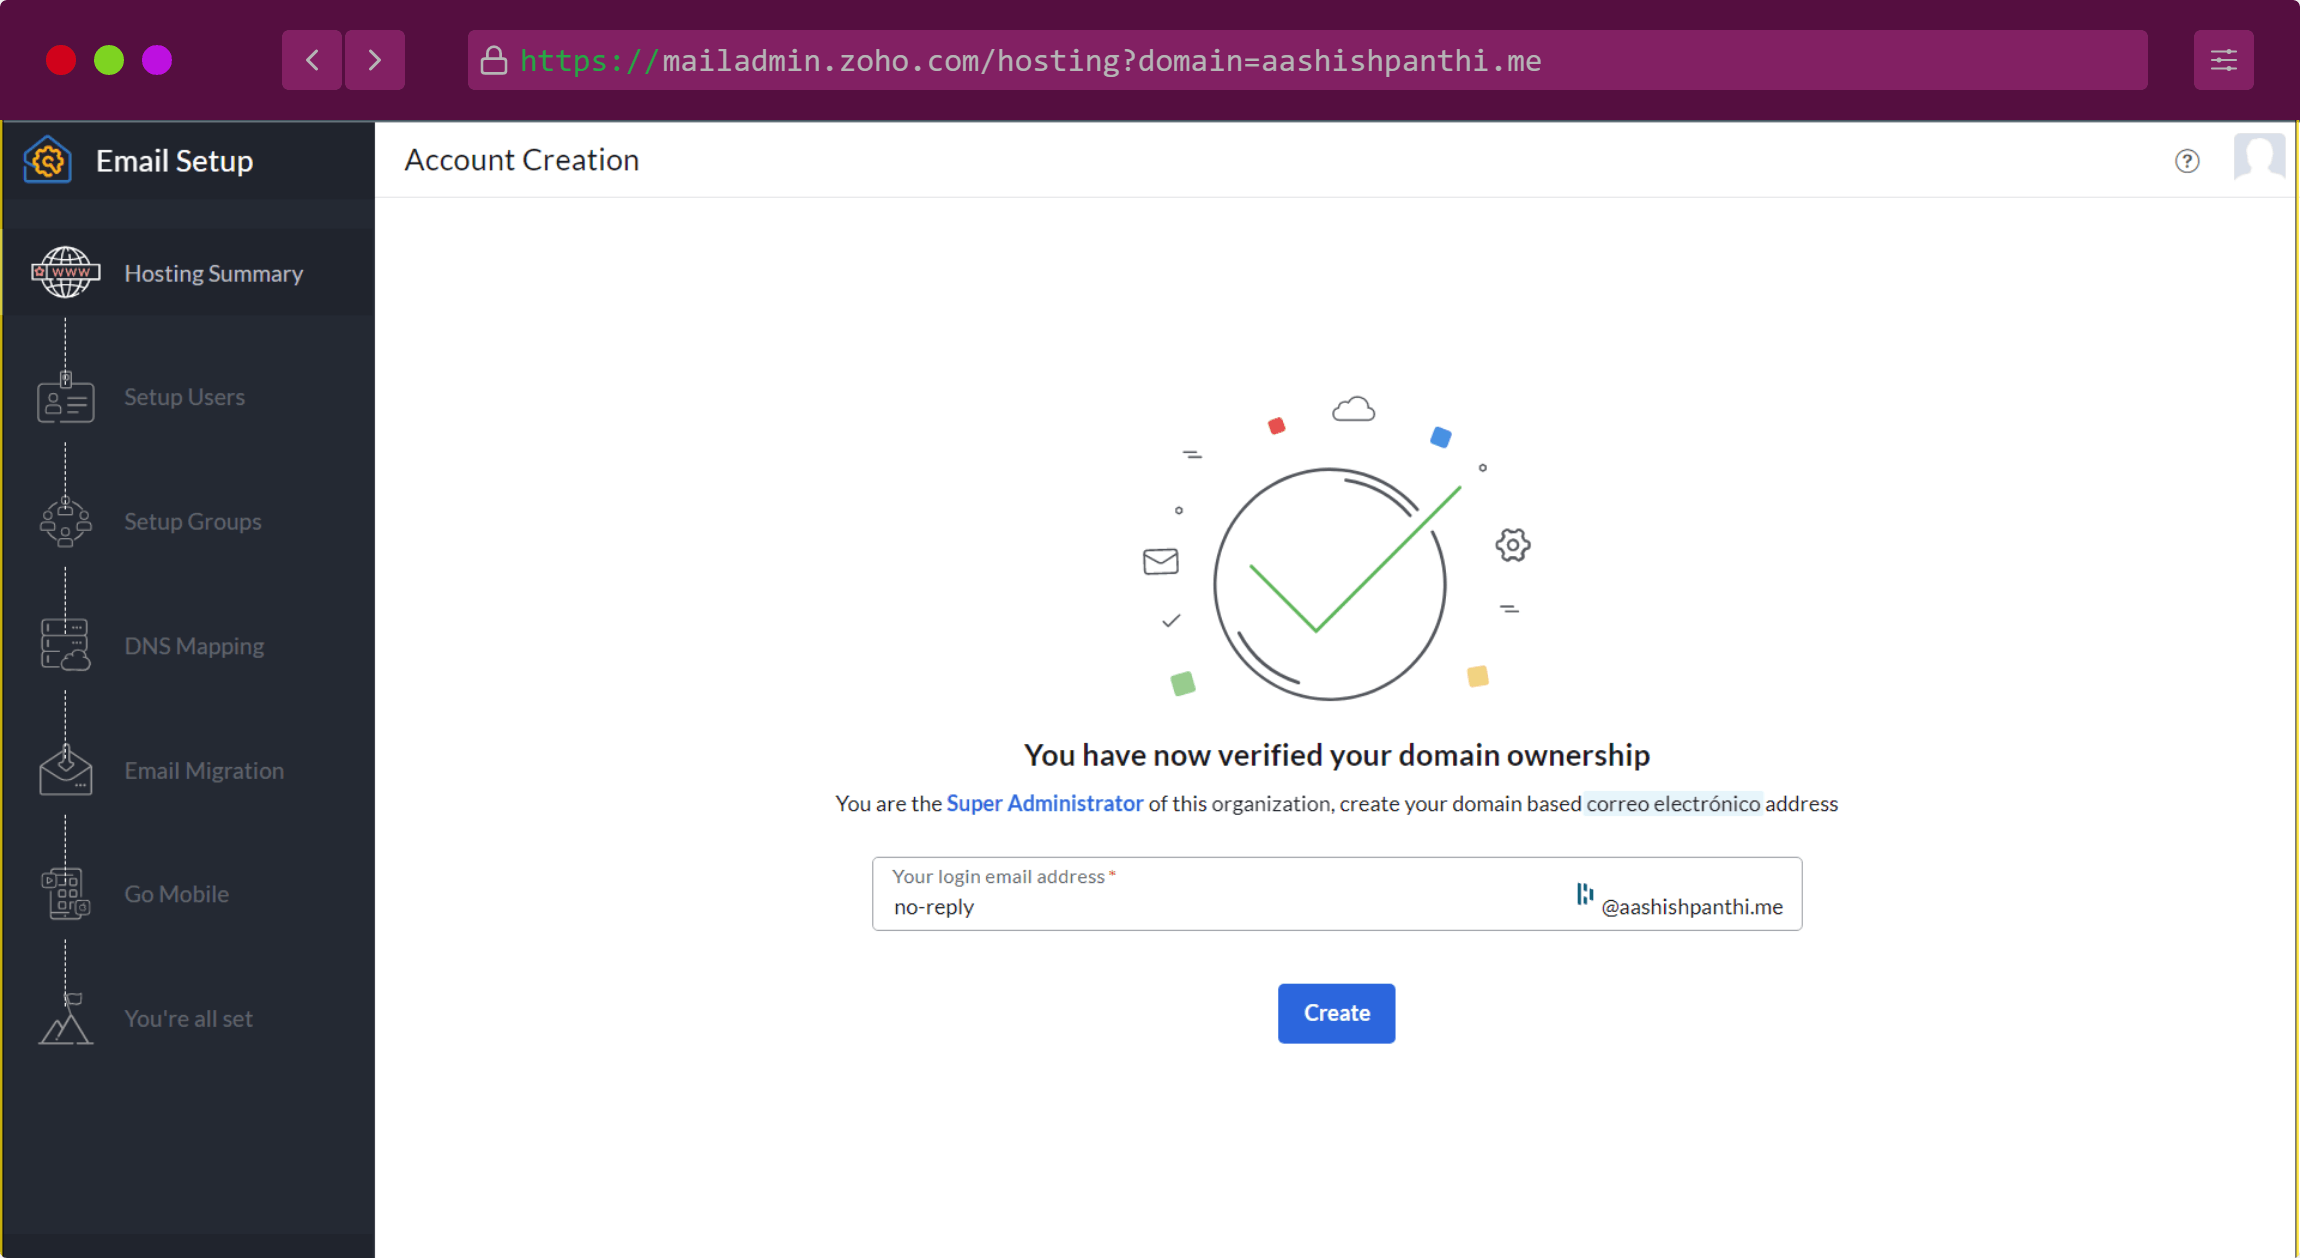
Click on create and you will be now directed to set up users, if you want you can add users. I don't want to do that here so let's Proceed To Setup Groups. Also, we don't need to set up any groups. You can skip this part also. And click on proceed to DNS mapping.
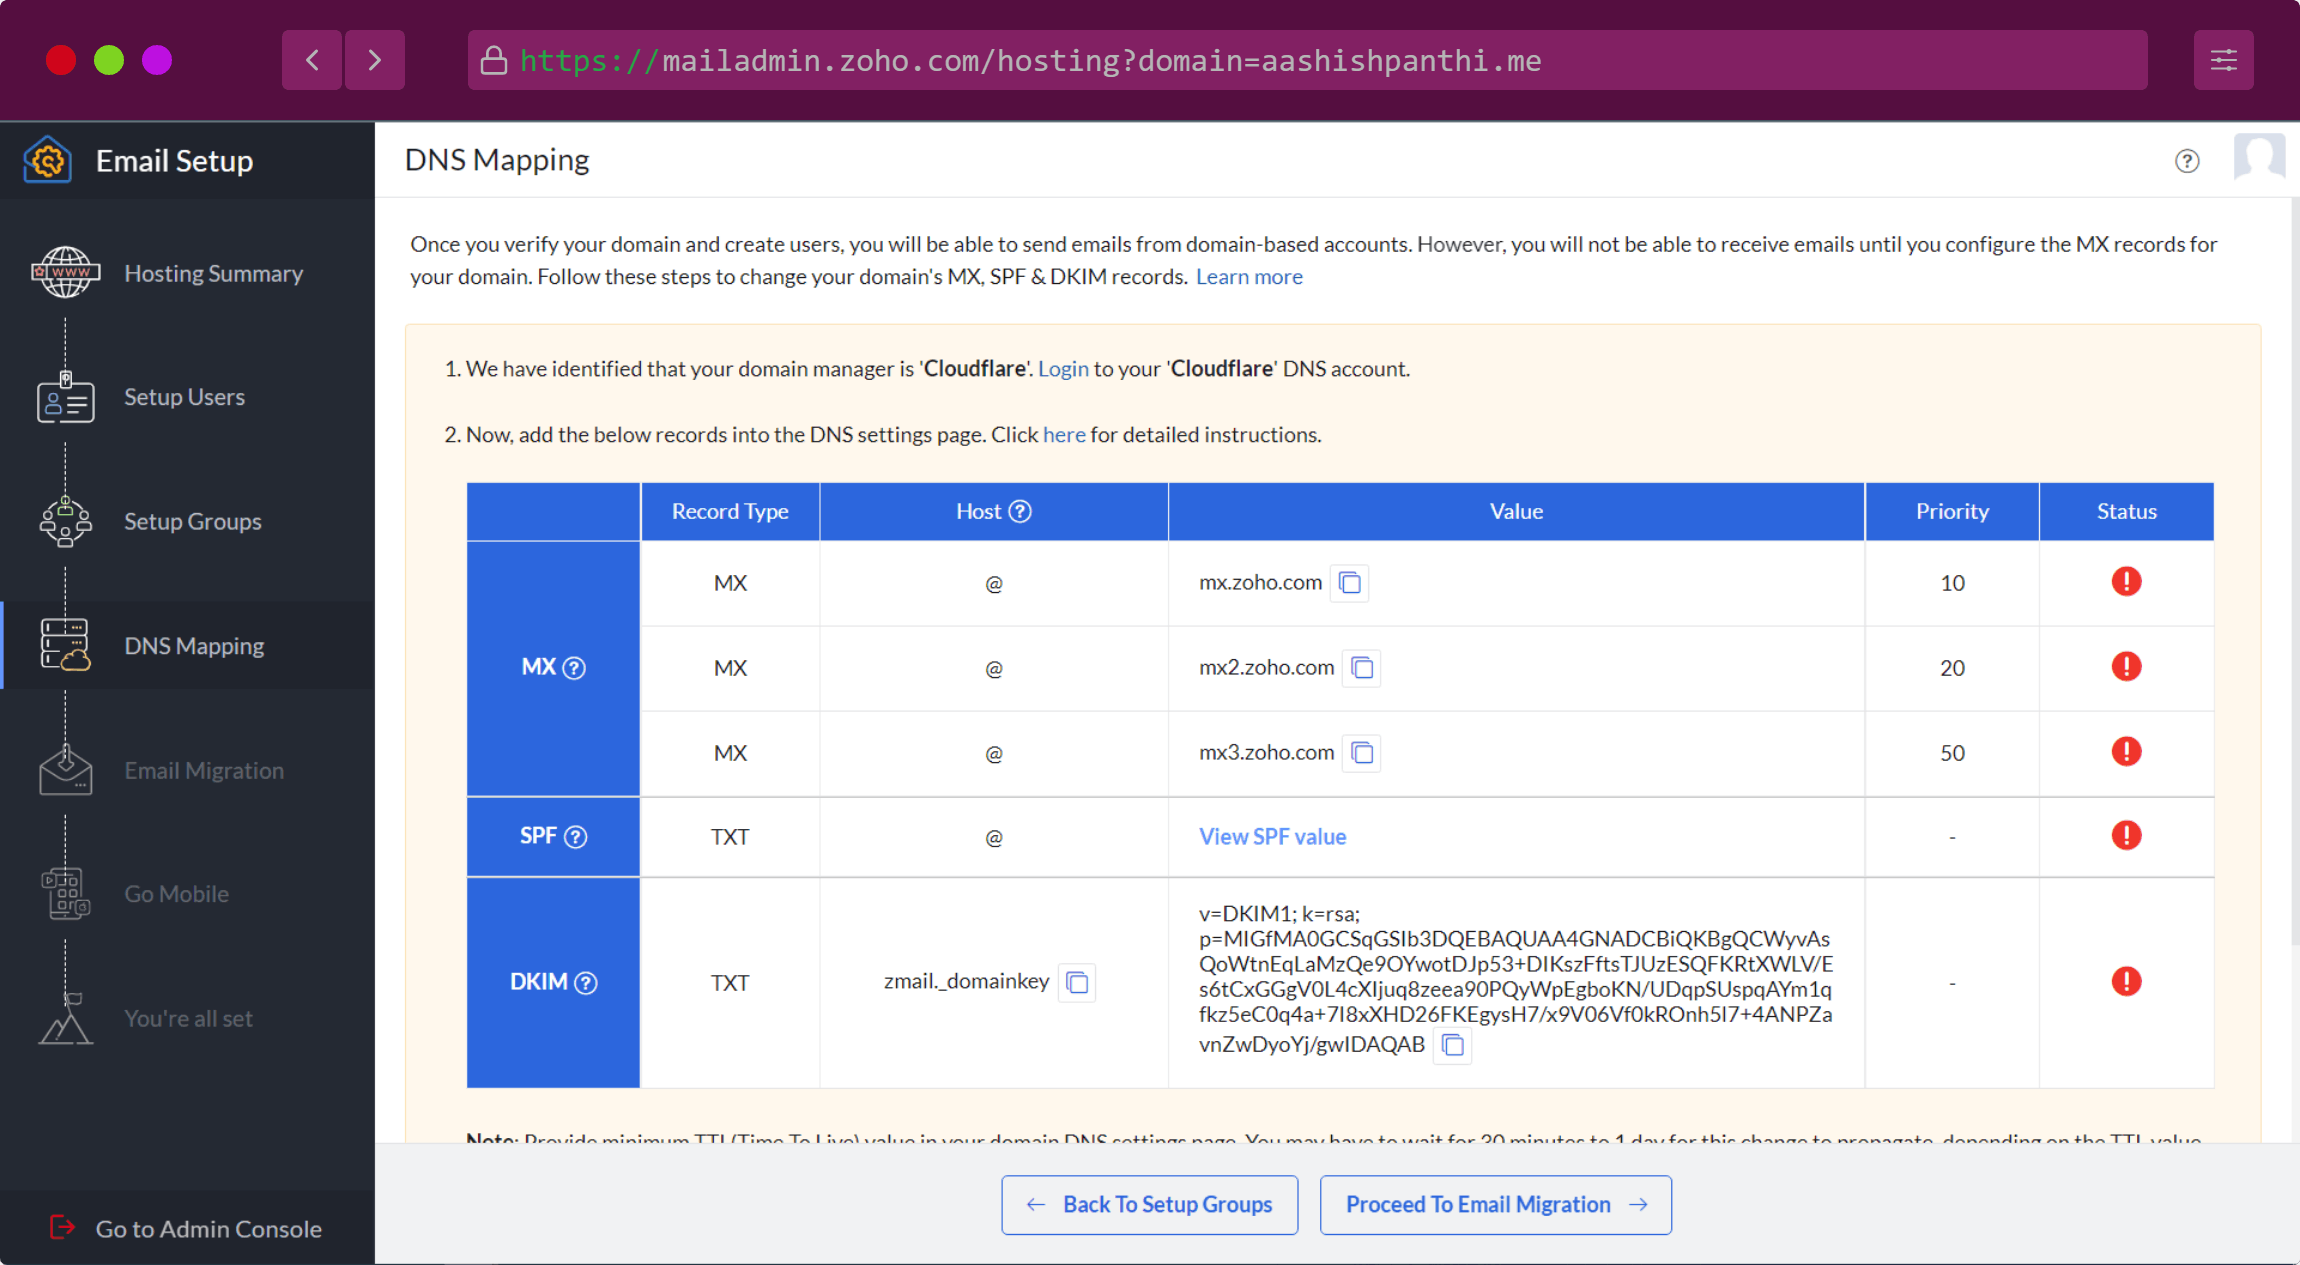
Here Zoho identified our domain manager as Cloudflare, so it is recommending the setup process accordingly. Now copy the values from here and add them to our Cloudflare's DNS record manager.
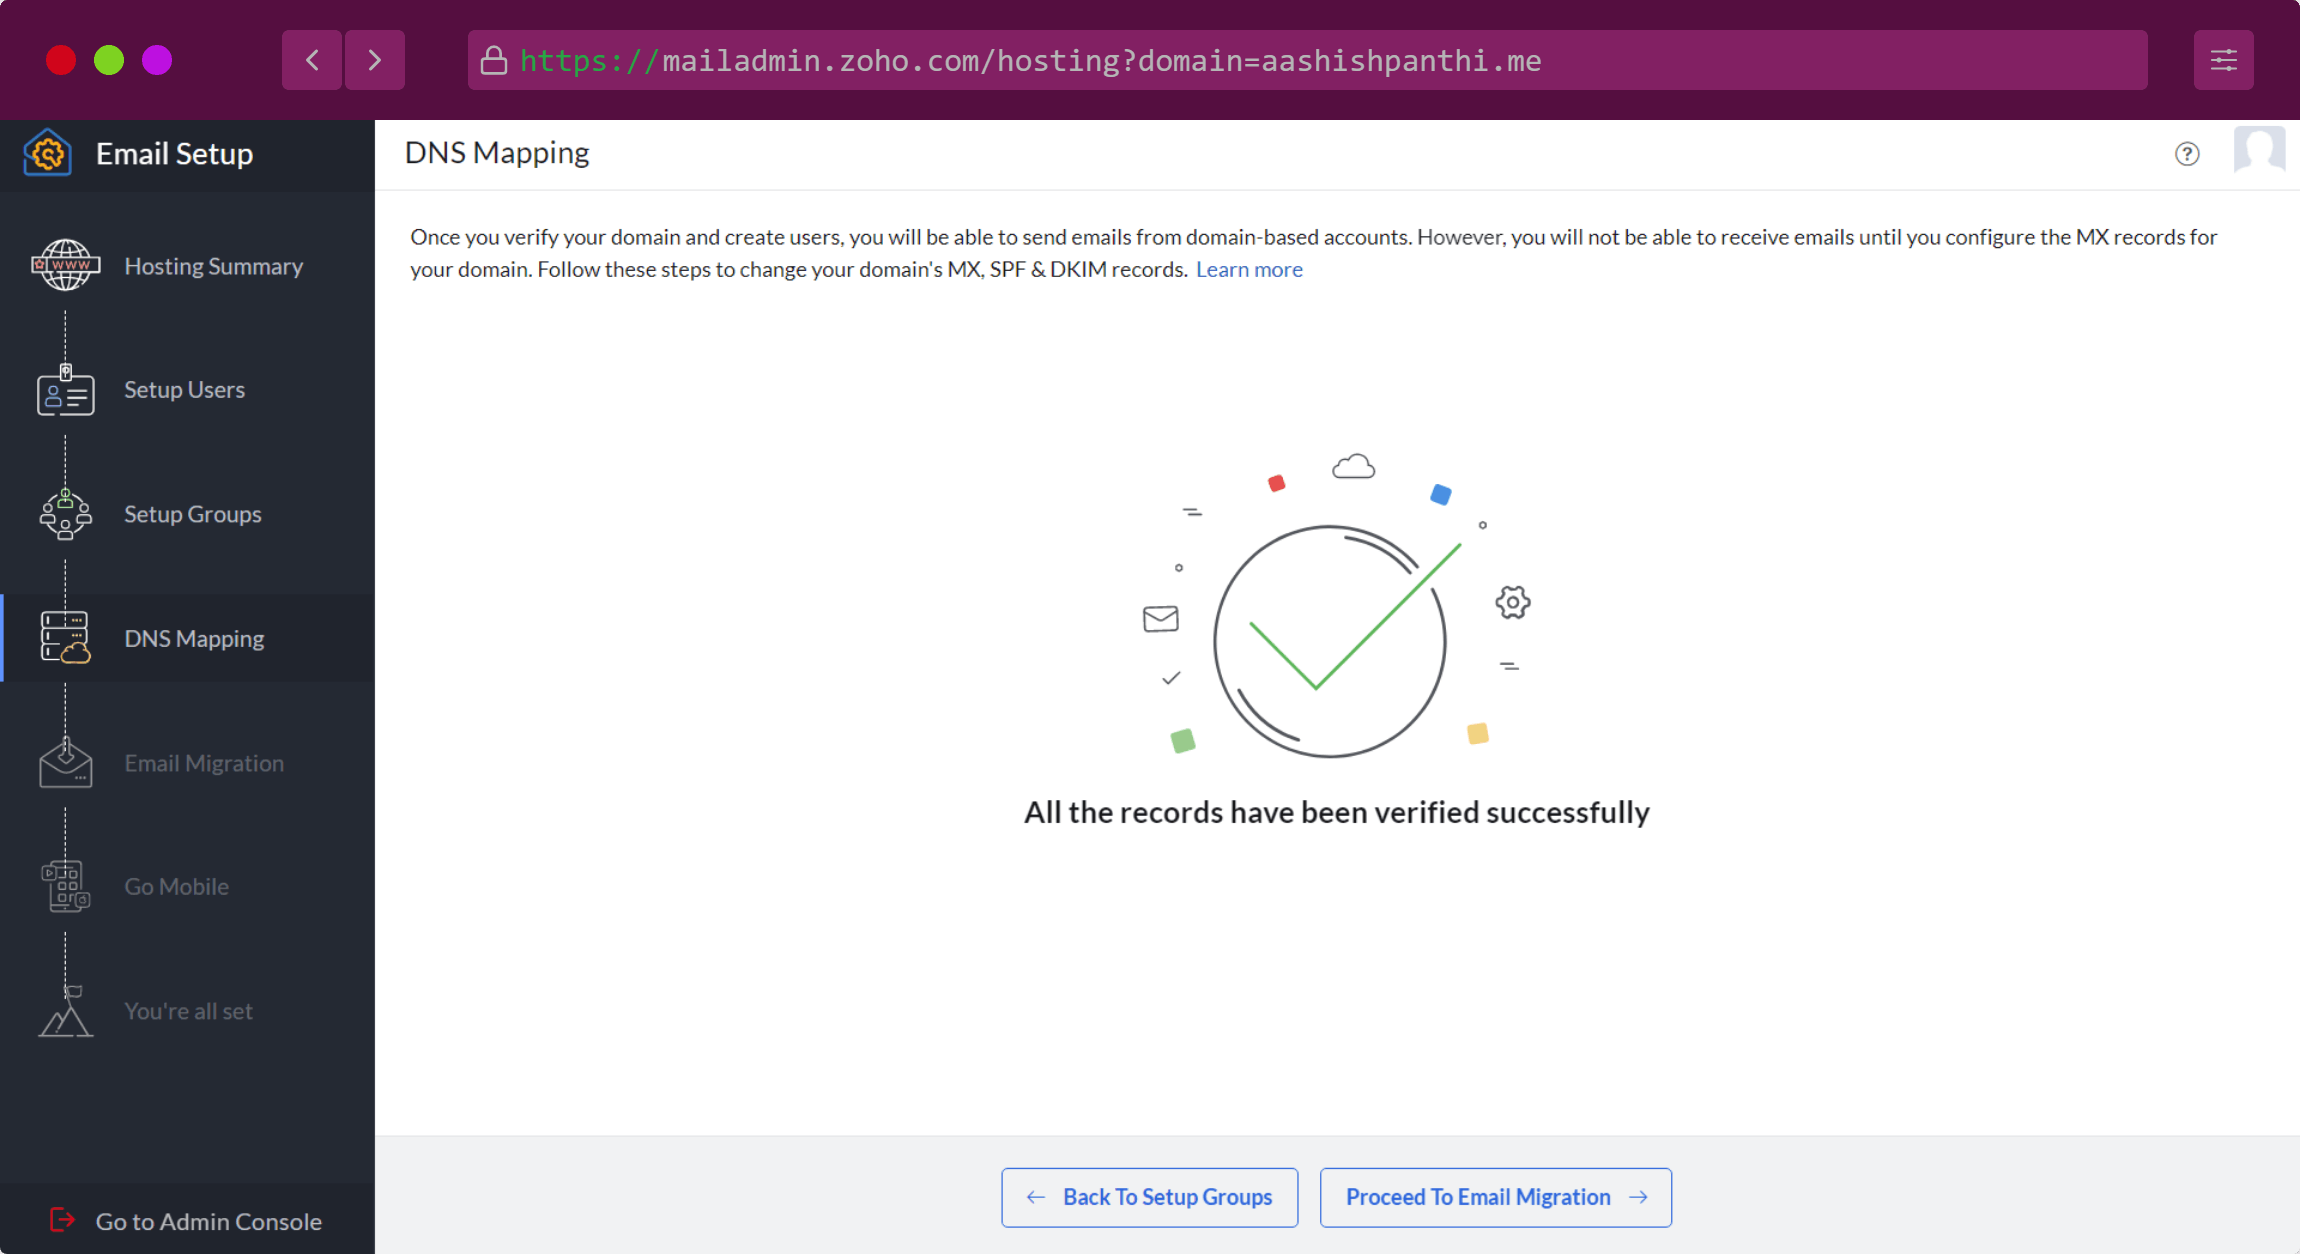
After you have completed your addition process. You can click on verify to let Zoho check the DNS records. It may take some time but you will see all of the fields in the status column checked after a few minutes. If it is taking much longer time, you can proceed to Email migration for now. You need to validate the fields later if you have entered the wrong values or in the wrong way.
Next step id Data Migration. Data migration helps you to migrate your existing emails, contacts, and other data from your previous email server to the Zoho Mail server. Since we don't have any previous mail server so we will proceed to the next step.
This step is a little advertisement from the company to make you use their mobile app. If you want, you can download and install the mobile app. If you are good without it then you can proceed to the next step, our final step.
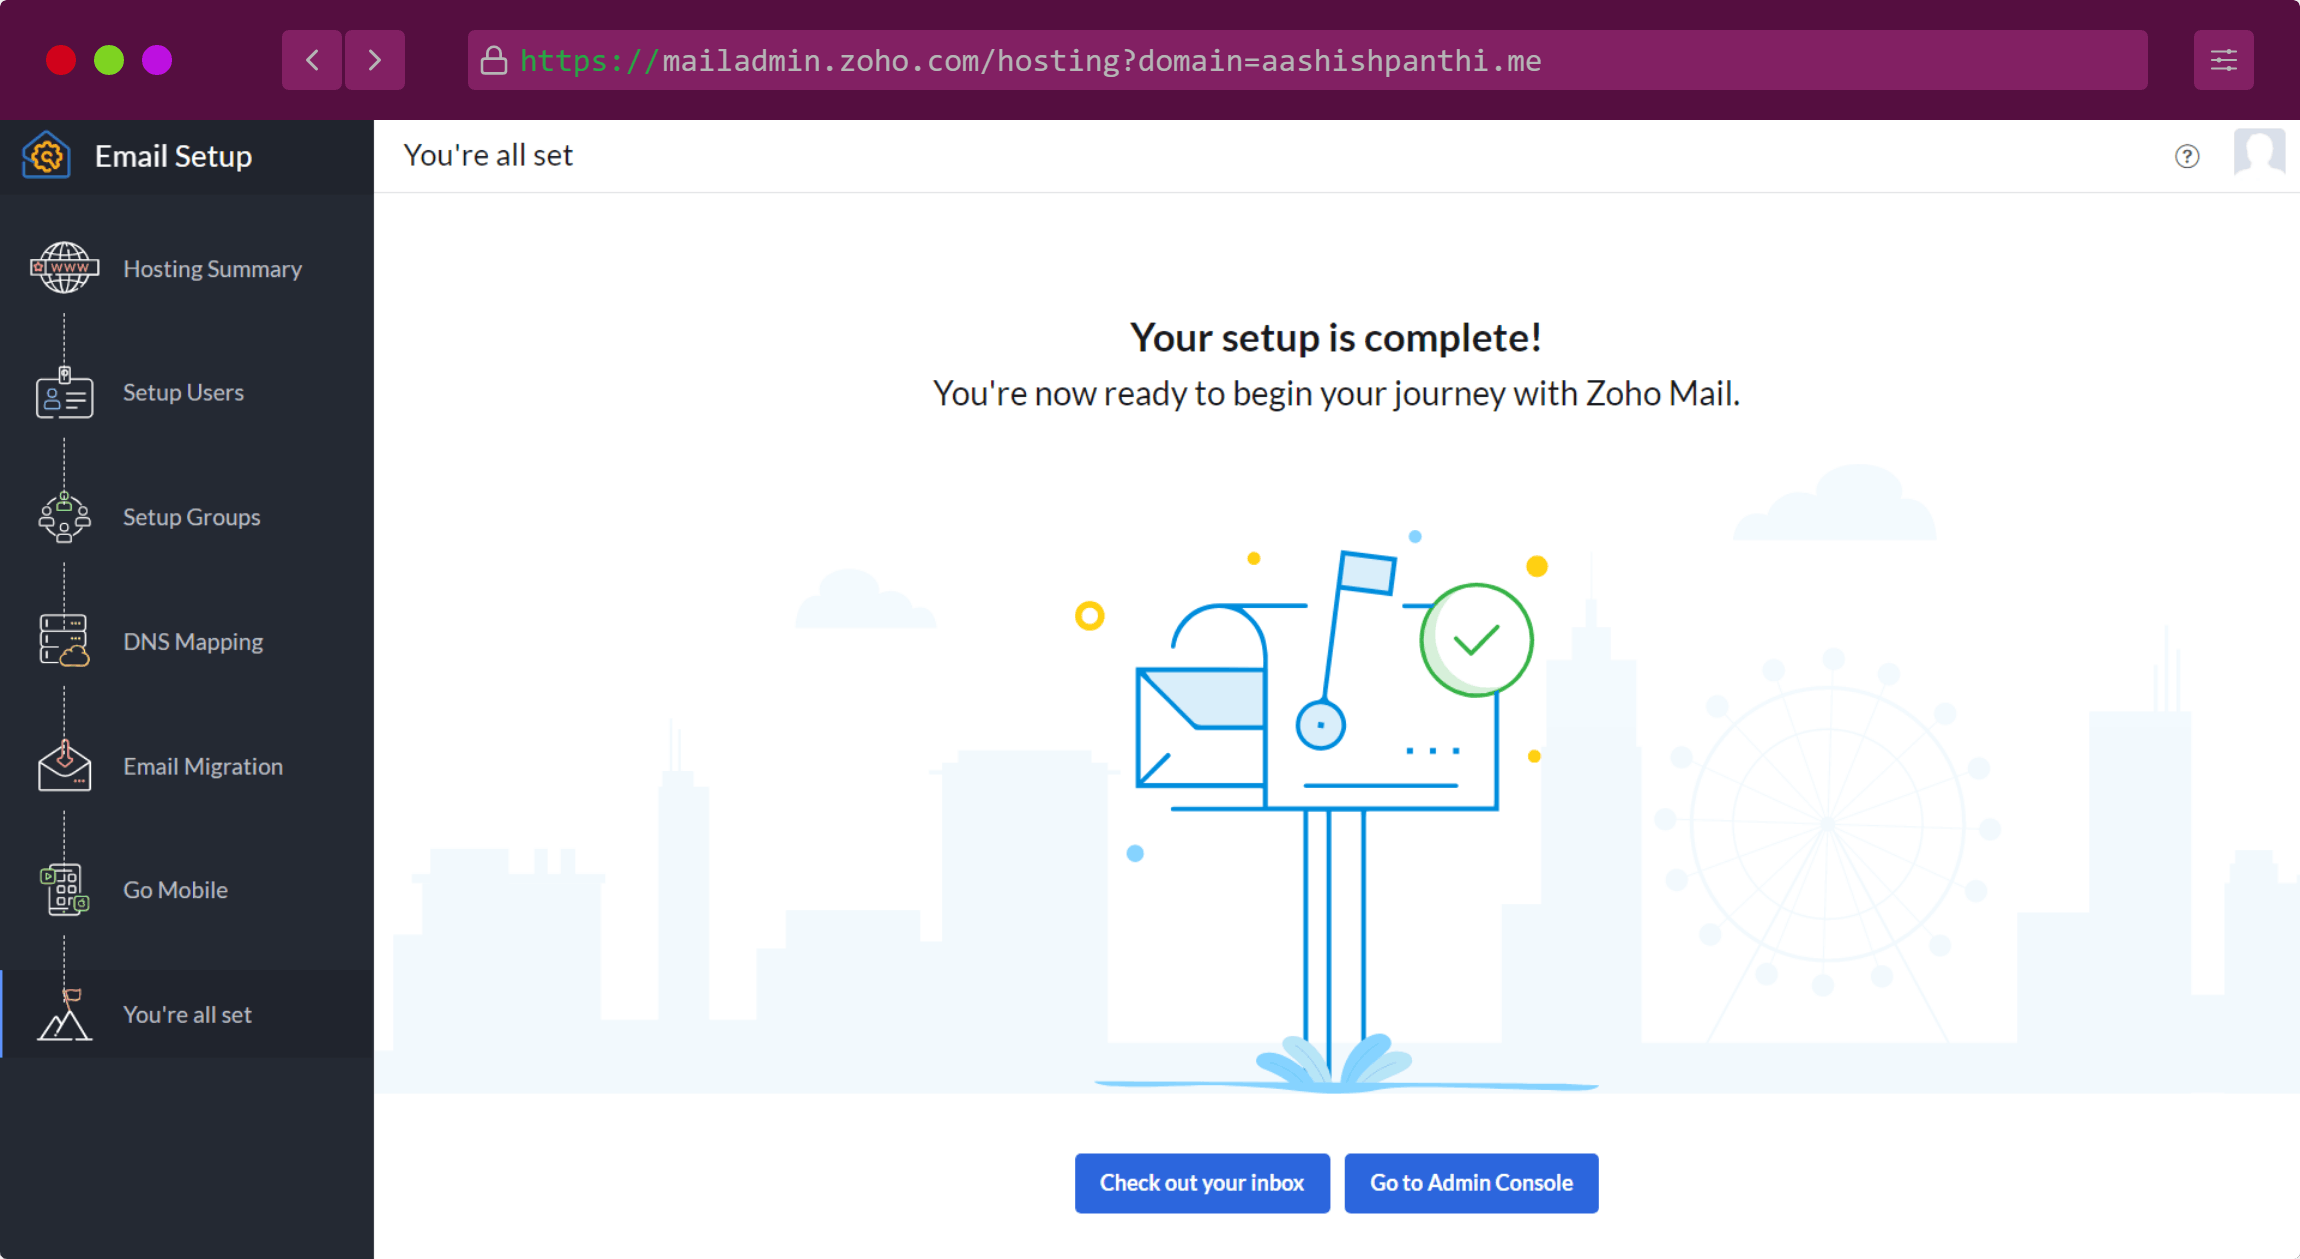
Finally, we are done with our setup process now you can use the email however you want. Either only to send emails as a bot or interact as a real human by both sending and receiving emails. You can do the second option from now onwards by clicking on the check out your inbox button. But I am really interested in the first option which is to send email as a bot from our node server using nodemailer.
Create a nodejs project
Now let's send the email using nodemailer. Create a folder where you want to write the code. If you already have an existing project then you can skip few of these steps.
Initialize a project
To initialize the project, use the command
npm init
Provide useful information and hit enter. A new file called package.json needs to be generated.
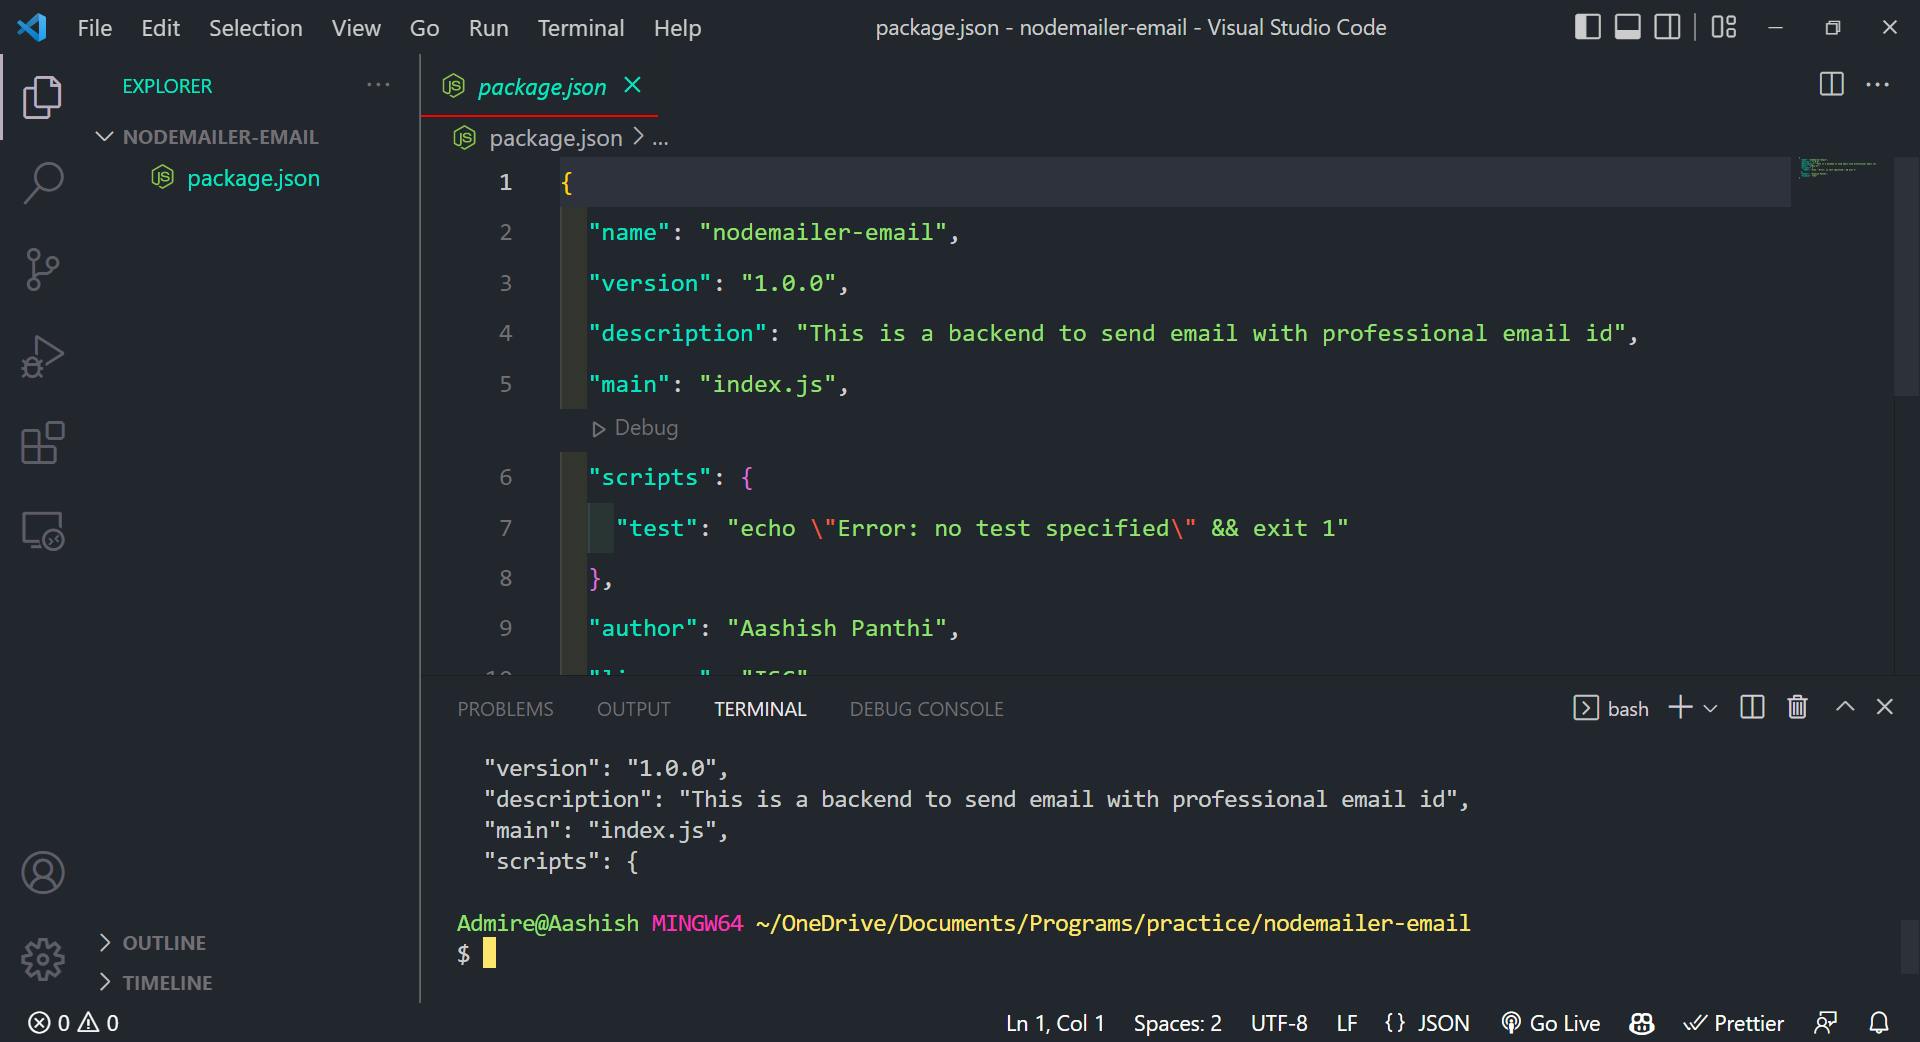
Now create an entry file. I have set index.js as an entry file. So now need to create a new file. You can use the command or GUI.
touch index.js
Now you can follow along if you already have an existing project. If you already have a project or just initialized one, now install nodemailer with this command:
npm i nodemailer
Also, we need a .env file to store our secrets. You can use the following command:
touch .env
Let's write some code
Now, import your nodemailer module like this (Common JS style):
const nodemailer = require("nodemailer");
Or, use ES6 import/export like this:
import nodemailer from 'nodemailer'
To use import/export, you have to add
"type": "module"inside yourpackage.jsonfile.
Now your package.json file looks something like this:
{
  "name": "nodemailer-email",
  "version": "1.0.0",
  "description": "This is a backend to send email with professional email id",
  "type": "module",
  "main": "index.js",
  "scripts": {
    "test": "echo \"Error: no test specified\" && exit 1"
  },
  "author": "Aashish Panthi",
  "license": "ISC"
}
To send emails, you need a transporter object, like this one:
const transporter = nodemailer.createTransport(transport)
Transporter is going to be an object that is able to send mail. Learn more about transporter here.
transport contains configuration. But in this example, we are passing object directly.
const transporter = nodemailer.createTransport({
    host: "smtp.zoho.com",
    port: 465,
    secure: true, // use SSL
    auth: {
      user: youremail@yourdomain.com,
      pass: yourpassword,
    },
  });
Our host is zoho so we use
smtp.zoho.com. 25, 465, and 587 for outgoing ports from the server. The port number we used is 465, TCP port number 465 can exchange email in an encrypted form rather than in plaintext. We can enable SSL for port 465. Inside of auth, the details you need to provide is the details you use while signing in to zoho mail from web.
I don't feel the upper one is safe to use, due to that reason we created the .env file earlier. Now let's create environmental variables.
EMAIL_HOST = smtp.zoho.com
EMAIL_USERNAME =
EMAIL_PASSWORD =
EMAIL_FROM =
EMAIL_SENDER =
Leave EMAIL_HOST as it is, but insert values to other blank variables. Like:
EMAIL_USERNAME = usermail@domain.com, EMAIL_PASSWORD = pass, EMAIL_FROM = usermail@domain.com and EMAIL_SENDER = Your Name.
Now we need to use those variables inside our index.js file. To do so, we are going to install another simple module called dotenv, like this:
npm install dotenv
Let's import this module. Again we have two ways. Just follow one (like you did while importing nodemailer).
CJS:
const dotenv = require("dotenv");
ES6:
import dotenv from 'dotenv'
At last, we need to config and we are done:
dotenv.config()
Now, we can create a transporter like this:
const transporter = nodemailer.createTransport({
    host: EMAIL_HOST,
    port: 465,
    secure: true, // use SSL
    auth: {
      user: process.env.EMAIL_USERNAME,
      pass: process.env.EMAIL_PASSWORD,
    },
  });
We need options object to send email, create one like this:
const options = {
    from: `"${process.env.EMAIL_SENDER}" <${process.env.EMAIL_FROM}>`,
    to: "mail@aashishpanthi.info.np",
    subject: "This is a message",
    text: "body of the email",
  };
I hope the above options are self-descriptive. Well, let's see them one by one:
from: sender name and emailto: receiver email address (your target email id)subject: Subject of your emailtext: Message or body sectionhtml: you can send a custom text with this option using HTML
We are all set to send mail using node.js. call transporter.sendMail method and pass options object as a parameter. Then we have a callback function, where we get the status of our mail like error and info.
transporter.sendMail(options, (error, info) => {
    if (error) console.log(error);
    else console.log(info);
  });
The above code snippet logs error, if we get an error else it logs the information(status) of mail.
At last, let's combine all our code snippets (of index.js) into one and wrap them inside a function sendMail:
import nodemailer from 'nodemailer';
import dotenv from 'dotenv';
dotenv.config();

const sendMail = (to, subject, message) => {
  const transporter = nodemailer.createTransport({
    host: "smtp.zoho.com",
    port: 465,
    secure: true, // use SSL
    auth: {
      user: process.env.EMAIL_USERNAME,
      pass: process.env.EMAIL_PASSWORD,
    },
  });

  const options = {
    from: `"${process.env.EMAIL_SENDER}" <${process.env.EMAIL_FROM}>`,
    to,
    subject,
    text: message,
  };

  transporter.sendMail(options, (error, info) => {
    if (error) console.log(error);
    else console.log(info);
  });
};
I'm using ES6 modules in this demo.
We can also create a separate js file to sendMail, export the function, and use it all over the project.
Now we can call the sendMail function again and again (when we need it). Let's call it
sendMail('mail@aashishpanthi.info.np', 'Thank you!', 'Thank you so much for sticking with me');
Run our index.js file:
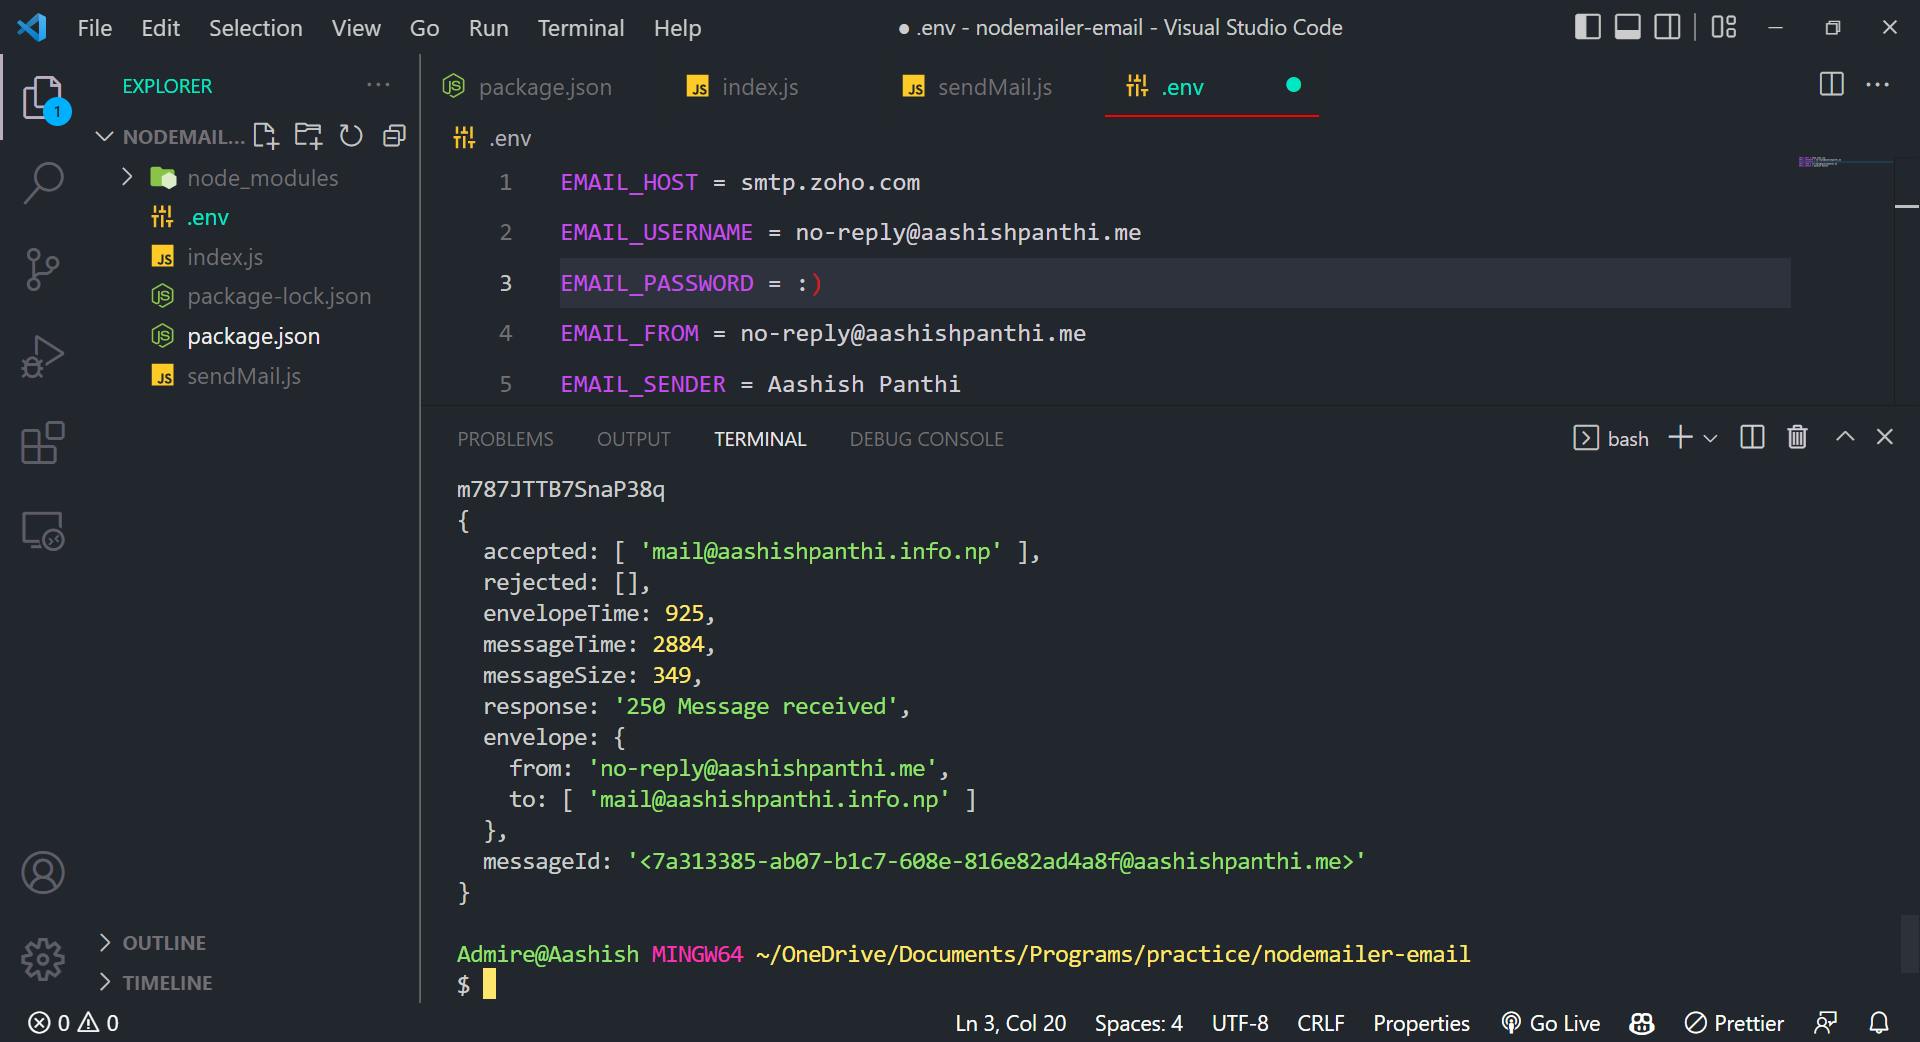
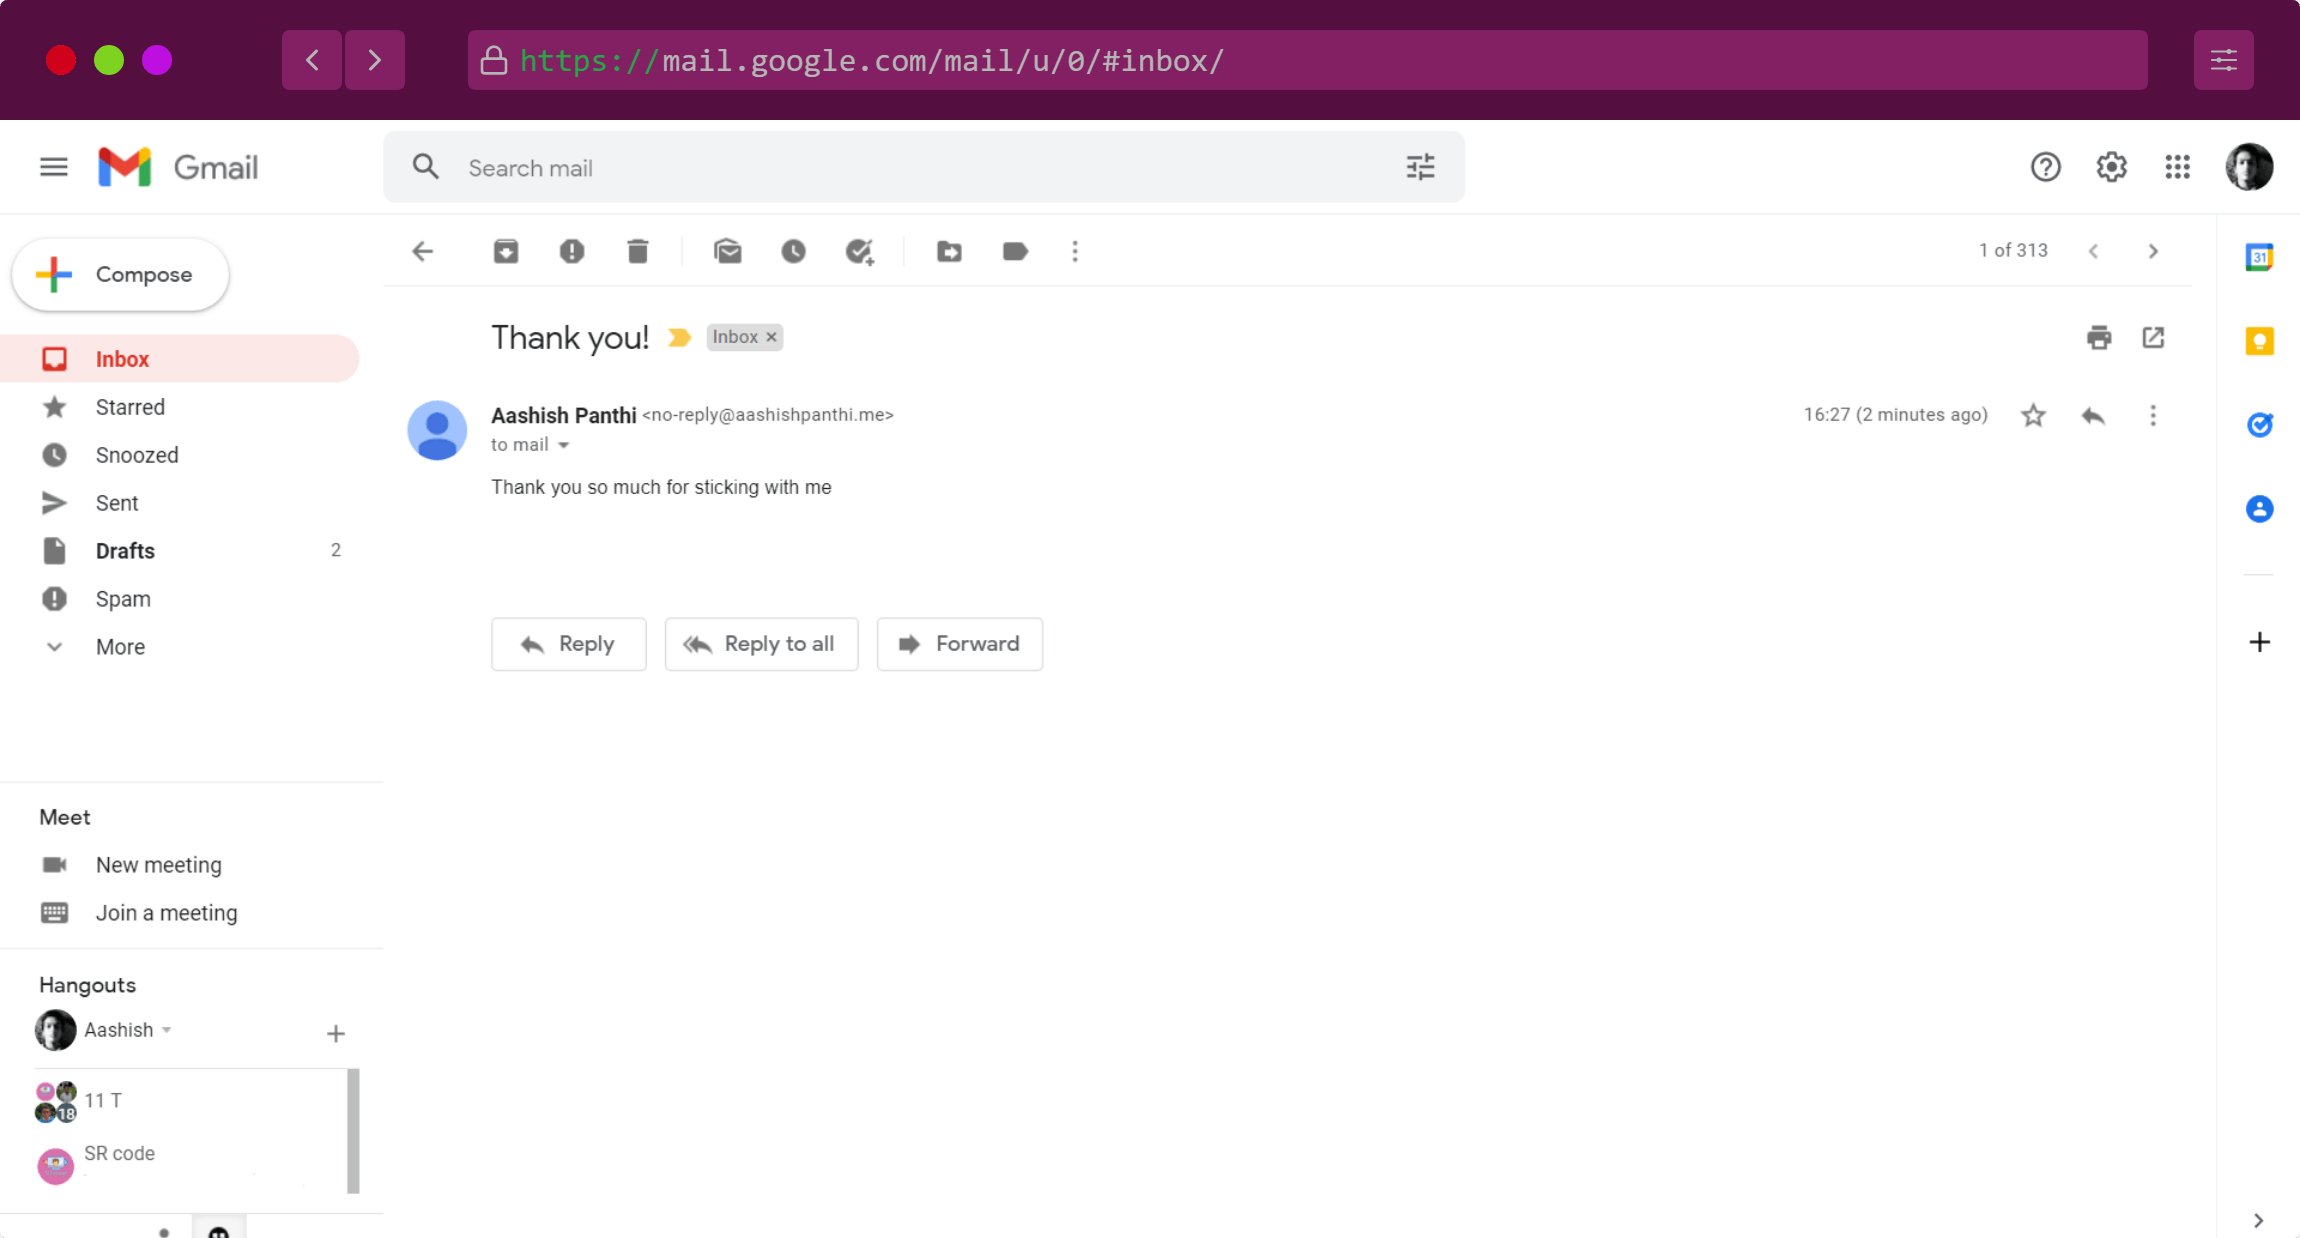
And our mail is sent.
And our mail is received.
