

How to make an email tracker using Nhost serverless functions

I am a developer from Nepal who loves playing with tech.
I hope you know what pixel tracking is. No worry if you don't know you can read this article:
What we are trying to do?
Today, we will create a serverless function using Nhost.io and the function will run when we hit some endpoint. Yes, we are also going to deploy the function for free. And we will call this function when someone opens up your email. Curious? Wait for a few more minutes :)
Create a project
First of all, create a new folder. Then go inside that folder. Now, initialize a node project here.
Note: If you already have a node project like React, Next, Vue, etc. Then you don't need to initialize the project. You can continue by creating a functions folder in the root directory.
If you are on linux or Mac you can type out these commands on your terminal. You can do the same thing with git bash on Windows.
To initialize the node project, you run the command npm init. Also, add -y flag because we don't want to get deep into examples.
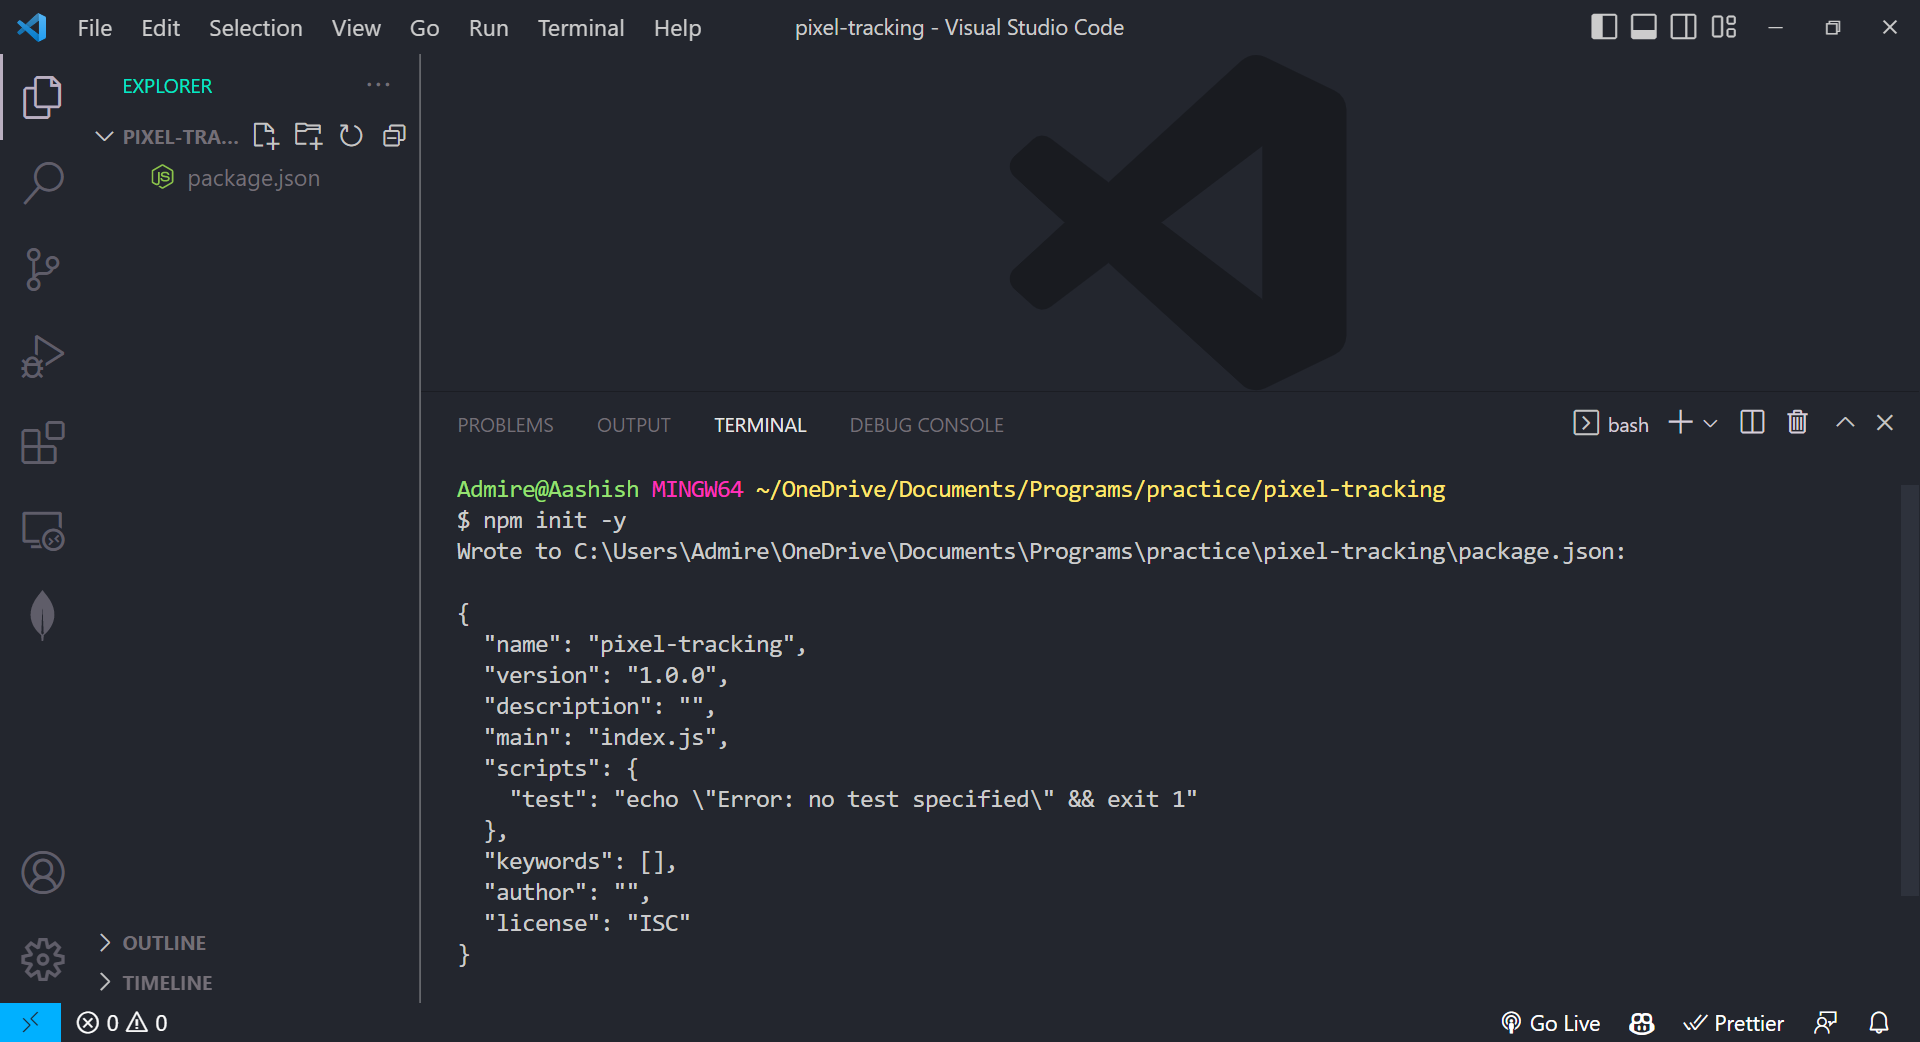
Now you can see a package.json created in your root directory of the project.
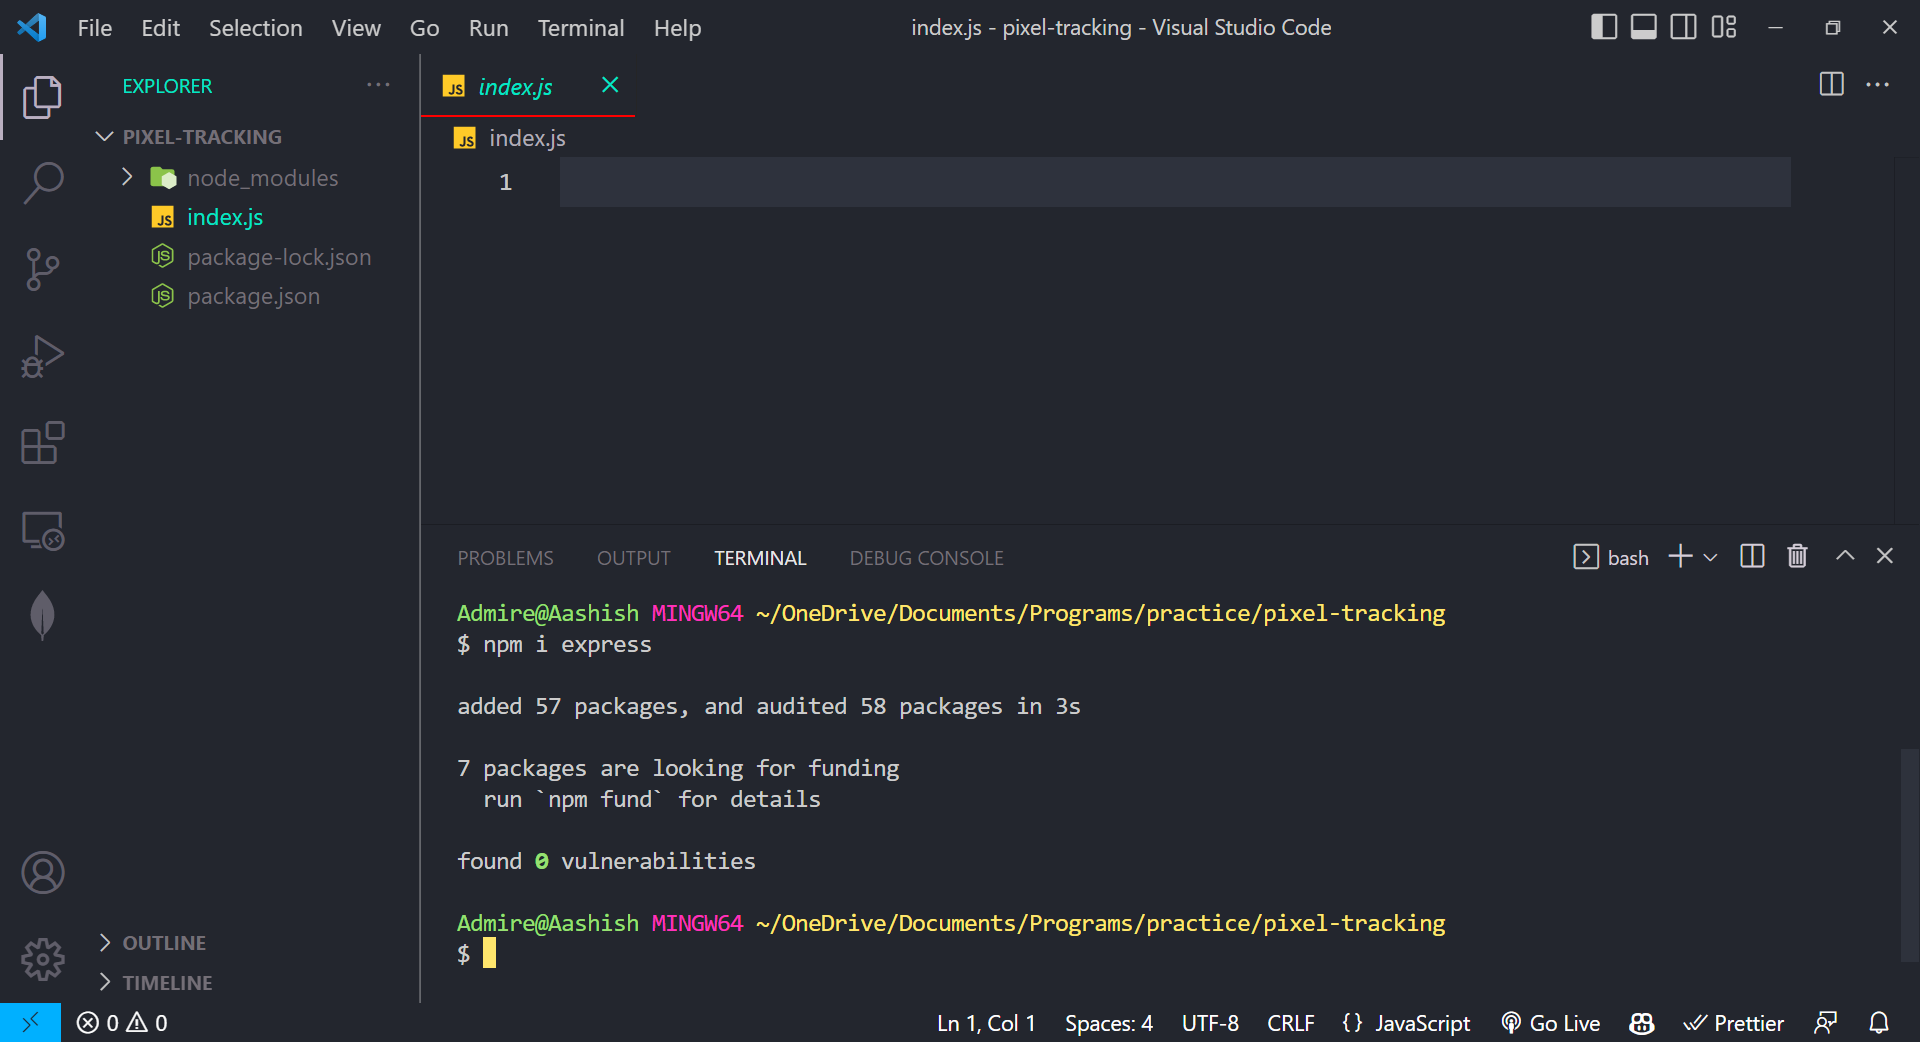
You need to install express as it is required by the host. You can do that with the command:
npm i express
Also install @nhost/nhost-js as we will require this if you want to perform some database operations.
npm i @nhost/nhost-js
Creating functions
Now make a new folder called functions.
mkdir functions
Inside it create a update.js file. This will be the name of the function itself. You can do that with the command:
touch functions/update.js
Now open up your update.js file and write the following code.
import { NhostClient } from "@nhost/nhost-js";

const backendUrl = process.env.NHOST_BACKEND_URL;

const nhost = new NhostClient({
  backendUrl: backendUrl,
});
This will help us create a new NhostClient. And we are using process.env.NHOST_BACKEND_URL here. Don't worry about that, this environment variable will be provided to us when our function will be deployed to the Nhost server. Nothing to worry about here. It is just a small file so we can write code without testing.
Now we will be creating a function and exporting it. Why not directly export it, right?
export default async (req, res) => {

  // get the data from the request
  const imgId = req.query.text;
  console.log("imgId", imgId);

  if (!imgText) {
    return res.status(500).json({ error: "No image token provided" });
  }

  //perform some operations and send a response
};
In the above code, we have created a function and exported it as default. Inside it, we have got the image_id from the query parameter. If you don't know what a query parameter is then let me explain.
While copying the image address from pexels.com, we got this URL https://images.pexels.com/photos/14041162/pexels-photo-14041162.jpeg?w=1260&h=750. If we break it down, it can be divided into various parts but for now, let's only break it into two parts.
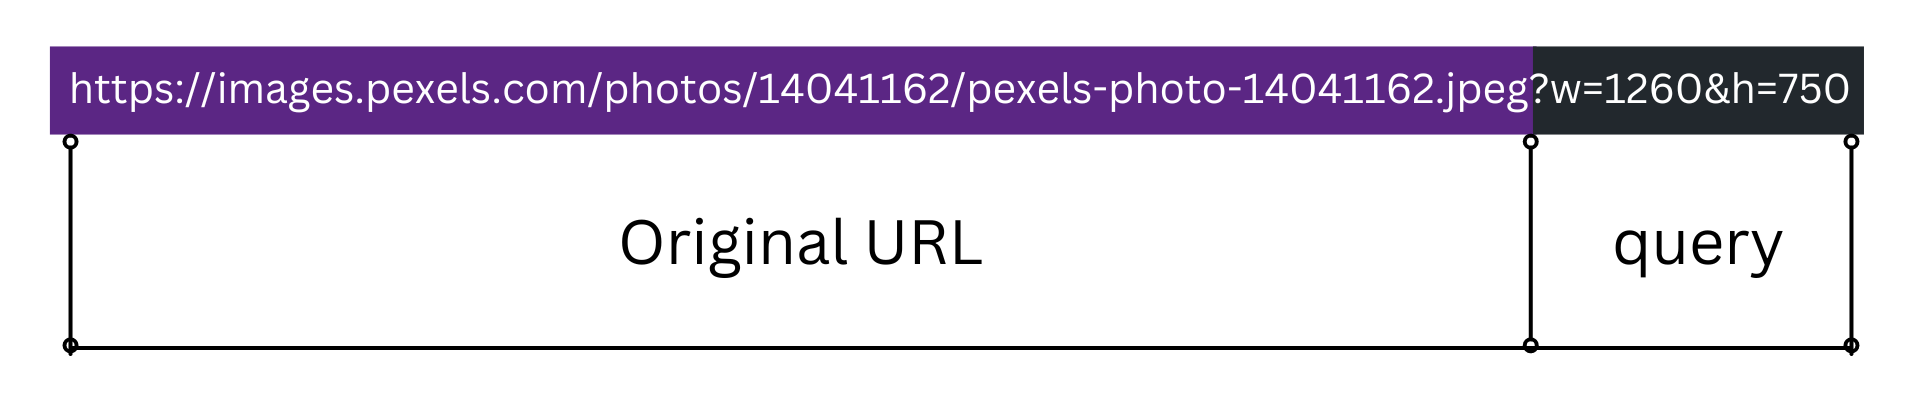
Here, w is a query for width and h is a query for height. It is used to provide additional information to the server in addition to the original URL. We are going to do the same thing.
We will provide an image_id via a text query. In this way, we can recognize from where the GET request is coming and we can perform the operations accordingly. We will complete our function after setting up your Nhost project. You can directly skip here.
Setup a Nhost project
Now visit nhost.io and create an account if you don't have one. Next, you will be redirected to the dashboard where you can create a new project. So click on that new project button. You now need to fill out the details for the new project.
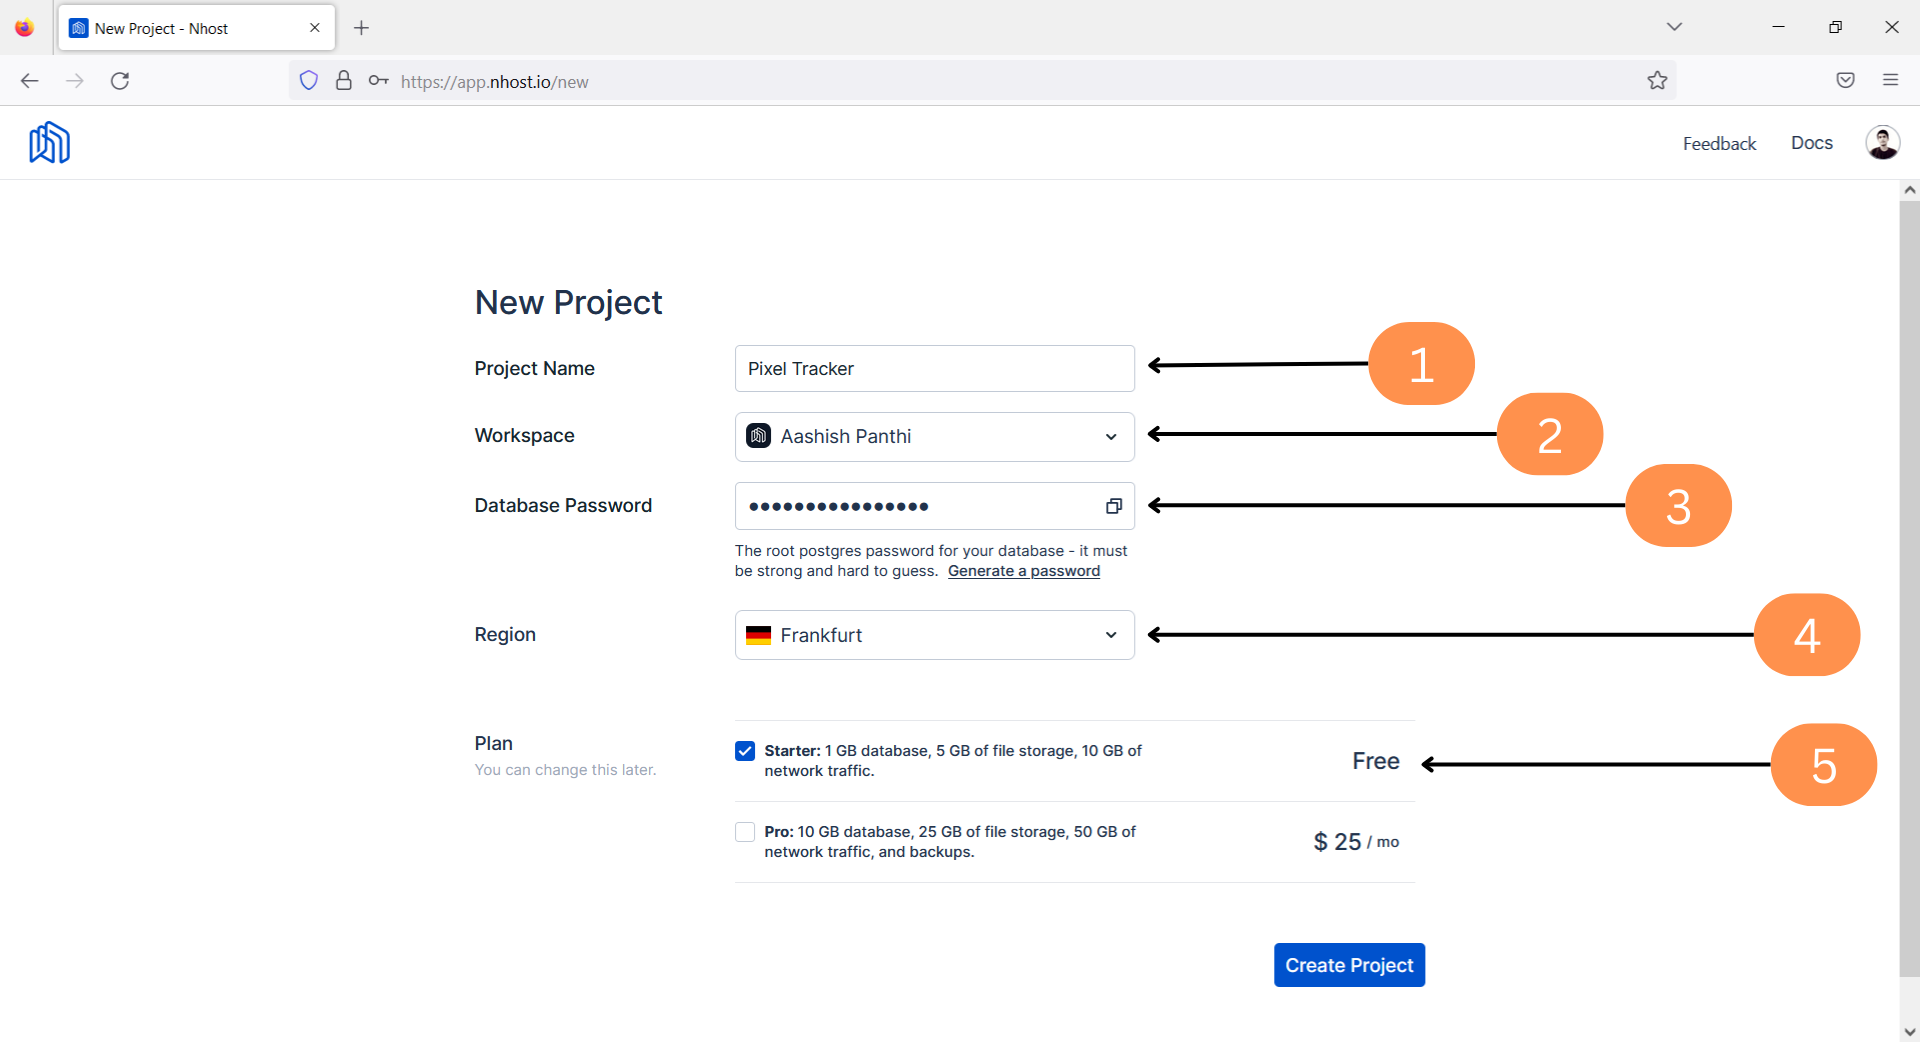
- Provide a name for your project.
- Choose a workspace. If you don't have any idea about this then leave it untouched.
- Then choose a strong password.
- Select the region you want.
- Choose a plan. We will go for a free plan here.
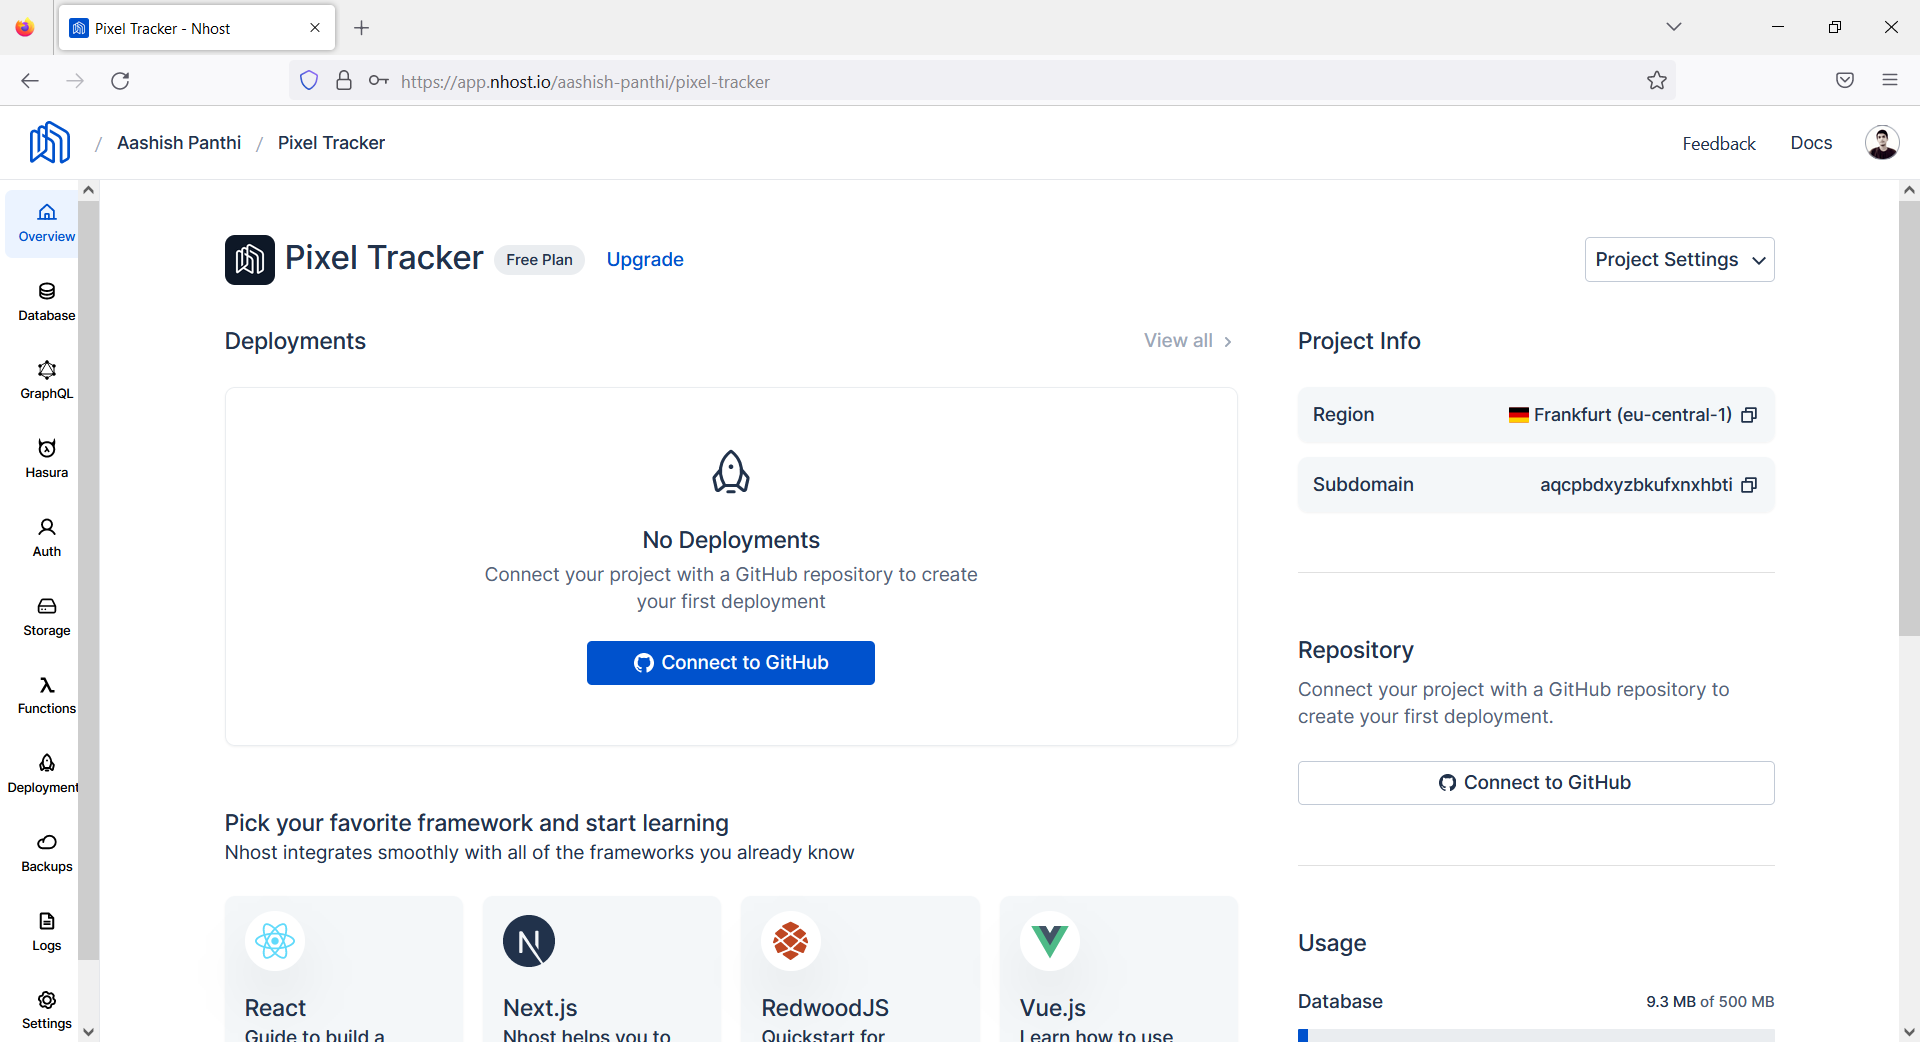
After that just click on the create project button. Then your project setup will start. It will take nearly two minutes.
Now you should be able to view the dashboard of your project.
Make a table in the database
While making a pixel tracker. We need to store the details of a pixel inside of a database. So we can use the database already provided by the Nhost. Inside the database, we need to create a new table. Supposing we are tracking the email i.e. we are finding out if the email is seen or not, we will follow these steps to create a new table.
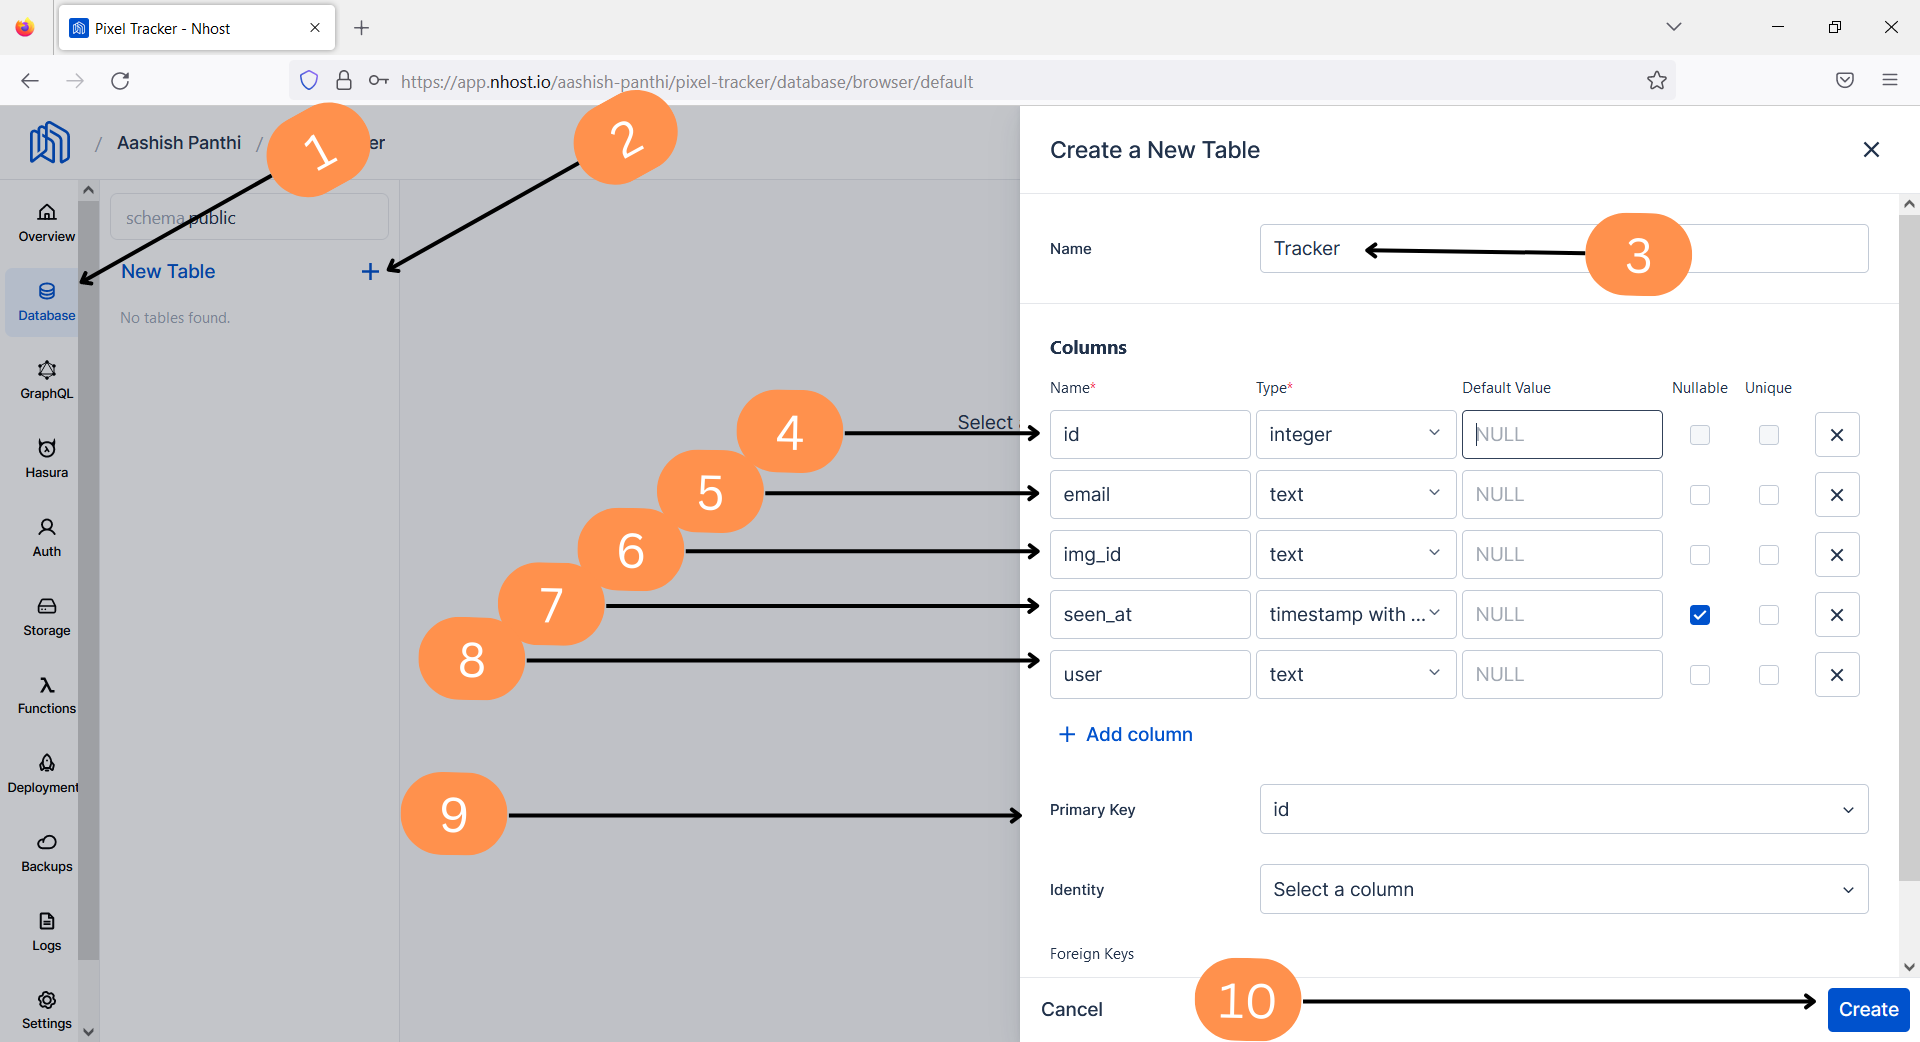
You should provide the type and the default value for each column that you are going to be using. It is exactly the same as creating a table in MySQL. Be sure to select the id as the primary key. The user column links to the user who is the creator of that row.
Manage permissions
Next, we need to manage the persimmons in the table. Hasura allows us to create different roles inside of our table giving them custom access to our table. So we need to manage the permission before performing any actions. So, open up the Hasura with just two clicks.
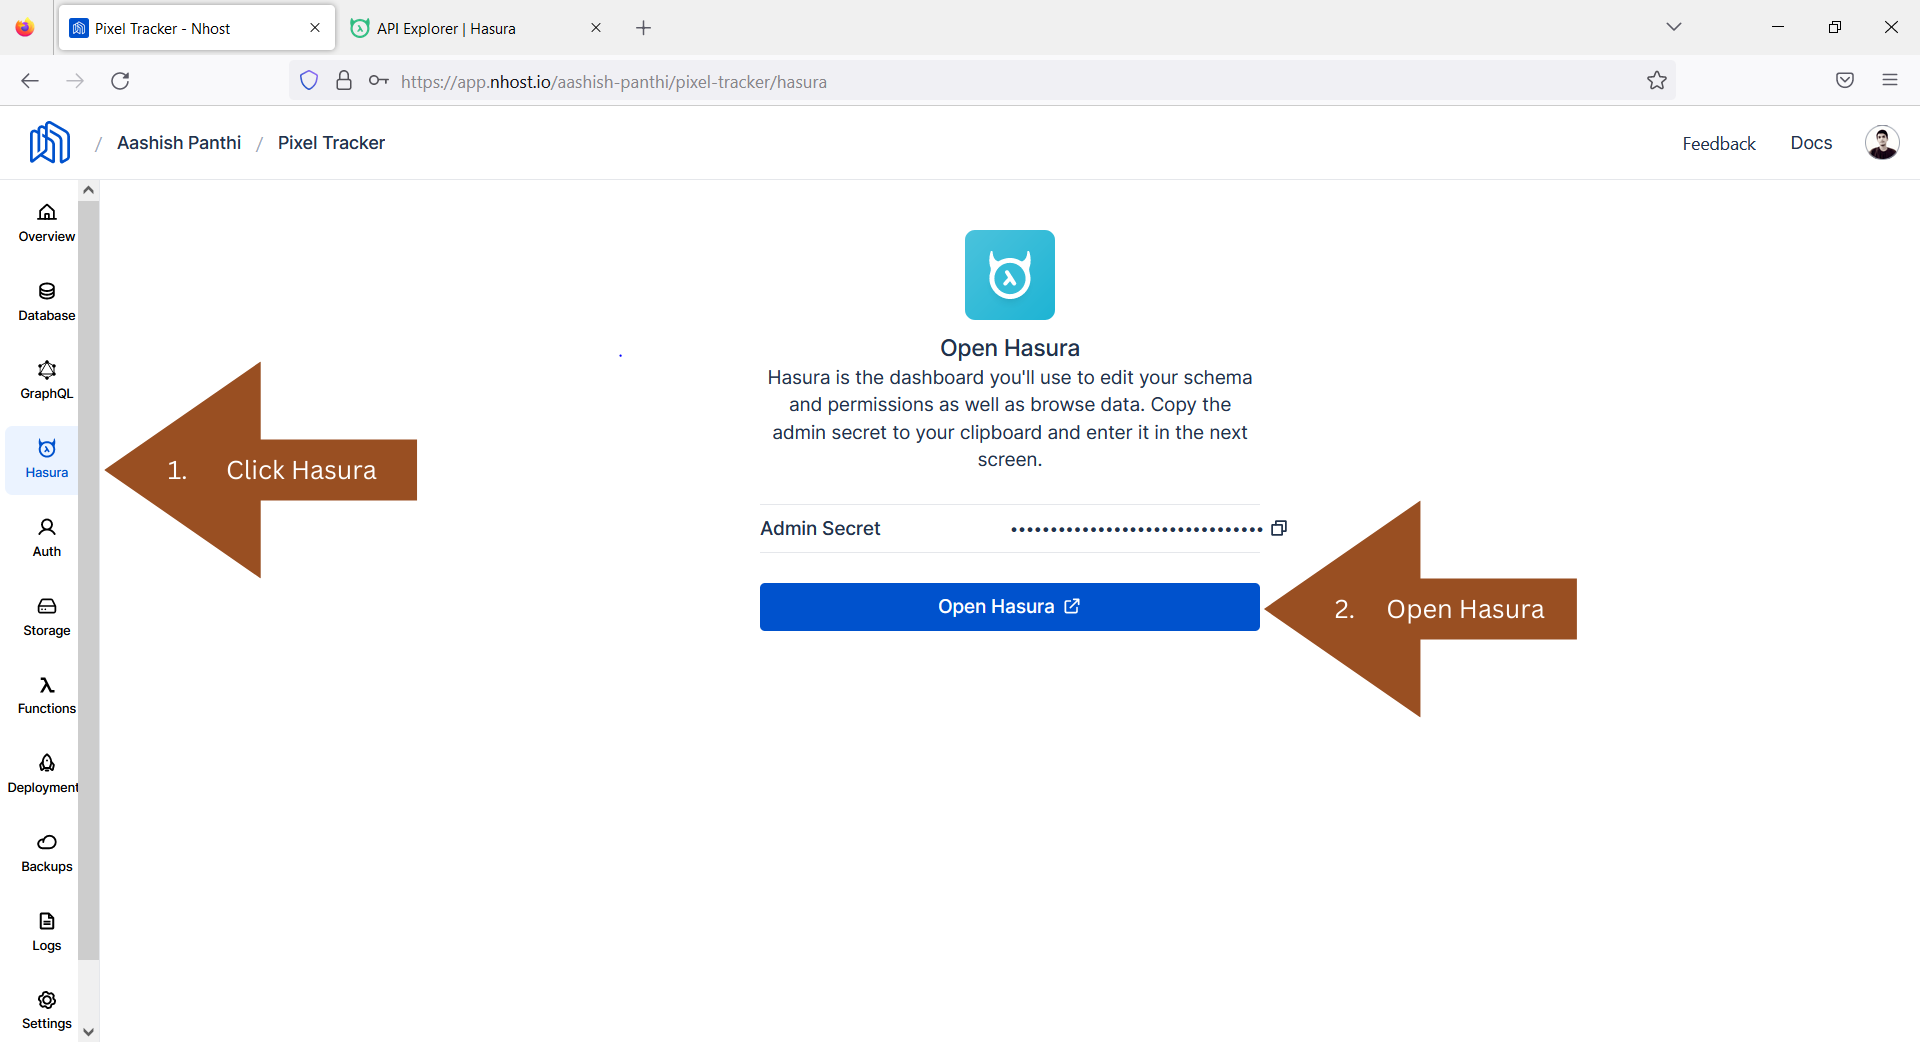
When you open Hasura on a new tab, it will ask for the admin secret. While opening up the Hasura, you should have got an admin secret. Copy that admin secret and provide it to Hasura to access the console.
Currently, we are inside the API tab, we don't want to be here. So, click on the data tab then click on public, and select Tracker table. Then you will be able to access the permissions page.
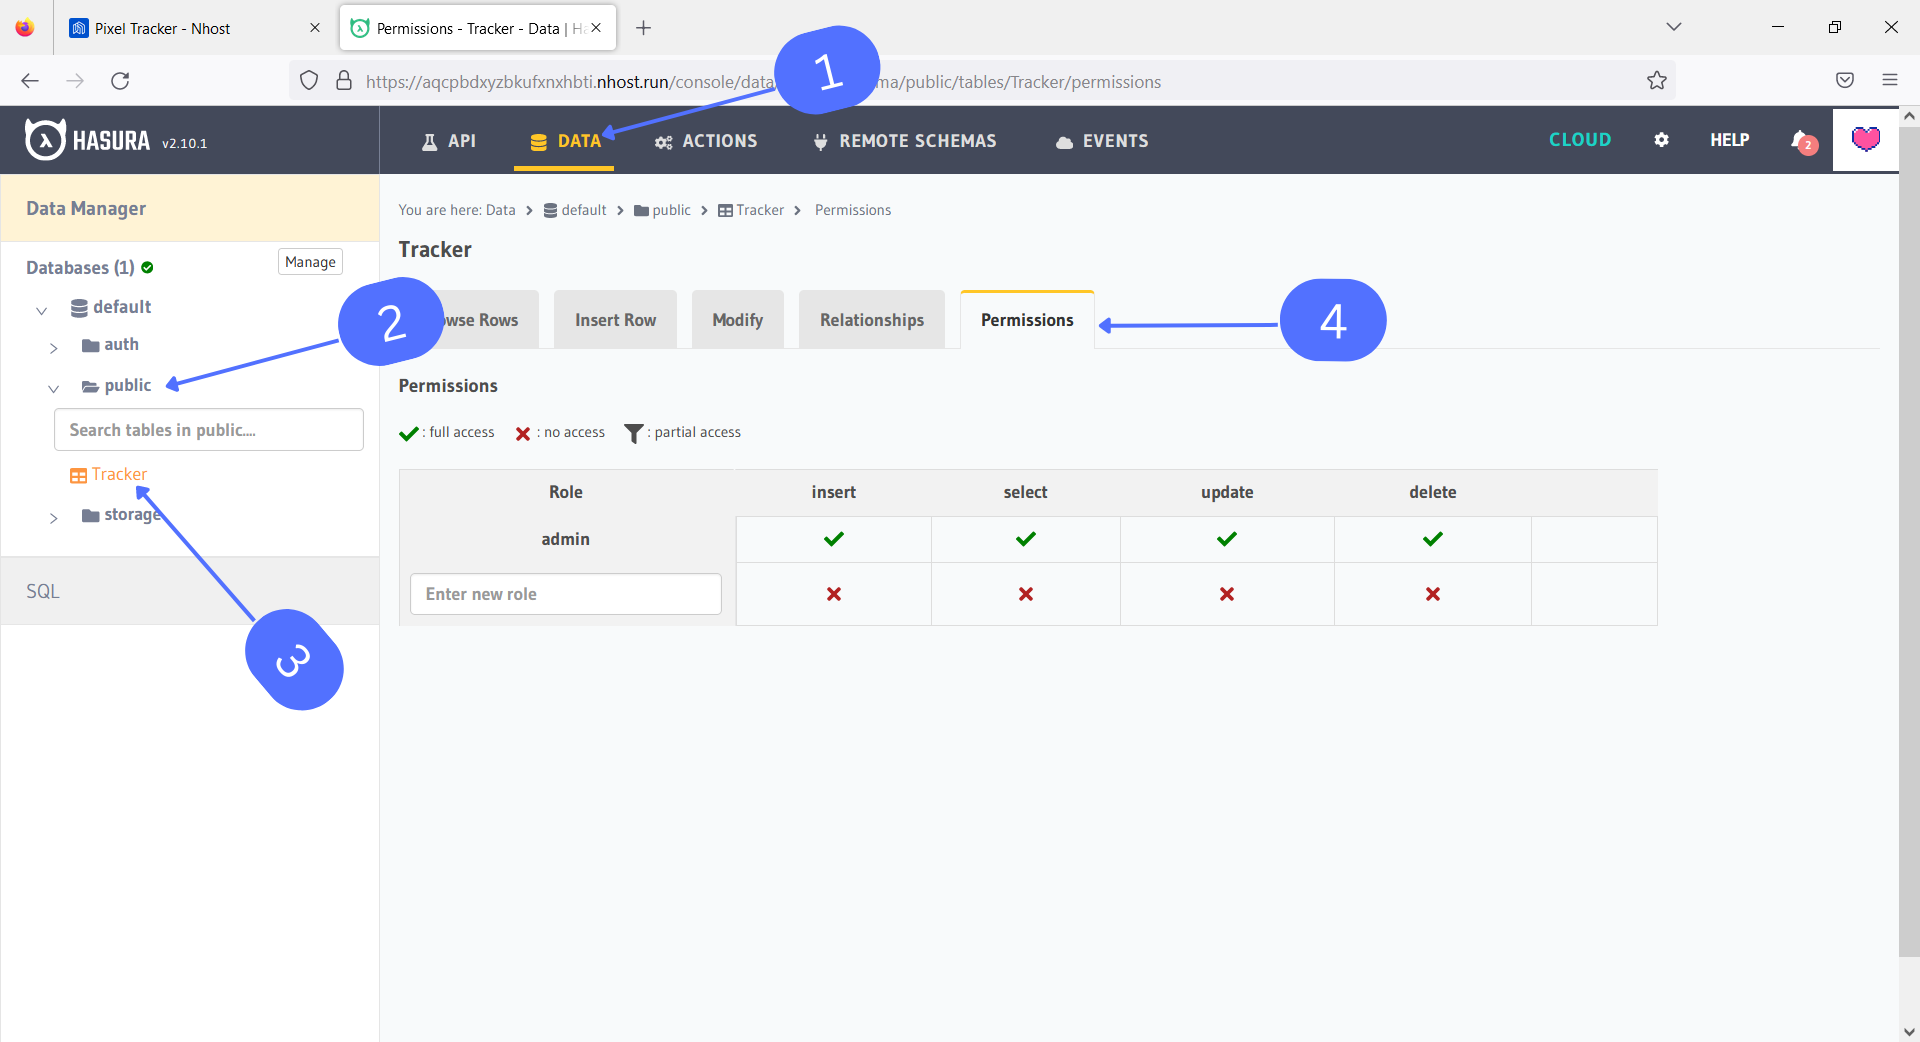
While in here, create a new role named public. As the name suggests, if any unauthorized user tries to query then the default role associated with them is public. In this demo, we are not going to handle the headache of authorizing the users and assigning them specific roles, and managing their access. Instead, we will be having a public role that will be used during pixel tracking.
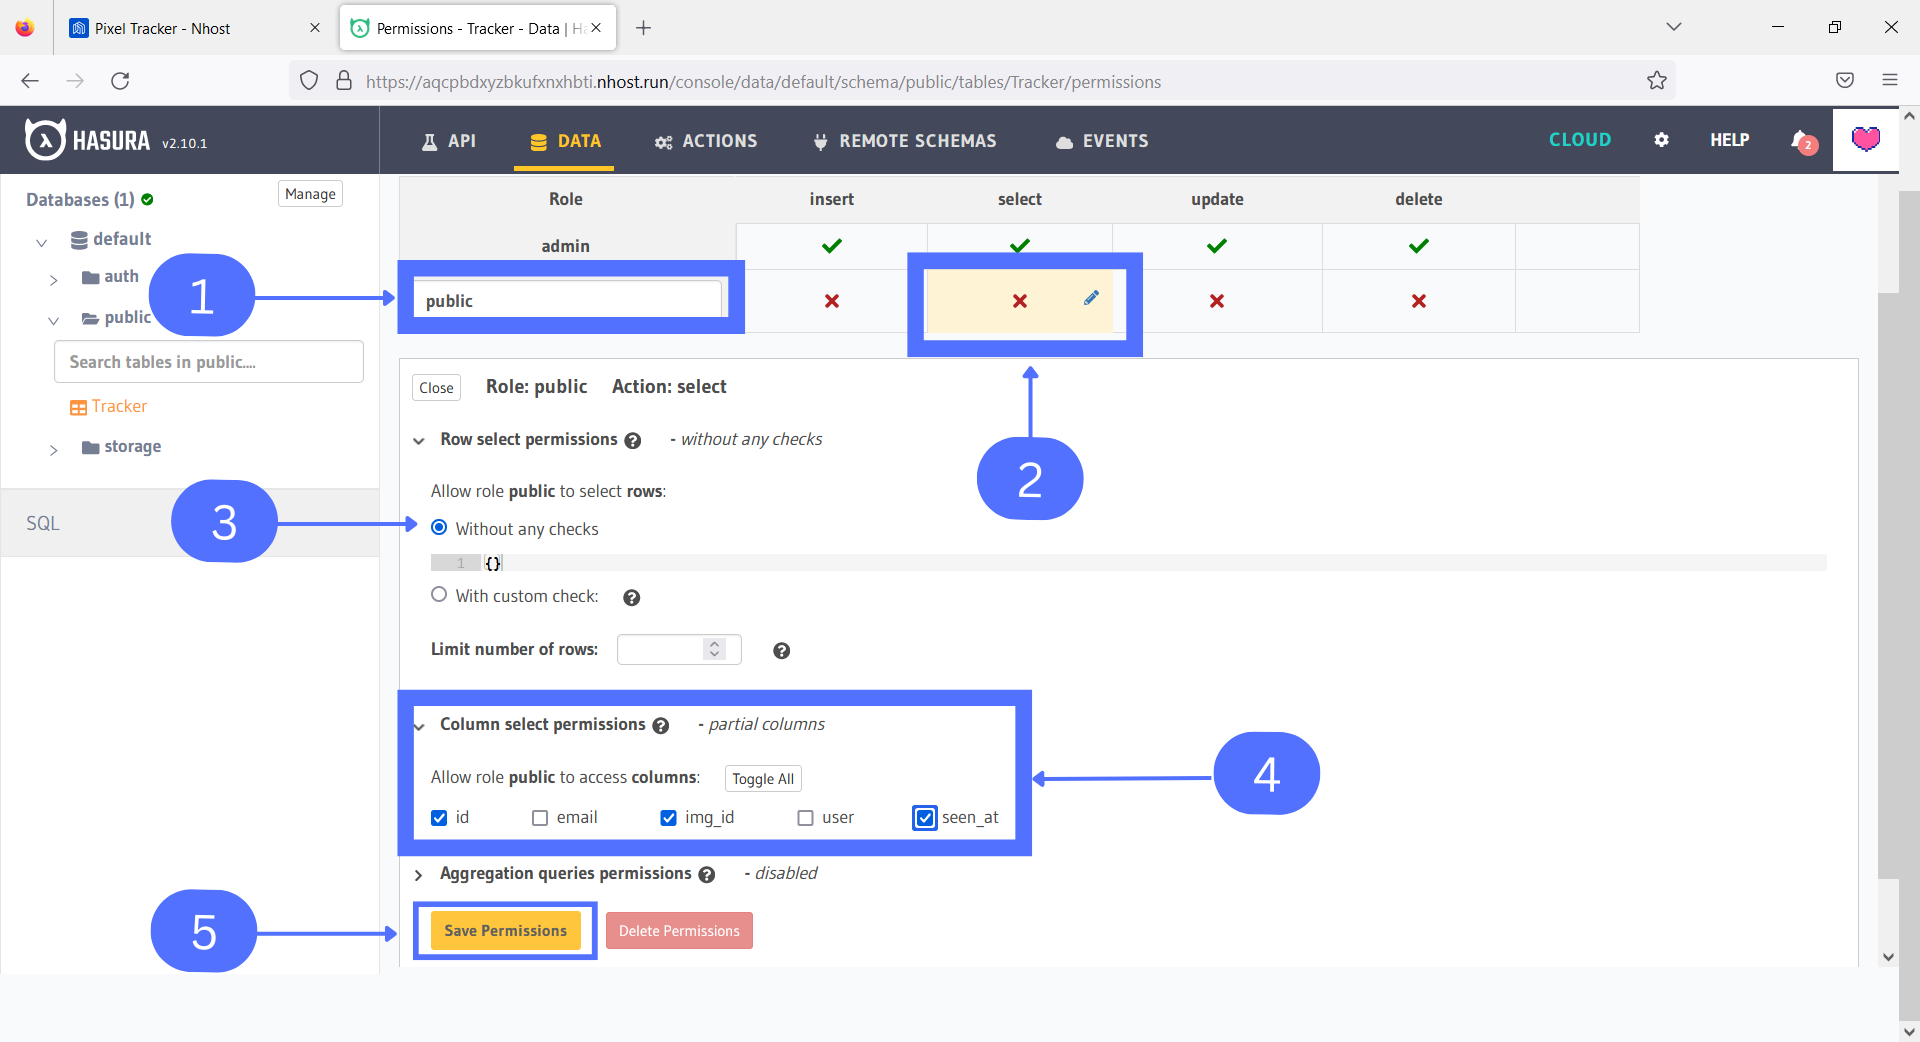
We will be giving limited access to SELECT and UPDATE to the public role. Perform the actions according to the image attached below.
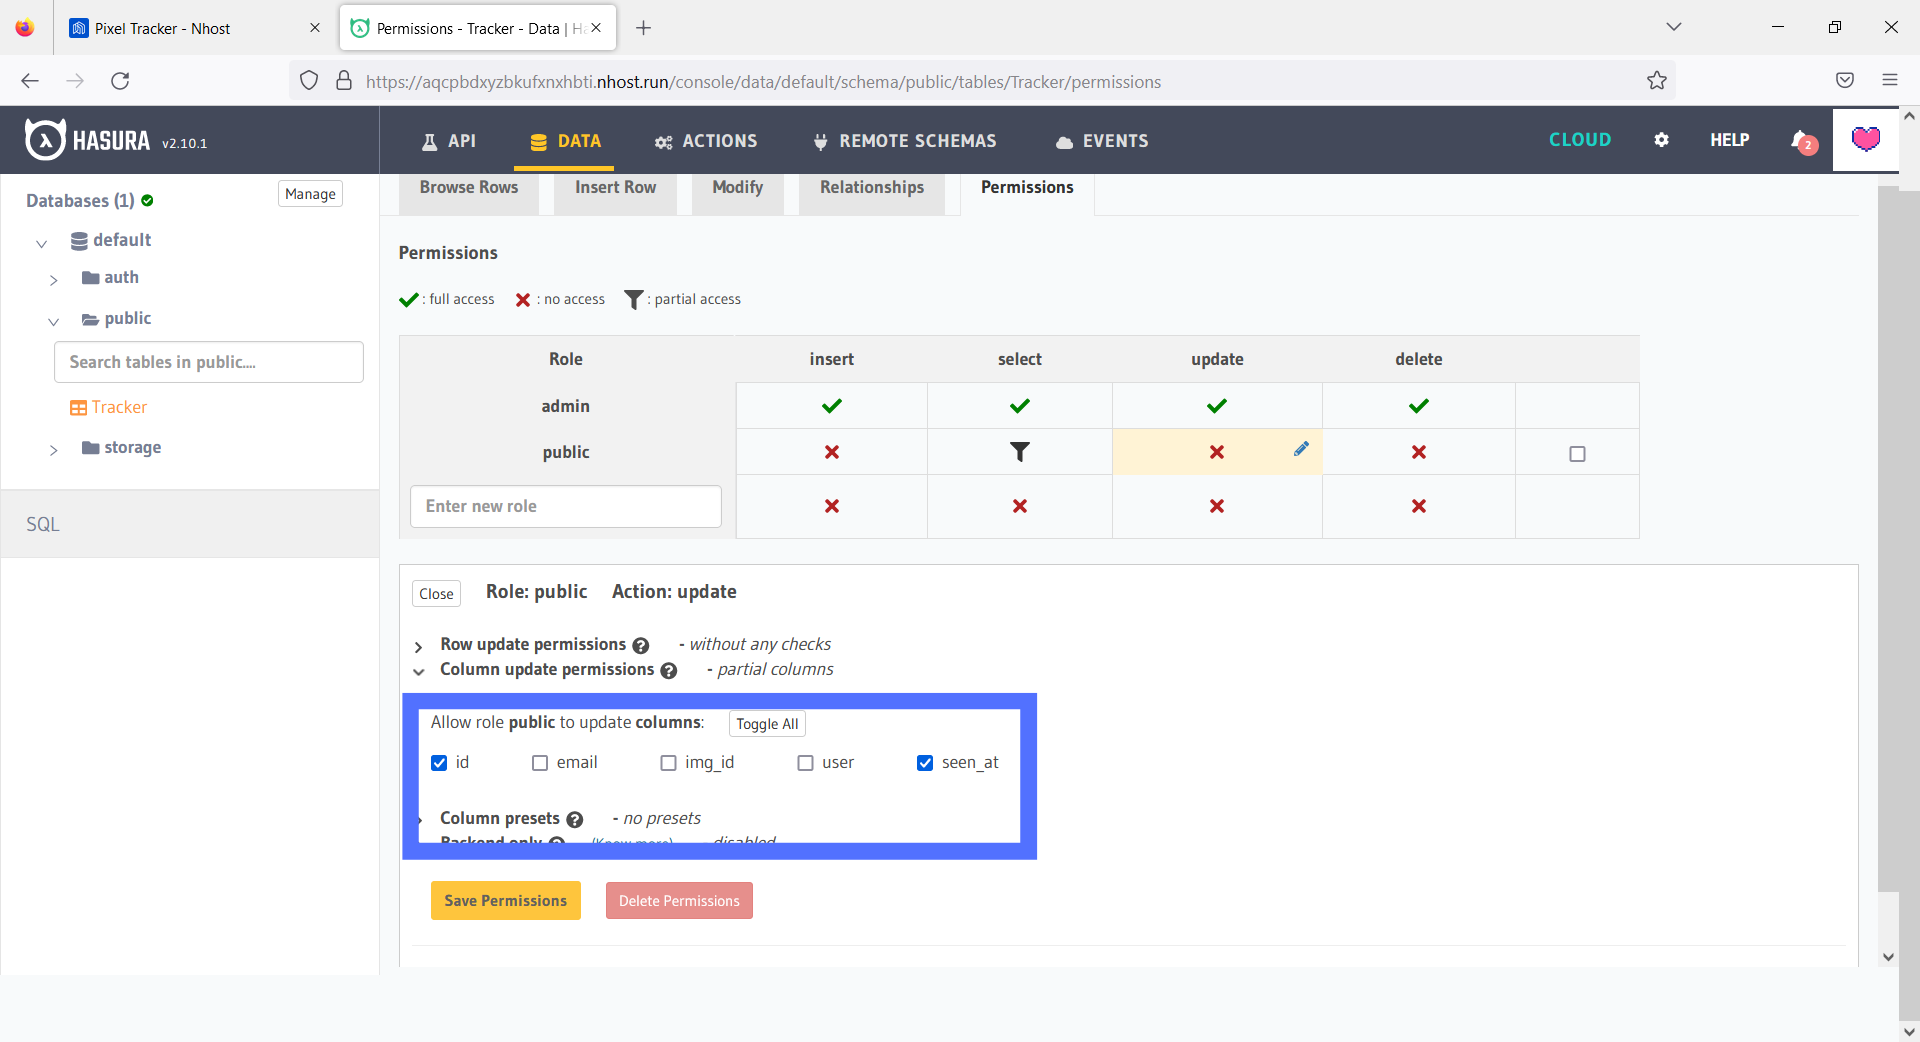
Similarly, allow the limited updation to the public role.
Yes, we are done with setting up the permissions.
Test Graphql queries
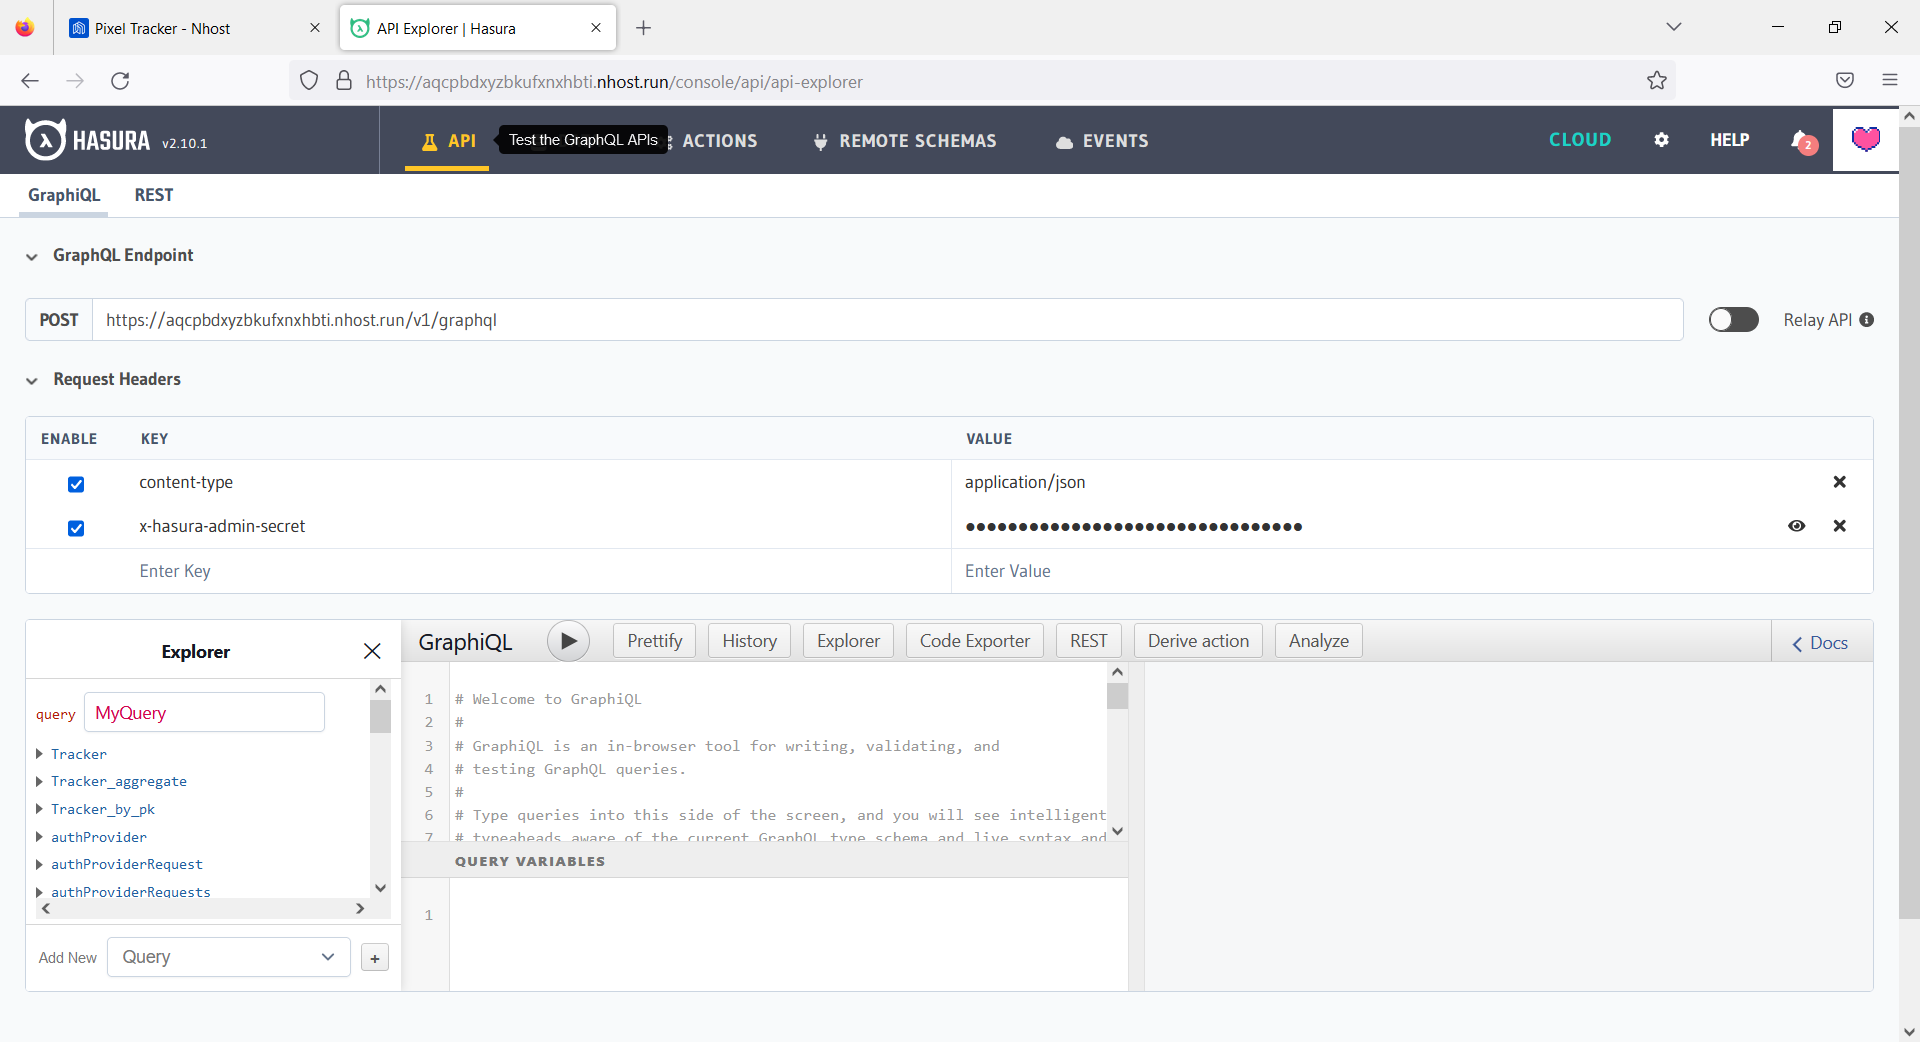
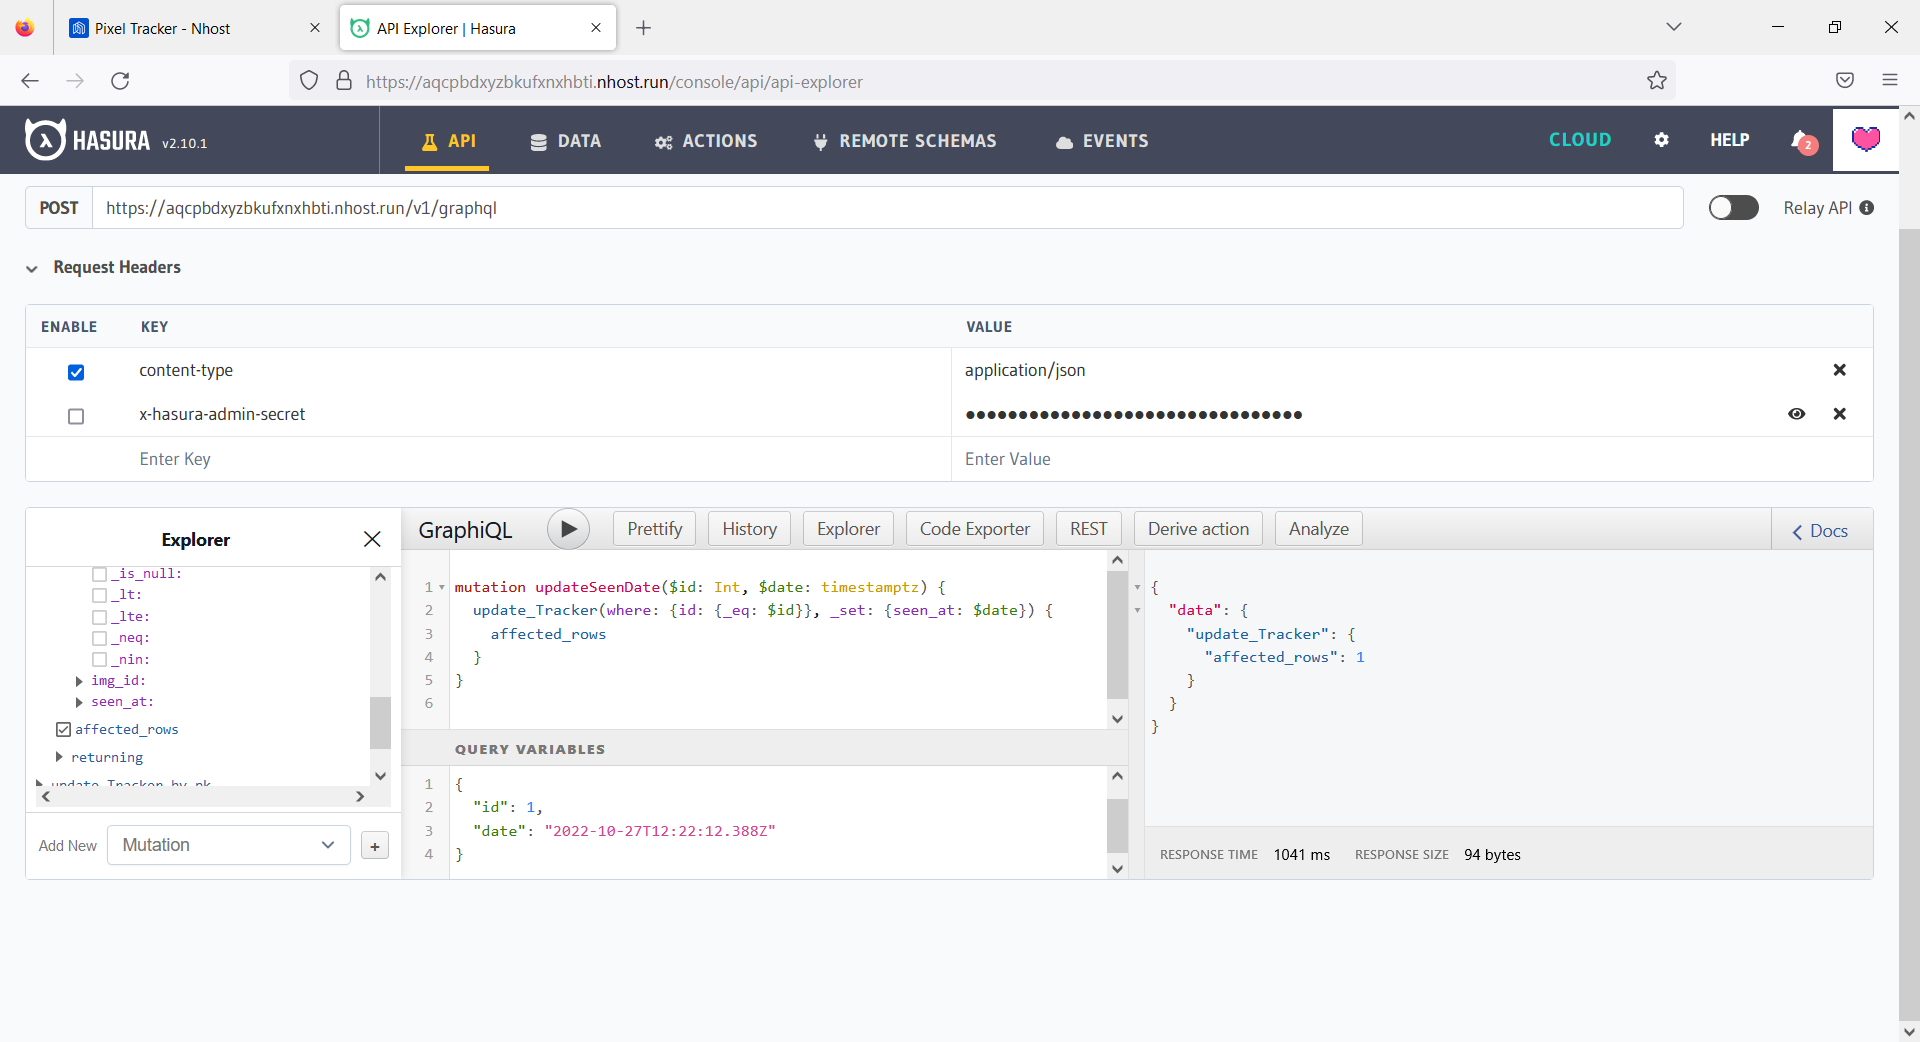
Now click on the API tab (you can find it on the top, besides the data tab). On this page, we can test our graphQL query. We will be testing here the select and update queries.

Be sure to uncheck the
x-hasura-admin-secret. By doing this, we will be interacting with the public role, not with the admin role.
In the image above, you can see that our query is tested successfully. It takes the img_id and returns us the id(primary key) of that row. And here is the query:
query getId($id: String) {
  Tracker(where: {img_id: {_eq: $id}}) {
    id
  }
}
Now let's make another query for the update. While creating a query, use mutation because only mutation allows us to insert, update and delete.
The update query looks like this:
mutation updateSeenDate($id: Int, $date: timestamptz) {
  update_Tracker(where: {id: {_eq: $id}}, _set: {seen_at: $date}) {
    affected_rows
  }
}
You can see that, it will return us the affected_rows as the response to the request we sent.
Complete the function
Our project setup on the Nhost part is done. Now let's complete the function from where we left up.
We now have two queries, one is a get query (GET_ID) and another one is an update query (UPDATE_QUERY).
Then we can run our query with the help of nhost object we have created above. We use the method nhost.graphql.request() to execute our query.
Since all of the requests are asynchronous, we will need to handle errors. So we will use try/catch along with async/await.
  // make a get query to get email id using imgText
  const GET_ID = `
     query getId($id: String) {
       Tracker(where: {img_id: {_eq: $id}}) {
          id
        }
      }`;

  // update query with the email id
  const UPDATE_QUERY = `
    mutation updateSeenDate($id: Int, $date: timestamptz) {
      update_Tracker(where: {id: {_eq: $id}}, _set: {seen_at: $date}) {
        affected_rows
      }
    }`;

  try {
    const { data, error } = await nhost.graphql.request(GET_ID, {
      text: imgText,
    });

    if (error) {
      return res.status(500).json({ error: error.message });
    }

    if (!data) {
      return res.status(500).json({ error: "No row found" });
    }

    // extract the row id from the response
    const id = data.Tracker[0].id;

    //update the column in tracker table
    const { data: updatedData, error: updateError } =
      await nhost.graphql.request(UPDATE_QUERY, {
        id: id,
        date: new Date(),
      });

    if (updateError) {
      return res.status(500).json({ error: error.message });
    }

    res.status(404).send({ error: "Bye bye" });
  } catch (error) {
    console.log(error);
    res.status(500).json({ error });
  }
In the above code, we are trying to get the row id using the image_id (imgText). If an error occurs, we will halt our process otherwise we will continue. Also, if we get no data then we will also respond back with an error message. If everything goes well, we will extract the id we have got. After that, we will run the update query passing the required variables.
If we get an error, we will respond with an error message and error code. If our task completes then also we are going to give a 404 error. We are sending a 404 error because we don't want to send back anything.
In a nutshell, the link will be attached as the source(src) of an image so if we return a 404 error then the email provider may think the image doesn't exist. They will not think it is a suspicious thing.
Deploy the function
We need to create a GitHub repository in order to deploy our function. If you have closely followed the above steps then you are going great. So let's just follow the below two steps to deploy our function for pixel tracking.
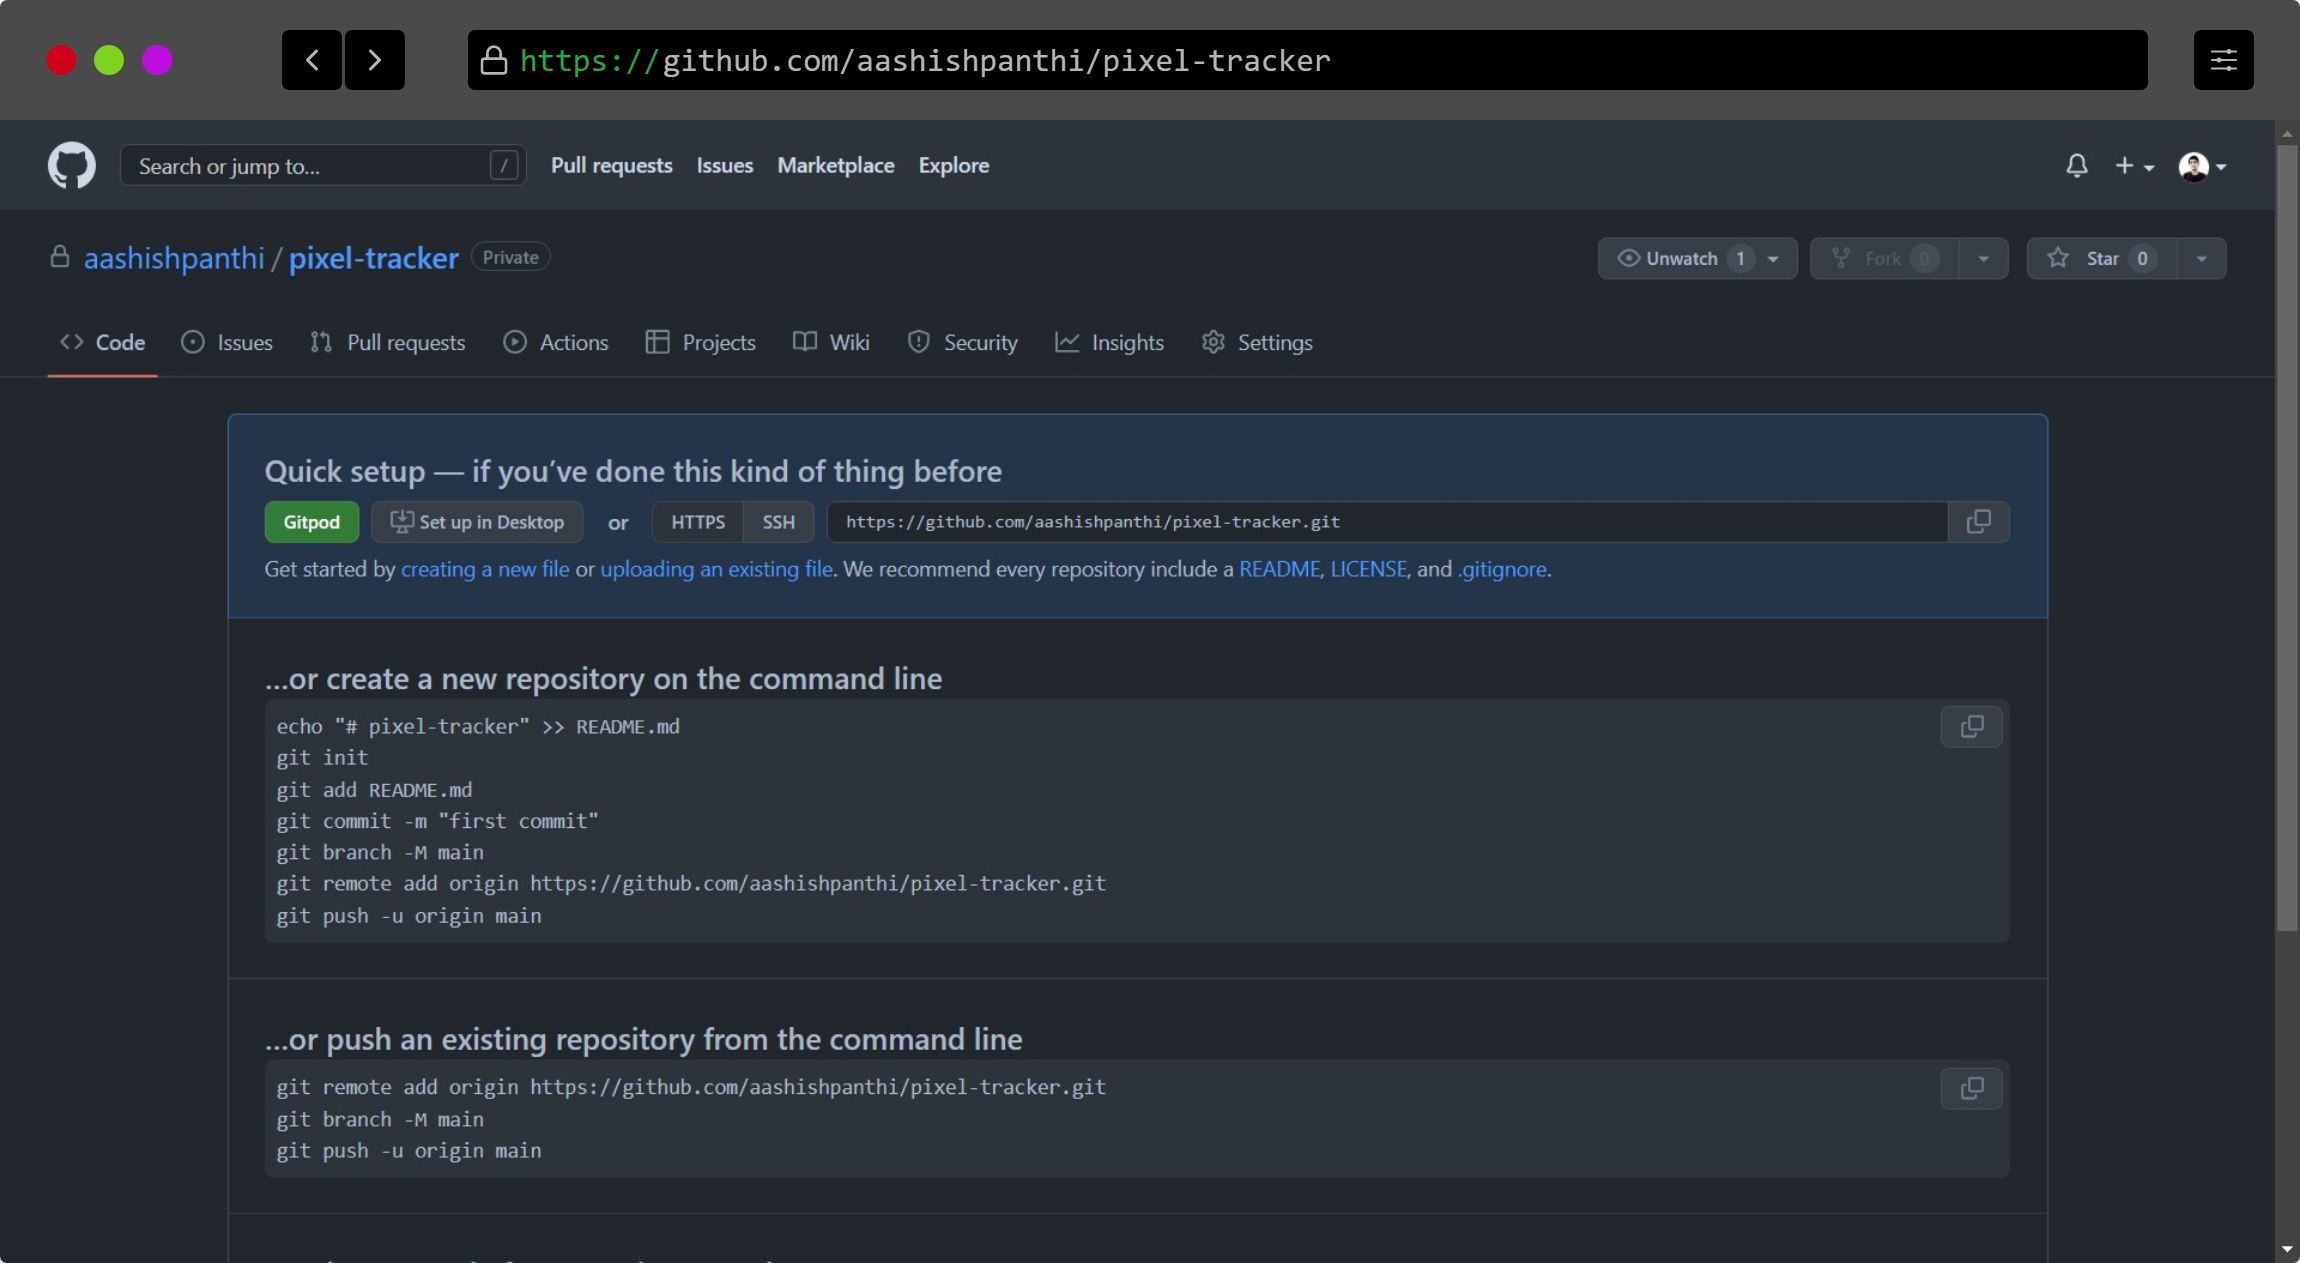
Make a GitHub repository
I assume you already know how to create a GitHub repository. If you don't know then got to github.com/new and fill out the title and description of the repository. Also, choose if you want the repo to be public or private. We can still deploy our function even if your repository is private.
Now you need to push code to the repository. First of all initialize git, if you haven't done yet. To initialize the git, use the command:
git init
Then add all of the files, (remember to exclude node_modules by creating a .gitignore file) and commit your message.
git add .
git commit -m "My first commit"
Switch to main branch if you are on master branch.
git branch -M main
And add a remote URL (repository URL).
git remote add origin __your-remote-path__
Then push the code.
git push origin main
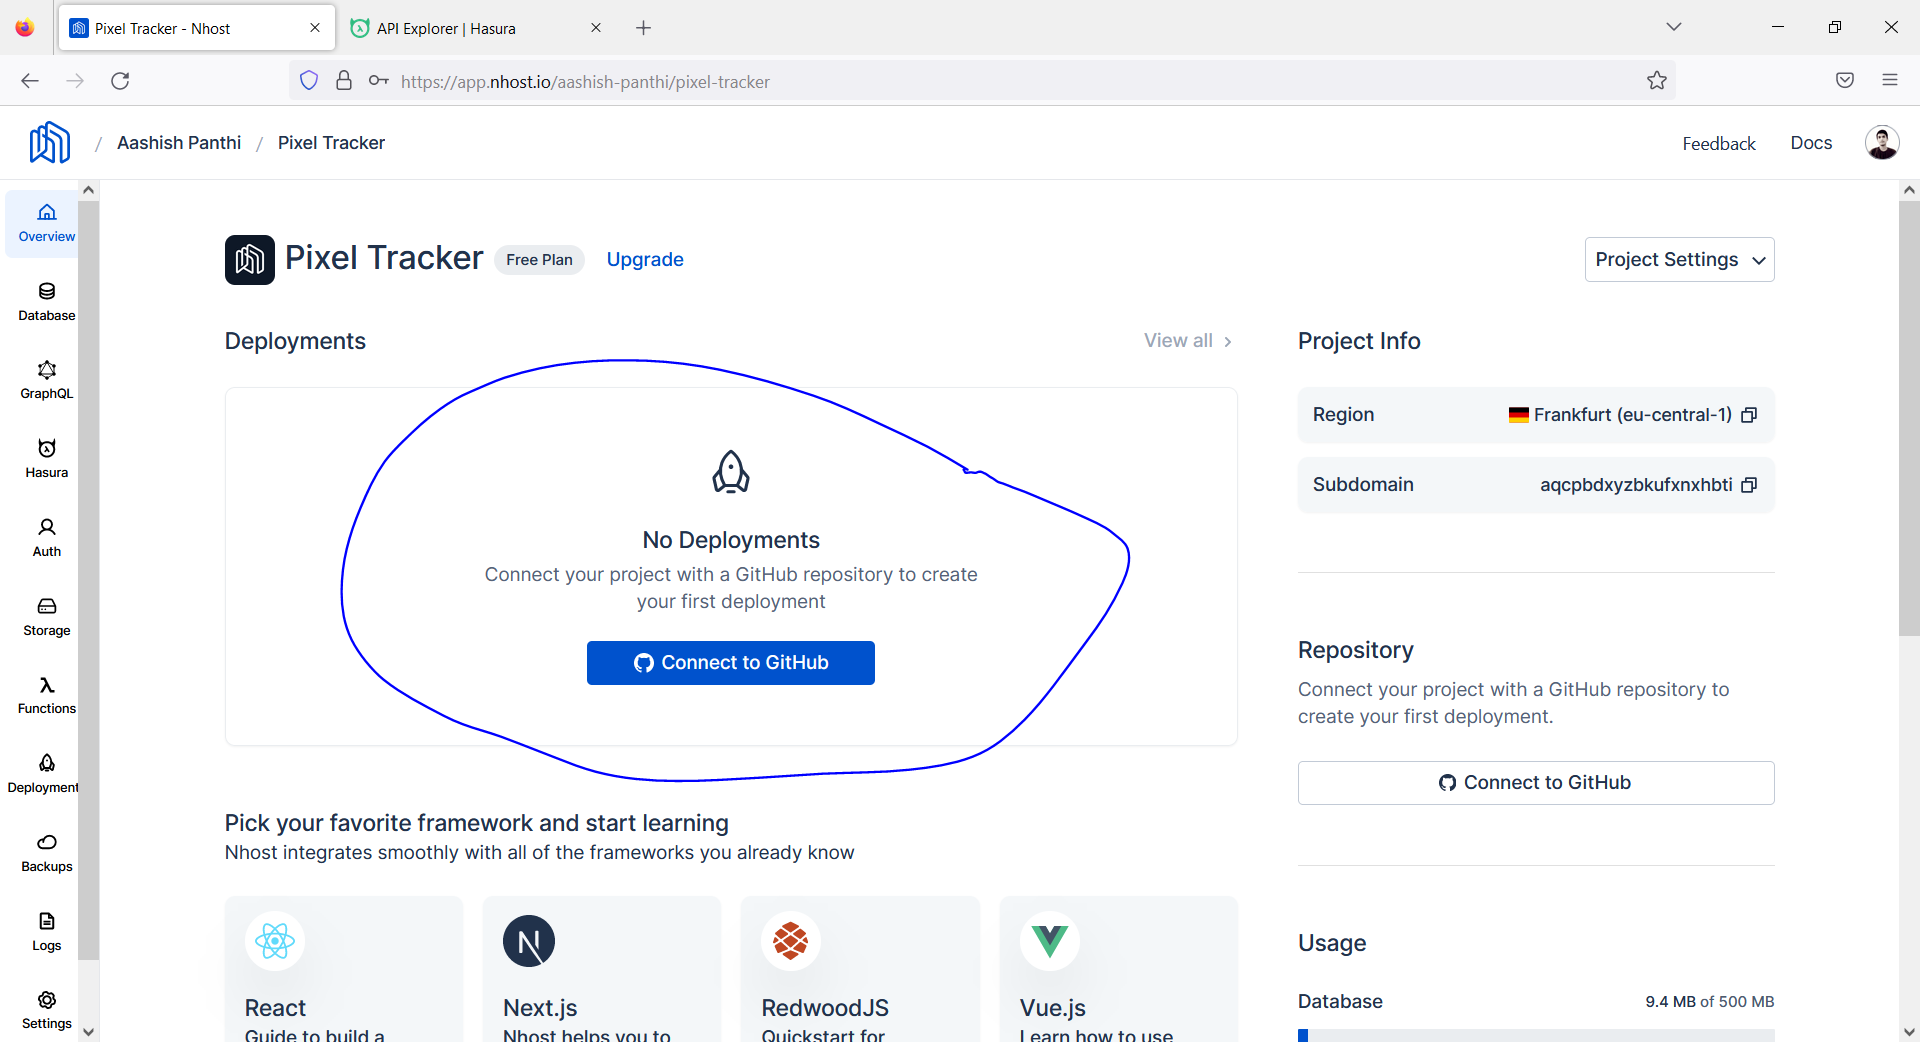
Connect to the repo and deploy
Back to your Nhost dashboard, you will find a button that says connect to GitHub. Click on that button.
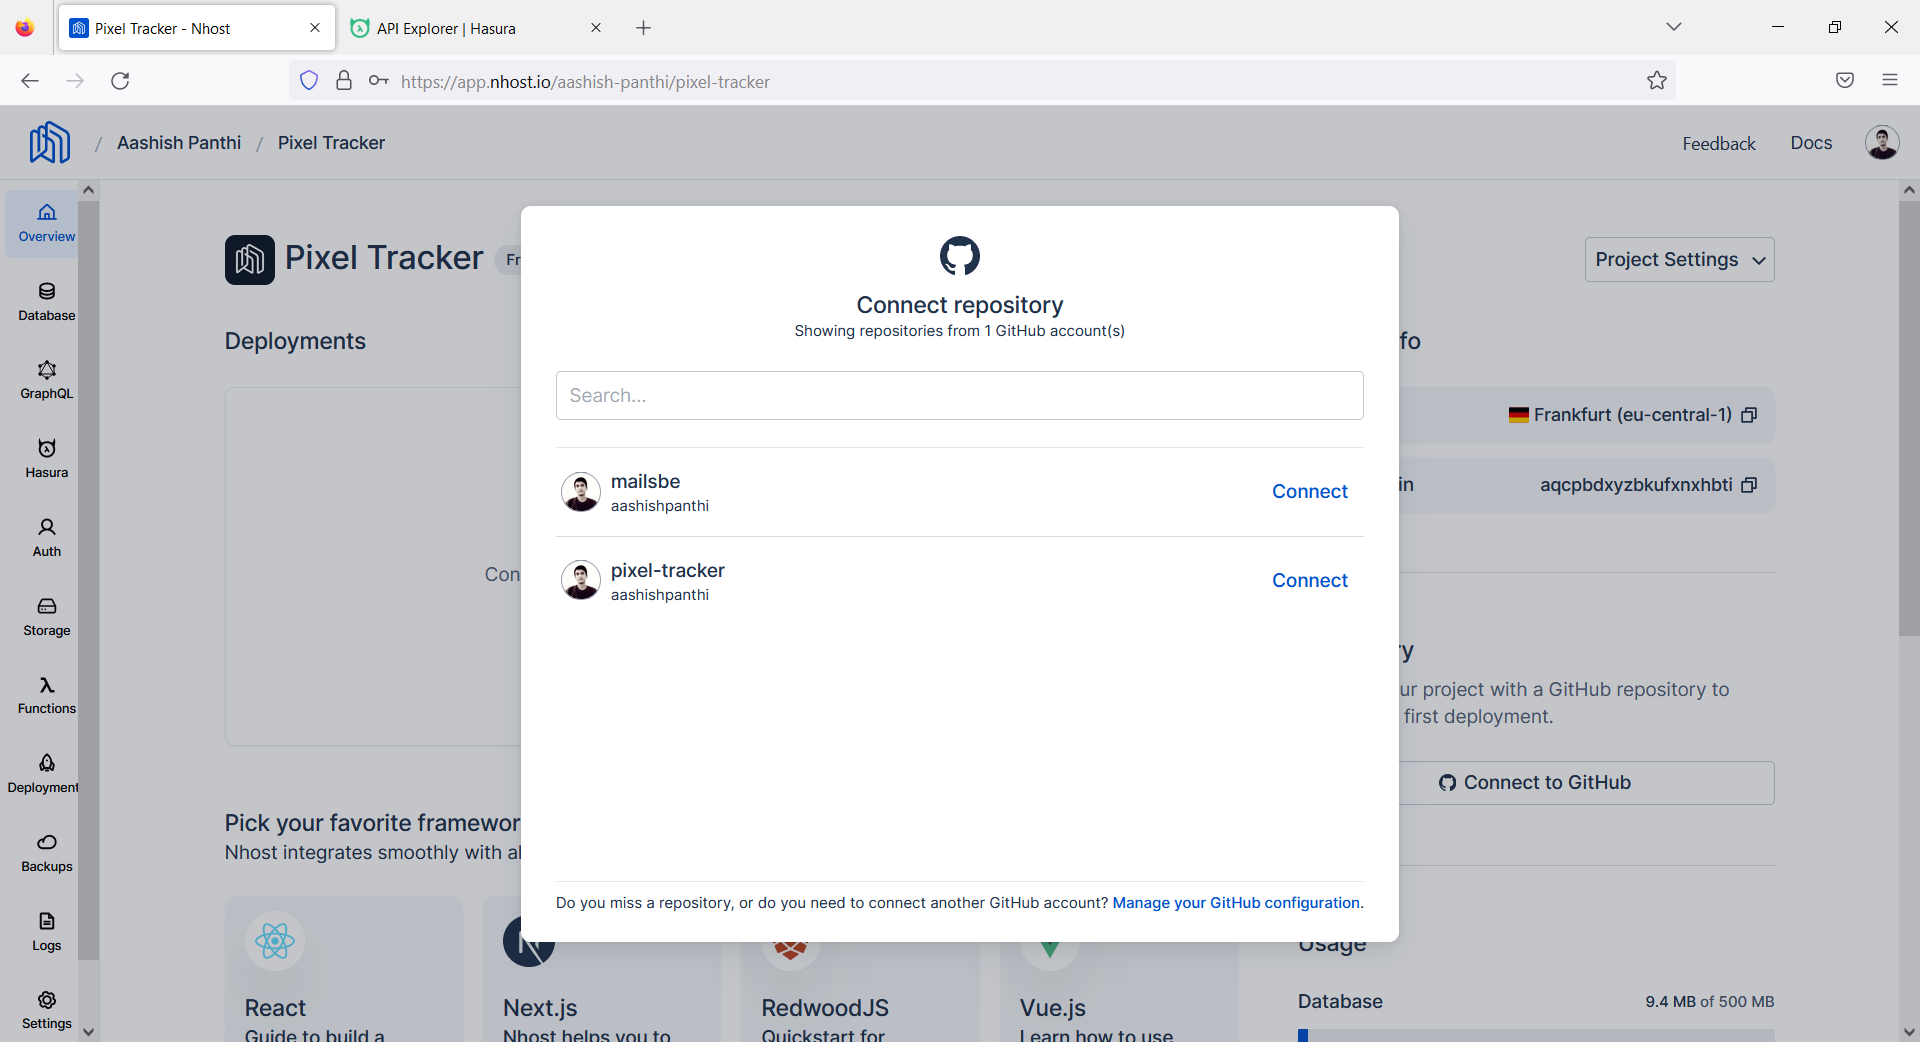
After you authorize Nhost with GitHub, select the repository. In my case, it is a pixel-tracker. Then click on connect.
You need to configure your GitHub integration. Choose your main branch, also the base directory, and click on Connect Repository.
After that, your function(s) will be deployed in a few seconds. Mine has been deployed in 11 seconds.
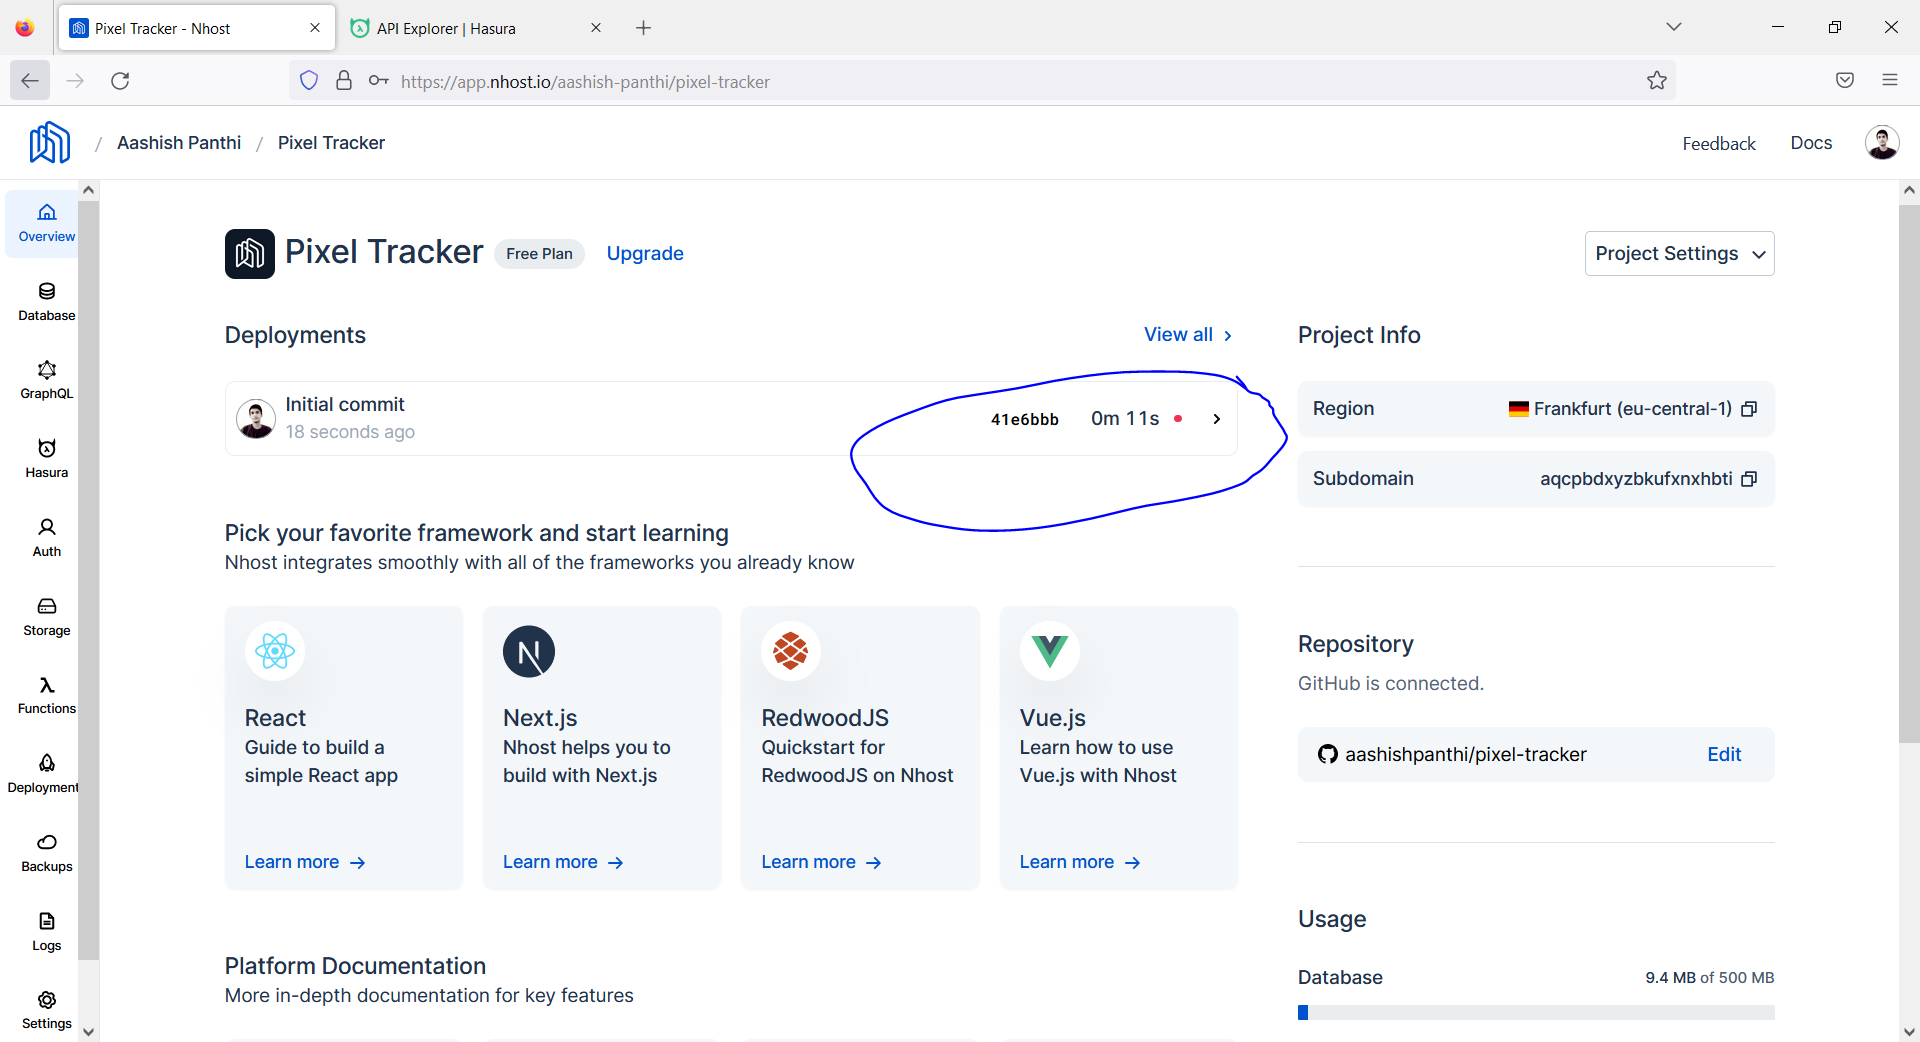
That's all we need to do to make a pixel tracker. We have successfully deployed our function over to Nhost functions.


